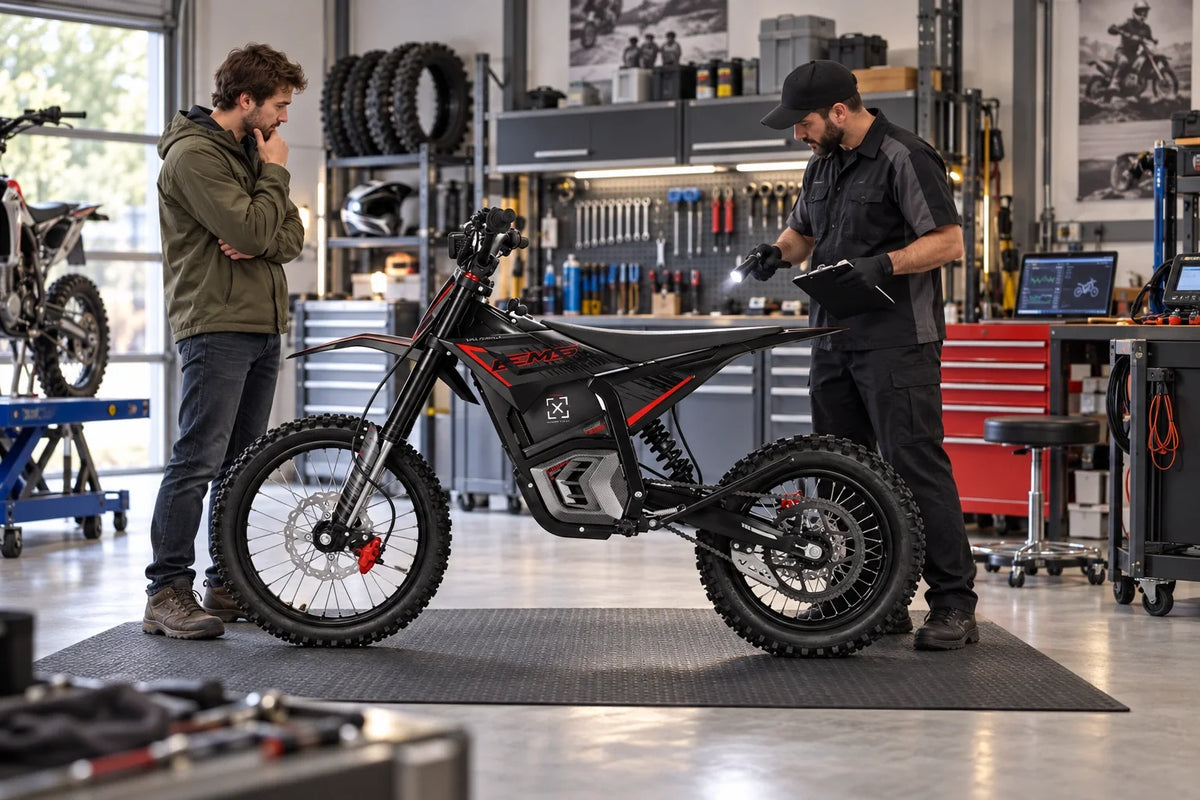
Electric Dirt Bike Brake Cutoff Sensor: Troubleshooting Guide: The Safe Diagnostic Order
Start with the symptom, not the sensor. If the motor will not run after both brake levers are released, the controller may be receiving a continuous brake signal or another safety interlock may be active. If the motor continues to drive while a brake lever is applied, switch the bike off and do not ride it until the cutoff system has been diagnosed.
Neither symptom proves that the brake cutoff sensor itself has failed.
A lever that does not return fully, a cable pulled tight at steering lock, a wet connector, damaged wiring, a display or controller fault, or another interlock can produce similar behavior. This guide uses observable symptoms and powered-off inspection in a fixed order. It does not recommend bridging wires, disconnecting a sensor to ride, editing controller settings or applying another model's sensor gap.
What the Brake Cutoff Sensor Actually Does
The brake cutoff sensor reports brake-lever status to the controller so motor output can be inhibited when the rider applies a brake.

Lever Input, Motor Inhibit
When a lever is pulled, the sensor changes state and the controller should inhibit motor output. This electronic safety input is separate from the pads, rotor and hydraulic or cable system that physically slow the wheel.
A bike can therefore have strong mechanical brakes but a failed motor cutoff, or a functioning cutoff but poor mechanical braking. Test and service the two systems separately.
16 CFR 1512.5 is a federal bicycle braking rule. It is useful background for mechanical braking requirements, but it does not establish how an electric dirt bike's motor-inhibit circuit should behave. Test the mechanical brake and the electronic cutoff as separate systems using the model manual.
Why Sensor Logic Is Not Universal
Some controllers read an open circuit as "braking." Others read a closed circuit that way. Others read a digital message. The sensor may sit inside the lever body or outside it as a housing and a magnet.
None of that is visible from the outside. Unplug a normally closed sensor and the controller sees a permanent brake command. Unplug a normally open one, and it sees a bike that never brakes. Same action, opposite result.
You cannot confirm the effect of disconnecting a sensor without the model wiring diagram. UL 2849 evaluates an e-bike electrical system and its interconnections for defined safety risks; it is not a generic brake-sensor test procedure. Altering or bypassing an input can also invalidate the behavior the manufacturer designed and tested.
Two Symptoms, Two Levels of Urgency
Sort the fault before you pick up a tool. Everything below depends on this call.

Motor Will Not Run After the Levers Are Released
The inhibit is stuck on. Something holds a continuous brake command, or something unrelated is blocking the motor. Usual holds: a lever returning 95 percent instead of all the way. Mud packed in the pivot. A handguard or grip edge fouling the blade. A cable tight at full lock. Corrosion in a connector. A startup check that never cleared.
This is usually a no-drive condition, but unexpected changes during testing still require caution. Keep the drive wheel clear and do not turn a stationary check into a test ride.
Motor Keeps Pulling While You Brake
Switch the bike off immediately and do not ride it home.
Continued motor output can oppose braking and reduce control. Treat power that continues under braking, activates without throttle input or cycles unpredictably as a stop-riding fault.
CPSC advises consumers to stop using micromobility products that show abnormal electrical or control behavior and to follow the manufacturer's service guidance. That general safety principle applies here: unexpected propulsion or power that does not stop with brake input requires diagnosis before the bike is ridden again.
Safety Rules Before You Start

Four rules. They apply to every row in the matrix below.
- Stop riding for unexpected propulsion. Motor under brake, throttle acting alone, power cutting in and out. Do not test under power. Do not ride it to the shop.
- Power down. Remove the battery only if your manual allows it. Some models want the pack left in. Support the bike so it cannot tip.
- Keep the drive wheel clear. If an approved stationary check comes later, the rear wheel is off the ground with nothing near it. No hands. No bystanders.
- Nothing invasive. No bridging, no unplug-to-ride, no controller edits, no guessed gap, no probes in connector terminals, no live measurement.
What This Guide Will Not Tell You to Do
Avoid the following shortcuts unless the exact model service manual explicitly requires them:
- Unplugging one sensor and riding to see what changes. That is a bypass. It is also the single most published "diagnostic step" on this topic.
- A universal magnet gap. Figures like 2 to 4 mm come from one brand’s sensor. They do not transfer.
- Set-screw and locknut turn counts copied off another bike’s hydraulic lever.
- Probing a live signal line. Some cutoff plugs carry 5V, ground, and signal together, and the wrong pair takes out the controller’s 5V supply.
- Assuming your controller shares another brand’s logic. It may be the exact inverse.
The Brake Cutoff Troubleshooting Matrix

Symptoms mapped to fault areas. It does not diagnose. Read the third column as a shortlist for your support ticket, not a verdict.
|
Symptom |
Lever or display behavior |
Likely fault areas |
Safe check, powered off |
Threshold and next action |
|
Motor will not run at startup |
Brake icon or code may appear |
Held lever, brake input, separate interlock |
Lever return travel; read the whole display |
Any unexpected activation ends the job. Record details, check the manual |
|
Motor stays inhibited after release |
Icon stays lit |
Sticking lever, sensor, wiring |
Compare return speed and travel side to side |
Erratic motor response means stop. Contact support |
|
Motor runs while braking |
Brake input may not register at all |
Sensor, cable, controller |
Observation only. No powered testing |
Stop immediately. Power down, arrange service |
|
Power cuts out over bumps |
Icon flickers |
Loose connector, cable strained at steering lock |
Trace the visible cable route, lock to lock |
Unpredictable propulsion means stop. Document the pattern |
|
Brake error only at startup |
Code clears or repeats next cycle |
Lever held at power-on, startup self-check, wiring |
Power up with both levers released and untouched |
If it repeats, stop guessing. Check the model manual |
|
Icon stays active with levers released |
Both levers look and feel released |
Incomplete return, stuck input |
Look for mud, handguard contact, a bent blade |
Odd motor behavior means stop. Seek diagnosis |
|
One lever behaves differently |
Icon or brake light responds on one side only |
That lever, its sensor, local wiring |
Compare feel, travel, and feedback between sides |
If either side lacks cutoff, do not disconnect it. Contact support |
|
Rear brake light stays on |
Light stays lit after full release |
Lever switch, adjustment, wiring |
Confirm the lever reaches its rest stop |
Heat or abnormal motor response means stop. Arrange inspection |
|
Fault follows rain, washing, a fall, transport |
Error is intermittent |
Moisture, impact, displaced connector |
Visual damage check; connectors seated and sealed |
Water in a plug, crushed wire, or bent pin: do not power up |
|
No visible fault, response still wrong |
Display looks completely normal |
Controller, or a hidden run of harness |
Write down the exact behavior and when it repeats |
Any unexpected propulsion means stop riding. Request diagnosis |
Rows describe candidate fault areas only. Confirmation needs the manufacturer procedure for your specific model.
Record a Baseline Before You Inspect Anything
Ten minutes of notes saves a wasted service visit. Intermittent faults are the ones that vanish at the shop counter.

Note When the Fault Appears
At power-up. After using a lever. Over rough ground. Mid-corner with the bars turned. Then tie it to conditions: rain, a wash, a cold morning, a bike that has been running warm for 20 minutes. A fault that repeats on demand is a fault a technician can find. One that only appears at full left lock points somewhere very different from one that only appears cold.
Compare Both Levers
Watch how fully and how fast each one snaps back. Compare feel, brake-light response, and whatever the display does on each side. Asymmetry is evidence. Do not manufacture it by unplugging a side to see what happens.
Capture the Error Exactly
Photograph the whole display, not just the code. Screens use symbols that mean nothing out of context, and a circle with an exclamation mark reads differently depending on what else is lit. Then write down:
- Bike model, plus display and controller model if you know them
- State of charge when the fault appears. Low voltage changes controller behavior
- Recent work: brake service, a lever swap, a bar adjustment, a bleed
- Any crash, drop, strap over the bars, or pressure washing
- Stationary or moving when it started
Powered-Off Visual and Mechanical Inspection
Bike off. Battery handled per the manual. Now look, and only look.
Full Lever Return
Check the pivot for packed dirt, debris, or a blade bent inward a few degrees by an impact. Then check what might block it: handguard edges, grip ends, a cable routed too tight, a bar accessory sitting in the travel path. The lever has to reach its rest stop every time. Not almost.
External Sensor Components
Look at the housing, its bracket, and any magnet or fastener. Cracks, looseness, missing hardware, a part that has shifted. Note what you see and stop there. Tolerances differ between designs. A gap that looks wrong may be correct, and one that looks fine may be out by more than the sensor can handle.
The Visible Cable Route

Follow the wire from the brake assembly along the bar toward the main harness. Pinched insulation. Sharp bends at a clamp exit. Abrasion on the sheath. Then turn the bars lock to lock. Watch for tension appearing at either extreme, because a cable that is slack straight-ahead can go taut at full lock and open a marginal connection. That is the classic cuts-out-only-in-corners fault.
Accessible Connectors

Confirm external quick-disconnect plugs are fully home and sealed. Moisture, corrosion, grit, a bent pin. Never put a metal tool into a housing socket and never force mismatched plugs together. In our experience, the copper inside can be broken while the outer insulation looks untouched, which is why a clean visual pass does not clear a wire.
Recent Work or Damage
Ask when it started. A fault that began the day after a lever swap, a bleed, a bar adjustment, a pressure wash, or a tip-over is telling you where to look. Timeline first. Parts second.
How to Verify the Cutoff Without Defeating It
The bike already has the feedback you need.
Use Display and Brake-Light Feedback
On many models, a brake icon, a diagnostic screen, or the rear brake light changes state when either lever is pulled. Watch for a prompt response that clears completely on full release. Both sides. Repeatable.
That tells you the controller is receiving a brake command. It does not prove the whole chain works, and it does not prove the motor will inhibit under load. Useful. Partial. Write it down anyway.
Follow the Manufacturer Procedure, Not a Generic One
Expected signal states, pinouts, tolerances, and diagnostic menus differ between bikes. A procedure written for another model can hand you a confident wrong answer. Start with the model-specific user manual for your exact bike, then ask the manufacturer for the approved brake-input test if the manual does not cover it.
CPSC’s own pre-ride guidance puts brakes and throttle on the same short checklist and sends riders back to manufacturer directions rather than a universal method. There is a reason for that.
Leave Electrical Testing to a Technician
Continuity and signal measurement need the right wiring diagram, the right equipment, and a model-specific method. Generic wire colors and voltage values found online do not describe your controller. If display feedback and a powered-off inspection came up empty, that is the handoff point.
What a Safe Check Can and Cannot Tell You
Two honest lists. Read both before deciding you found it.
It can confirm:
- Whether each lever returns fully, freely, at the same rate
- Visible damage to housing, bracket, cable, or connector
- Cable tension appearing at a specific steering angle
- That the controller registers a brake command on one or both sides
- A repeatable trigger, which is the most useful thing you can hand a technician
It cannot confirm:
- Which side is faulty when both report normally
- That inhibit will hold under load and heat
- Sensor versus harness versus controller
- Sensor logic, tolerance, or expected signal state for your model
- Anything about a break hidden under intact insulation
Why We Do Not Recommend the Disconnect Test
It works. That is the uncomfortable part.
Some troubleshooting pages recommend unplugging one sensor and riding to see whether throttle returns. We do not recommend that method because it changes a safety input and turns a diagnostic check into a powered ride with altered behavior.
Three reasons. First, the test is the bypass. You ride with one brake input removed, assuming the other works, when the whole reason you are testing is that you no longer trust the input. Second, logic. On a normally closed circuit, unplugging mimics a permanent brake command instead of clearing one, so identical steps give opposite results on hardware you cannot see.
Third, it repairs nothing. A cracked connector or a chafed wire is not fixed by knowing which side it is on, and riders who isolate a side often keep riding unplugged because the bike "works fine now."
The gap tweak has the same problem. Backing a locknut out three-quarters of a turn until the error clears does not mean the sensor is correct. It means you moved it far enough that the controller stopped complaining. Different outcomes.
The trade is real. Our path is slower and sometimes ends at a technician instead of a driveway fix. On a safety input, that is the right trade.
Rule Out What Is Not the Brake Sensor
A stuck inhibit is not the only way to lose drive. Check these before ordering a lever.
Other Motor-Inhibit Conditions
A deployed side stand. An active kill switch. A startup self-check that never passed. Low pack voltage. Thermal protection after a long climb on a hot day. Any of them holds the motor off, and several display a warning riders read as a brake fault. Your manual lists the ones your model uses.
Throttle, Battery, Harness, Display, Controller
Side-stand, kill-switch, startup, battery, thermal, throttle, harness, display and controller faults can all create no-drive or intermittent-drive symptoms. A normal brake icon does not rule them out. Use the model's inhibit-condition list before ordering a lever or sensor.
Mechanical Brake Problems
Weak stopping power, a rubbing rotor, worn pads, a spongy lever, a hydraulic weep. These live in the same 10 centimeters of handlebar and have nothing to do with the cutoff electrically. A spongy lever can still hold the sensor half-triggered, though, which is how a mechanical fault ends up looking electrical. Both systems get fixed before the bike moves.
Cleaning, Reseating, Replacement, or Service
Four outcomes. Two of them belong in your garage.
Low-Risk Corrective Actions
Keep it to what your model approves. Clearing mud or an external obstruction from the lever path. Cleaning accessible surfaces as directed. Reseating a user-serviceable connector with the bike powered off. Do not open a sealed component, and do not force connector halves that resist.
When Replacement Is the Answer
A cracked, crushed, corroded, or missing sensor body, integrated lever, cable, connector, magnet, or bracket gets replaced rather than adjusted. Match the part to the bike, the controller, the connector, and the required sensor logic. Physical fit proves nothing about electrical compatibility. None at all. An incompatible replacement lever is one of the more common ways riders turn a temporary fault into a permanent one.
Confirm the Function After Repair
Run the manufacturer's stationary verification for both inputs before you ride. Consistent lever return, correct display behavior, motor inhibit exactly as documented. If any part of the result is delayed, inconsistent, or unclear, stop and arrange service. Ambiguity is a fail.
Where the Valtinsu Lineup Fits

Hardware context, because brake behavior depends on what the bike actually has.
Brake hardware, ride modes, sensor design and ingress ratings vary by model and revision. Record the exact model, mode, weather and load when the fault appears, but do not diagnose a lever, battery or controller from mode correlation alone. Keep pressure washers away from levers, connectors and harness junctions regardless of the published IP rating.
|
Model |
Brakes |
Water rating |
Ride modes |
Age |
|
EM-5 |
Front and rear hydraulic disc |
IPX6 |
22 / 32 / 40 mph |
13+ |
|
EM-5 Pro |
Front and rear hydraulic disc |
IPX6 |
26 / 40 / 52 mph |
18+ |
|
EM23 |
Front and rear hydraulic disc |
IPX4 |
16 / 28 / 43.5 mph |
16+ |
On a high-output model such as the EM-5 Pro, correct brake-input behavior is especially important. Use only the current model manual and support instructions for sensor checks, lever replacement and connector identification.
Brake levers, sensors, throttles, controllers and wiring harnesses are model-specific service parts rather than universal fitments. If you are unsure which documentation applies, compare the Valtinsu lineup, confirm the exact model and serial information, and then use the corresponding manual.
Sensor logic, connector pinouts and adjustment tolerances belong in the service information for the exact model and production revision. Do not transfer wire colors, gap measurements or adjustment turns from another bike.
When to Stop and Call for Service

Arrange professional diagnosis immediately if:
- Motor power continues while you are braking
- The throttle engages with no input
- Propulsion is intermittent and unpredictable
- You find heat, smoke, melted insulation, or an electrical smell
- Water sits in a connector, a wire is crushed, or a pin is bent
- The error returns after inspection, especially following a crash, a brake replacement, or a non-original part
Any test needing live probing, controller changes, wire bridging, sensor disconnection, or any other form of defeat is outside DIY inspection. Power the bike down and leave it down. Photograph the display, write out the exact lever and motor behavior, then contact the manufacturer, your dealer, or a qualified electric dirt bike technician.
If you think the fault is a defect rather than wear or damage, file it with CPSC through SaferProducts.gov. Reports there feed the same hazard data this guide cites.
How We Built This Guide
Federal Hazard Data Over Forum Consensus
The urgency ranking is based on the immediate riding consequence: unexpected propulsion can oppose braking, while a stuck inhibit usually prevents drive. CPSC incident data provides general micromobility context, but it does not identify brake-cutoff sensors as the cause of the broader control-issue category.
Model-Specific Over Universal
No gap measurement. No expected voltage, wire color, or turn count. We cannot know your hardware, and no general guide can. Where a number would be needed, we route to the manual. That decision costs us some perceived completeness, and we accept it.
Safety-Input Integrity First
Anything that removes, fakes, or masks a brake input is excluded, even where it is an effective shortcut and even where competitors publish it. Slower path. Intact safety system.
Preventing the Next Brake Cutoff Fault
Many brake cutoff faults begin with lever damage, cable strain, contamination or incompatible replacement parts, although component and wiring faults are also possible.
- Squeeze and release both levers before every ride. Full return, both sides. Five seconds
- Route cables clear of pinch points, sharp bends, and anything that moves with the steering
- Transport straps go over the frame. Never over the bars or across brake lines
- Skip the pressure washer near levers, connectors, and the display. Low-pressure rinse instead
- After a fall, a haul, a bar adjustment, or brake service, check cutoff behavior before the next ride
- Fit only levers and sensors confirmed compatible with your bike and controller
- Log a flickering icon the week it starts. Intermittent faults diagnose more easily than constant ones, which is the opposite of what most riders assume
- Ask for brake cutoff verification at every scheduled service, by name
One thing about where you ride: designated routes on National Forest System land can put you a long way from a vehicle. A fault that is inconvenient in a driveway is a different problem eight miles up a trail.
The Short Version
Use this diagnostic order: lever return, display feedback, visible wiring and connectors, then the model-specific procedure in the manual.
A motor that stays inhibited has several plausible causes, and the brake sensor is only one. A motor that continues under braking or moves without input must not be ridden. Record the exact symptoms, display codes, lever behavior and recent service history, then use model-specific support instead of defeating the safety input.
If your bike is a Valtinsu and something above matches what you are seeing, send us the display photo and the lever behavior. Those details usually give the Valtinsu support team enough context to choose the next model-specific check before the bike is moved.
FAQs
Why Does the Bike Show the Brake as Active After I Release the Lever?
The controller is still receiving a brake-on signal. The cause may be mechanical, magnetic or electrical, so do not assume the sensor itself has failed.
- The lever is not returning fully because of mud, damage, an overtightened pivot or handguard contact.
- A magnet or sensor has shifted out of its model-specific position.
- A connector is loose, wet or corroded.
- A cable is pulled at full steering lock or has an intermittent conductor.
How Do I Test a Brake Cutoff Sensor Without Bypassing It?
Use only the feedback and checks described in the model manual. A safe rider-level test does not require bridging wires or probing controller pins.
- Power the bike on in a stable, controlled area and keep the drive wheel safely unloaded only if the manual permits it.
- Operate one lever at a time and watch for the brake icon, display change or brake-light response specified by the manufacturer.
- Release the lever fully and confirm the indication clears every time.
- Repeat at straight ahead and at both steering locks to expose cable-tension faults.
- If the signal is inconsistent, stop the test and record the exact lever, steering position and display behavior for service.
Is There a Universal Brake Sensor Reset?
No. Brake cutoff systems do not share one reset procedure. First confirm both levers return completely, remove visible mud or handguard interference, and then follow only the approved power-cycle or code-clearing procedure in the model manual. If the warning returns, repeated resetting is not a repair.
Can I Ride With a Faulty Brake Cutoff Sensor?
No. Keep the bike out of service until the fault is diagnosed and repaired.
- A stuck brake-on signal can remove power unexpectedly or leave the bike stranded.
- A cutoff that fails to engage can allow motor power to continue while braking.
- An intermittent signal can cut power during a corner, climb or obstacle.
Can Wiring Problems Cause a Brake Cutoff Error?
Yes. A wiring fault can create a false brake input or an intermittent signal even when the lever and sensor look normal.
Check for a connector that is not fully seated, corrosion or moisture inside a plug, cable tension at full steering lock, and insulation damage near the head tube or lever. Do not pierce insulation or probe unknown pins; those tests require the correct wiring diagram and service procedure.
Should You Bypass an Electric Dirt Bike Brake Sensor?
No. Unplugging the sensor, bridging wires or changing controller settings can remove a designed motor-inhibit function and may create unexpected propulsion while braking. It can also hide the original lever, connector or harness fault. Use a confirmed compatible replacement and qualified diagnosis instead.
Sources
- U.S. Consumer Product Safety Commission, Micromobility Products-Related Deaths, Injuries, and Hazard Patterns: 2017-2024 (2026)
- U.S. Consumer Product Safety Commission, Micromobility: E-Bikes, E-Scooters and Hoverboards (2026)
- Electronic Code of Federal Regulations, 16 CFR 1512.5, Requirements for Braking System (2026)
- UL Standards & Engagement, How UL 2849 Addresses the Risk of Electrical Shock and Fire from E-Bikes (2025)
- USDA Forest Service, Off-Highway Vehicle Program (2026)
- U.S. Consumer Product Safety Commission, SaferProducts.gov Incident Reporting Portal (2026)


Looking for something else?
Electric Dirt Bike Loses Power Under Load: Causes and How to Fix It
LEARN MORE
Electric Dirt Bike Bolt Torque Checklist: What to Check and Where the Numbers Come From
LEARN MORE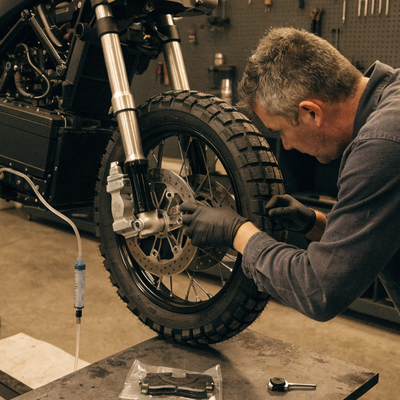
How to Bleed Electric Dirt Bike Brakes Safely
LEARN MORE
Electric Dirt Bike Throttle Not Working: What to Check First
LEARN MORELooking for something else?
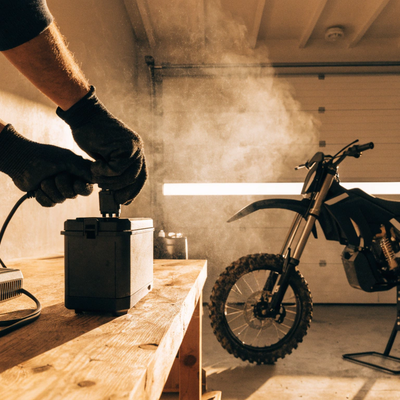
Electric Bike Battery Not Charging? Work Through This Before You Buy a New One
LEARN MORE
Electric Dirt Bike Error Codes: What They Mean and What to Check First
LEARN MORE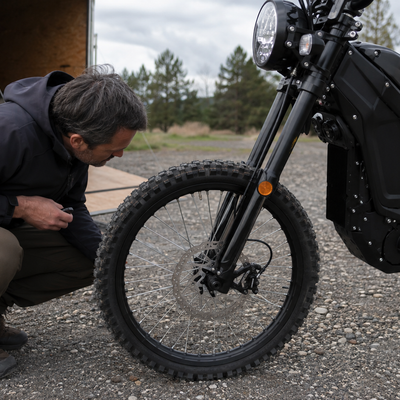
Electric Dirt Bike Brake Rotor Rubbing: Diagnose the Cause Before Adjusting
LEARN MOREYou may also like
VALTINSU EM-5 Off-Road Electric Dirt Bike
VALTINSU EM-5 Pro Off-Road Black Electric Dirt Bike
VALTINSU EM-5 Pro Green Electric Dirt Bike
VALTINSU EM-5 Ultra Electric Dirt Bike
VALTINSU EM-5 & EM-5 Pro Combo
Further reading
Electric Dirt Bike Trailside Power Loss: Recovery Plan When the Battery Is Dead
Electric Dirt Bike Fall Riding on Wet Leaves: Grip, Hidden Obstacles and Braking
How to Lift a Fallen Electric Dirt Bike Without Hurting Yourself or the Bike