How to Prevent Electric Dirt Bike Flat Tires
Most repeat flats can be traced to pressure, impact damage, embedded debris, the valve, or a problem inside the rim. Prevention starts by identifying which failure you actually have.
Use the bike or tire manufacturer’s cold-pressure specification, inspect tread, sidewall, bead, and valve before each ride, and inspect the tube, rim strip, spokes, and rim after a flat. Match puncture protection to the terrain; no product prevents every failure.
How Do You Prevent Electric Dirt Bike Flats?

|
Check cold tire pressure against the range specified by your bike or tire manufacturer. Inspect tires before rides and pull out embedded sharp debris. Replace worn or damaged tires. Check the tube, rim strip, valve and rim whenever the tire is off. Choose puncture protection that suits your terrain. Ride around severe sharp impacts where you can. Carry a repair kit that matches your actual wheel. |
Pre-Ride Flat-Prevention Check
- Check cold pressure with a gauge, not by squeezing the tire.
- Spin each wheel and scan the tread and sidewalls.
- Remove obvious embedded debris.
- Look at the valve area and the rim edge.
- Confirm the tire is seated evenly and undamaged.
- Confirm your repair kit is on the bike.
Why the Same Tire Keeps Going Flat
A tire that fails repeatedly usually has an unresolved cause: debris still in the casing, pressure outside the approved range, a damaged or displaced rim strip, a protruding spoke, a leaking valve core, tube movement at the valve, bead damage, or a bent rim.
Before installing another tube, match the damage location to the tire and rim, remove the cause, and verify the bead and valve. Replacing the tube without this inspection often reproduces the same failure.
What Tire Pressure Should an Electric Dirt Bike Have?

Use the pressure specified by your bike or tire manufacturer, measured cold, and adjust only inside that approved range when the manufacturer provides guidance for load and terrain. This article will not give you a number.
That refusal is deliberate. A PSI figure right for one tire, rim, rider weight and terrain can be wrong for another, and a wrong pressure causes exactly the flats you are trying to avoid.
Where the correct figure comes from
- The model-specific manual for your bike.
- The tire manufacturer specification.
- The wheel and tire compatibility requirements for your setup.
For a Valtinsu, start with the Valtinsu user manuals. Before changing tire pressure or replacing wheel components, check the model-specific manual, and contact support if the figure is not there. Valtinsu does not publish a tire pressure on its product pages, so it has to come from the manual rather than from an article.
The sidewall number is not automatically your riding pressure
A pressure printed on a tire may be a maximum rating, or a range for general use. It is not necessarily the right riding pressure for your machine, wheel, load and terrain. Do not inflate to the highest number you can find.
What sets the right figure: the tire, the wheel, rider and cargo load, terrain, speed, impact severity, tire construction, and the manufacturer specification.
The tradeoff, in both directions
Too little pressure can increase:
- Pinch-flat risk and rim strikes on square impacts
- Tire deformation under load
- Bead instability, and the risk of the tire rolling on the rim
- Valve-stem stress from tube movement
Too much pressure reduces compliance, traction on rough ground and impact absorption. It changes handling and impact behavior rather than automatically causing punctures.
Why cold pressure matters
Pressure changes with temperature, so compare a cold measurement with the manufacturer’s cold target. A hot reading should not be treated as equivalent.
Check before riding, cold. If pressure drops noticeably between rides, do not just top it up and go. Investigate a puncture, valve leak, bead or sealing issue, tube problem, temperature difference or installation error.
Inspect Tires Before Every Ride
A brief pre-ride scan can identify embedded debris, casing damage, valve problems, and pressure loss before they become trail failures.
|
Check |
What to look for |
Action if damaged |
|
Tread |
Embedded thorns, wire, nails, glass, sharp stones |
Remove debris carefully; inspect the hole |
|
Tread depth |
Rounded or squared-off knobs, heavy wear |
Plan replacement before the next demanding ride |
|
Sidewalls |
Cuts, cracks, dryness, gouges, bulges |
Replace. A bulge or gash is not repairable |
|
Casing |
Exposed cord or fabric |
Replace the tire |
|
Bead area |
Damage, displacement, uneven seating line |
Reseat or replace; do not ride an unseated bead |
|
Valve area |
A leaning or pulled valve stem, damage at the base |
Inspect the tube and rim hole before riding |
|
Pressure |
Any drop since the last check |
Find the cause rather than only reinflating |
|
Rim |
Dents, cracks, flat spots, protruding spokes |
Stop and have the wheel inspected |
Use judgment on removal. A small thorn comes out with a fingernail or a pick. If the object is large, or the tire is already losing pressure, inspect it in a controlled setting rather than at a trailhead. Pulling a large object out can release air suddenly.
Choose the Right Tire
The best tire is the one specified for your machine, not the thickest you can find. It has to match wheel size, load, speed, terrain and application.
What matters when comparing options:
- Casing strength appropriate to the vehicle weight and speed
- Reinforced sidewalls if you regularly hit rocks
- Puncture-resistant construction, where offered
- A load rating suited to bike plus rider plus gear
- Correct diameter and width, with confirmed rim compatibility
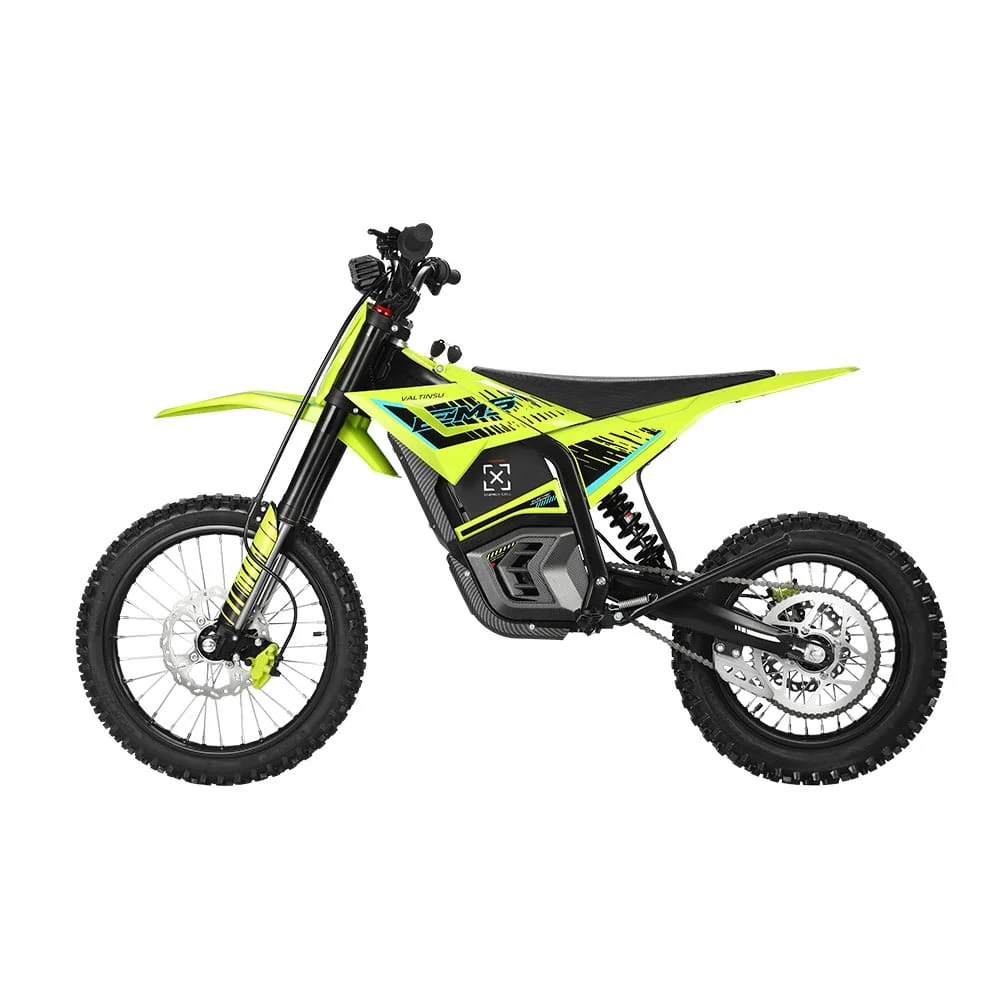
Use the Valtinsu EM-5 detail page to confirm the exact model and current wheel listing, then verify tire, tube, rim, and pressure requirements in the model manual. Do not assume another Valtinsu model uses the same wheel specification.
Do not fit a bicycle tire to an electric dirt motorcycle unless the manufacturer approves it. Bicycle components are rated for different loads and speeds.
Do Tire Liners Prevent Pinch Flats?

No. A liner is a barrier against some sharp objects, not against impacts. It may reduce punctures from thorns or glass when the size and installation are correct.
- Can help stop some sharp debris reaching the tube.
- Does not prevent pinch flats. Those are a compression failure.
- Can cause flats if the size is wrong and it shifts, folds or chafes at the valve.
- Adds weight, which REI notes adds rolling resistance.
Use only a liner confirmed for the tire and tube setup. A poorly sized or displaced liner can fold, chafe the tube, or interfere with the valve area.
Inspect the Rim Strip, Valve, and Rim Lock
A flat with damage on the inner side of the tube usually means the problem is inside the rim, not on the trail.
The rim has holes between its sidewalls for spoke nipples. A rim strip covers them and shields the tube from sharp rim edges, spoke ends and nipples. Park Tool notes it should cover the rim base without being so wide it interferes with bead seating, and that a damaged strip may cause a flat.
Inspect the strip whenever you change a tire or tube:
- Correct width, centered over the nipple holes
- No tears, rips or displaced sections
- No exposed spoke holes
- No sharp edge
- No interference with bead seating
Not a claim that rim tape causes flats generally. A damaged one can, and it is invisible unless you look.
Valve Stem and Rim Lock Inspection
The valve stem should sit straight and point toward the hub. A stem that looks severely angled or pulled is telling you the tube has moved inside the tire.
Check the stem base, valve core, locknut where fitted, rim hole and tube alignment. Park Tool notes a cut at the valve core commonly comes from tube misalignment or riding on low pressure, and that a loose core can cause a slow leak.
If your wheel uses a rim lock, check installation, looseness, damage and hardware. Whether a given Valtinsu model uses one is not stated in the available product information, so confirm it from the manual rather than assuming.
The mechanism matters. If the tire rotates on the rim under hard acceleration or braking, the tube goes with it and the valve takes the load. That is how a valve tears with no external puncture.
What Causes Pinch Flats?

A pinch flat happens when the tube is compressed between the tire and rim during a hard impact, typically leaving two symmetrical cuts. Riders call it a snake bite.
Contributors: insufficient pressure for the conditions, hard impacts, heavy load, aggressive riding, and tire construction not up to the terrain. Park Tool notes double slits commonly result from a rim pinch, the tube caught between rim and an object on the trail.
|
What does not fix a pinch flat Sealant does not reliably prevent a mechanical pinch flat. Neither does a tire liner. A pinch is a compression failure, not a hole from a sharp object, and products aimed at sharp objects do not address it. Prevention is correct pressure, suitable tire and tube construction, adequate rim protection where compatible, and riding technique. |
Does Tire Sealant Prevent Flats?
It reduces some puncture-related flats. It does not prevent flats generally, and the distinction matters when you are deciding what to rely on.
Compatible sealant may close some small tread punctures as they occur. The correct product, amount, and service interval depend on the tube or tubeless system and the sealant manufacturer’s instructions.
Reasonable against: small thorn punctures, some small nail or wire holes, small pinholes.
Do not rely on sealant for large cuts, sidewall damage, pinch flats, torn valve stems, damaged beads, major tube failures, or a bent or cracked rim.
Sealant needs maintenance, because many formulas dry out. SRAM notes it may need topping up depending on brand and on conditions like temperature and humidity, and that a bike left standing is more likely to have dried sealant pooled inside. Follow the manufacturer instructions, not a generic interval.
Protection Options Compared

No option here is universally best. Each addresses a different failure.
|
System |
Main benefit |
Main limitation |
Best suited to |
|
Standard tube |
Simple, light, cheap, easy to replace |
Least puncture and pinch resistance |
Moderate riding on cleaner terrain |
|
Heavy-duty tube |
Thicker material resists some punctures and impacts |
Heavier, harder to install, still pinches |
Rocky or thorny terrain, heavier loads |
|
Puncture-resistant tire |
Stronger casing or protective belt |
Heavier; does not stop pinch flats |
Debris-heavy trails and frequent riders |
|
Tube plus liner |
Extra barrier against sharp objects |
No pinch protection; can chafe if misfitted |
Thorn country |
|
Tube plus sealant |
Seals many small punctures while riding |
Useless against cuts, pinches and valve failures |
Thorn and small-debris terrain |
|
Tubeless plus sealant |
Removes the ordinary tube pinch mechanism |
Needs compatible rim, tire, valve and correct setup |
Riders with a confirmed tubeless-compatible wheel |
|
Insert or mousse, where compatible |
Impact and rim protection depending on system |
Complex install, weight, compatibility, different feel |
Technical or competitive off-road use |
Should I Convert My Electric Dirt Bike to Tubeless?
Only if the components are confirmed compatible. Removing the tube does not make a wheel tubeless-safe.
A working tubeless system needs several parts doing their jobs together. SRAM Zipp tubeless guidance lists tubeless-compatible rims with airtight sealing channels and a proper bead profile, tubeless-specific tires with reinforced beads and airtight construction, tubeless valve stems, correct-width rim tape, and sealant. It also states that all these components are needed for a reliable setup.
What tubeless changes: it removes the inner tube, so the ordinary tube pinch flat goes away. The tire can still puncture, burp air, lose its seal, or suffer sidewall and bead damage.
The failure modes shift rather than disappear. SRAM identifies air loss from a damaged valve, from adhesive rim tape lifting or tearing, and from dried sealant. It also names tire levers as the biggest culprit in damaging rim tape.
|
Do not convert on assumption Valtinsu does not state that any model is tubeless-ready, and does not publish a rim, tire or bead specification that would let anyone judge tubeless compatibility from public pages. Do not convert a Valtinsu wheel to tubeless unless Valtinsu or the wheel and tire manufacturer confirms compatibility. Confirm any insert or tubeless-conversion system against the exact rim, tire, and manufacturer instructions. Product-specific systems are not interchangeable. |
What Makes Electric Dirt Bikes Different

Electric dirt bikes combine vehicle load, rider load, speed, motor torque, and repeated off-road impacts. Those factors increase tire and wheel demand, but they do not establish a universal pressure or protection setup.
- Substantial vehicle and rider load
- Instant motor torque, and wheelspin under hard acceleration
- Higher sustained speeds
- Repeated off-road impacts
Vehicle load, rider load, speed, and off-road impacts all raise tire and wheel demand. Use the Valtinsu electric dirt bike lineup page to identify the current model; do not convert lineup specifications into a tire-pressure recommendation.
|
An evidence boundary worth stating A published maximum-load figure is not a tire-pressure input. Pressure still depends on the exact tire, rim, total load, terrain, and manufacturer specification; do not convert a lineup specification into PSI. |
Motor torque can increase wheelspin and traction demand, but it does not directly cause punctures. Treat it as another reason to verify pressure, tire selection, bead condition, and tube installation.
This does not prove that electric dirt bikes get more flats as a class. Tire and wheel maintenance must match the exact machine, load, terrain, and component specification.
Riding Technique That Saves Tubes
Line choice is free protection. This is an off-road machine, so the point is not avoiding rocks. It is not taking the worst hits at the worst speed.
- Scan ahead instead of watching the front wheel
- Ride around obvious metal, glass and thorn debris where a line exists
- Slow before a rock section, not during it
- Avoid square-edged impacts at speed where practical
- Unweight the wheels over the worst hits
- Let the suspension work
- Keep the throttle smooth on sharp surfaces to limit wheelspin
And the one that costs riders the most money: do not keep riding on a severely underinflated or flat tire.
When Should You Stop Riding?
Some findings end the ride. Continuing turns a tube into a tube, tire, rim and wheel bill.
|
Stop riding and inspect the bike if
Continuing on a flat or severely underinflated tire can damage the tire, tube, rim, bead, wheel and valve, and it degrades handling stability. If you suspect structural damage to a wheel or tire, replace the component or have it professionally inspected. If a low-speed recovery to a safe location is genuinely necessary, do it only when it is safe and appropriate to do so and follow your manufacturer guidance. Do not ride a damaged tire back to the trailhead at speed. |
After a Flat: Find the Cause Before Reinstalling
Fitting a new tube and moving on is how one problem becomes three flats. The new tube fails the same way, because whatever cut the last one is still in there.
A workable sequence:
- Remove the wheel following your manufacturer procedure.
- Inspect the tire externally, tread and sidewalls.
- Inspect the tube. Park Tool suggests inflating to about twice normal width, then listening close to your ear or submerging it and watching for bubbles.
- Identify exactly where the tube failed and mark it.
- Match the damage pattern to a likely cause using the table below.
- Inspect inside the tire casing. Wipe with a rag, then feel carefully for embedded glass, wire or thorn tips.
- Inspect the rim strip for tears, displacement and exposed holes, and check spokes and nipples for sharp protruding ends.
- Check the valve area, the rim valve hole, the rim for dents and cracks, and the tire bead.
- Correct the underlying issue before the new tube goes in.
Post-flat failure pattern reference

|
Tube damage |
What it may indicate |
What to inspect |
|
Single small puncture |
A thorn, nail or wire |
Tire casing and tread, inside and out |
|
Two parallel cuts |
A pinch flat |
Pressure, impact severity, tire and rim protection |
|
Hole on the inner tube side |
A rim, spoke or rim-strip problem |
The rim cavity, strip and spoke ends |
|
Damage at the valve base |
Tube movement, misalignment or low pressure |
Valve, rim hole and tube seating |
|
Large tear or shredded tube |
Severe impact, blowout or installation error |
Tire, rim and bead condition |
Treat each row as a starting point, not a verdict. Causes overlap, and one bad ride can produce a puncture and a pinch.
What Should You Carry for a Trailside Flat?
A kit that matches your wheel, axle hardware and valve type. A perfect kit for someone else’s bike is dead weight on yours.
- A correct-size spare tube for that wheel
- Tire levers strong enough for the tire, not thin bicycle levers
- A portable pump or inflator, plus a patch kit
- A valve-core tool where applicable
- The correct axle tools for your bike, and a multi-tool
- Gloves and a flashlight
- A compatible plug kit, only if you actually run tubeless
Do not rely on CO2 alone. SRAM notes CO2 permeates rubber considerably faster than air, so a CO2 fill gets you home but should be released and replaced with ordinary air afterward. A pump is the more reliable primary tool.
Flat-Tire Prevention for Valtinsu Electric Dirt Bikes
Valtinsu lists user manuals for the EM-5, EM-5 Pro in green and black, EM-5 Ultra and EM23. Before changing pressure, fitting a different tube, replacing a tire or modifying a wheel, check the Valtinsu user manuals for your model. The models do not share a wheel specification, so guidance for one is not guidance for another.
|
What Valtinsu does not publish Public Valtinsu pages show some model and wheel information, but they do not provide one universal tire pressure or enough tire, rim, bead, valve, and tube data to authorize component changes or a tubeless conversion. For pressure, tire, tube, rim, bead, valve, or tubeless-compatibility decisions, use the model-specific Valtinsu manual or contact Valtinsu support. Do not infer a tire specification from wheel diameter, load rating, speed, or suspension data. |
Conclusion
Flat prevention works as a sequence: use the approved cold pressure, inspect before riding, match protection to the failure pattern, and correct the root cause after a flat. Sealant, liners, heavy-duty tubes, inserts, and tubeless systems each address specific risks rather than every failure.
After a flat, inspect the tube, tire casing, valve, rim strip, spokes, bead, and rim before installing another tube. That is how you fix the cause instead of repeating the failure.
And for anything model-specific, tire pressure included, go to the Valtinsu user manuals rather than a general article. That is the one number no guide can supply for you.
FAQs
Why does the same electric dirt bike tire keep going flat?
Repeat flats usually mean the original cause was not removed. Check in this order:
- Match the new tube damage to the same position on the tire and rim.
- Inspect the casing for embedded wire, thorns, glass, or sharp debris.
- Check cold pressure against the approved specification and review recent impacts.
- Inspect the rim strip, spoke ends, valve core, valve base, bead, and rim.
- Correct the cause before installing or inflating another tube.
What cold tire pressure should I use?
Use the pressure specified for the exact bike-and-tire setup, measured before riding while the tire is cold. Adjust only within an approved range when the manufacturer gives load or terrain guidance. If a Valtinsu manual does not state the value, contact Valtinsu support rather than borrowing a bicycle or another model’s PSI.
How can I tell a pinch flat from a puncture or rim-strip problem?
The damage location and shape provide the best first clue, although more than one cause can occur at once:
- One small hole on the tread side: likely thorn, wire, nail, or similar debris
- Two parallel cuts: likely pinch damage from compressing the tube against the rim
- Hole on the inner side: inspect the rim strip, spoke ends, nipples, and sharp rim edges
- Damage at the valve: inspect tube alignment, pressure history, valve core, and rim hole
Are heavy-duty tubes, sealant, liners, inserts, or tubeless best?
No option is universally best; match the protection to the failure pattern and use only compatible components:
- Heavy-duty tube: more puncture and impact resistance, but more weight and harder installation
- Sealant: useful for some small punctures, not cuts, pinches, valves, beads, or rim damage
- Liner: barrier against some sharp objects, not against pinch compression
- Insert or mousse: system-specific impact protection with fitment, weight, and installation tradeoffs
- Tubeless: removes the ordinary tube-pinch mechanism but adds bead, tape, valve, sealant, and compatibility requirements
Can the valve or valve core cause a slow leak?
Yes. A loose or damaged valve core can leak, and damage at the valve base may indicate tube movement, misalignment, low pressure, or a problem at the rim hole. Confirm the leak source, inspect the stem and base, and repair the fault instead of repeatedly adding air.
What should I inspect after a hard impact or every ride?
Before every ride, check cold pressure, tread, sidewalls, bead seating, and the valve area. After a hard impact, stop if pressure falls, the wheel feels unstable, or the tire or rim looks damaged, then inspect:
- The tread and sidewalls for cuts, bulges, exposed casing, or embedded debris
- The bead line for even seating and damage
- The valve for leaning, leakage, or damage at the base
- The rim for dents, cracks, flat spots, or rubbing
- The tube, rim strip, and spoke ends whenever the tire is removed
Sources
- Valtinsu, User Manuals. Date not stated. Retrieved 11 Aug 2026. Supports: model-specific manuals listed for EM-5, EM-5 Pro green and black, EM-5 Ultra and EM23, and their role as the authority for pressure, tire, tube and wheel specifications.
- Valtinsu, Electric Dirt Bike Collection. Supports: current model identification and published wheel and load context; it is not a tire-pressure specification.
- Valtinsu, EM-5 Electric Dirt Bike. Supports: current model identification and the wheel configuration published for the EM-5; pressure and component compatibility still require the model manual.
- Valtinsu, Parts and Accessories. Date not stated. Retrieved 11 Aug 2026. Supports: model-specific replacement components including front and rear wheel parts; guidance to seek qualified technician assistance for unfamiliar work.
- Park Tool Co., Tire and Tube Removal and Installation. Published 20 Aug 2015. Retrieved 11 Aug 2026. Supports: a single puncture commonly indicates a thorn, wire or small nail; double slits commonly indicate a rim pinch; a hole on the inner edge indicates a problem inside the rim such as rim strip failure or a protruding spoke; a cut at the valve core commonly comes from tube misalignment or low pressure; a leaky valve core can cause a slow leak; large shredded holes and long slits indicate blowouts, the latter often from improper seating; rim strip must cover the rim base without interfering with bead seating and should be inspected at every tire change; always inspect both tire and tube to locate the cause; tube leak-finding by overinflation, listening or submersion; inspecting inside the casing by wiping and feeling.
- Park Tool Co., Tire, Wheel and Inner Tube Fit Standards. Date not stated. Retrieved 11 Aug 2026. Supports: bead diameter standards are not interchangeable, so tire and rim sizing must match.
- SRAM LLC, Zipp Tubeless Troubleshooting. Date not stated. Retrieved 11 Aug 2026. Supports: the components a tubeless system requires, including compatible rims with airtight sealing channels and bead profile, tubeless-specific tires with reinforced beads, tubeless valves, correct-width rim tape and sealant; 10 to 20 percent overnight air loss treated as normal and 50 percent or more in 24 to 48 hours as indicating a leak, for bicycle systems; air loss from valve damage, lifted or torn rim tape and dried sealant; tire levers as the biggest culprit in damaging rim tape; CO2 permeating rubber faster than air and needing replacement with ambient air; sealant requiring topping up depending on brand and conditions.


Looking for something else?
Electric Dirt Bike Replacement Parts Availability: What Buyers Should Verify Before Ordering
LEARN MORE
How to Check an Electric Dirt Bike for Safety Recalls by Model and Serial Number
LEARN MORE
How to Choose an Electric Dirt Bike Repair Shop: Questions to Ask Before Service
LEARN MORE
How to Lift a Fallen Electric Dirt Bike Without Hurting Yourself or the Bike
LEARN MORELooking for something else?
Electric Dirt Bike Fall Riding on Wet Leaves: Grip, Hidden Obstacles and Braking
LEARN MORE
Electric Dirt Bike Trailside Power Loss: Recovery Plan When the Battery Is Dead
LEARN MORE