Electric Dirt Bike Noise Diagnosis Checklist
An electric dirt bike has no engine noise masking anything, so every mechanical sound arrives clearly. Useful for diagnosis, unhelpful for nerves. The mistake that follows is predictable: the noise seems to come from the middle of the bike, the motor is in the middle of the bike, so the motor gets blamed. It usually is not the motor. Work the condition first.
Before you startThis guide helps identify possible noise sources. It does not replace the applicable model service manual or qualified mechanical inspection. Model-specific torque values, brake, suspension and axle procedures should come from Valtinsu documentation. Never open a battery pack, controller or motor housing casually. Internal electrical work is not owner-level diagnosis. |
Why Is My Electric Dirt Bike Making a Strange Noise?
Because something mechanical changed, and on a quiet machine you can hear it. The question worth answering is whether the sound is new, and whether it tracks a specific operating condition.
Some sound is normal. A smooth motor or controller sound that rises and falls predictably with power is not automatically a fault. What matters is change: a noise that appeared, got louder, turned to grinding, or arrived with vibration, power loss or heat. Location alone is a weak clue, because a rear brake, chain, wheel bearing and motor all sit within a foot of each other. Two better clues are available.
Diagnose the Noise by When It Happens

This table does most of the work. Find your row before touching anything.
|
When the noise occurs |
Likely systems |
First diagnostic direction |
|
Only while braking |
Pads, rotor, caliper |
Inspect pad condition, rotor surface and caliper alignment |
|
Only under acceleration |
Chain, sprockets, motor, motor mount |
Check chain slack, sprocket teeth and mounting hardware |
|
Only while coasting |
Wheel bearing, tire, rotor, axle, spokes |
Raise the wheel and rotate it by hand |
|
Only over bumps |
Fork, shock, linkage, battery mount, loose hardware |
Compress the suspension and check mounts and fasteners |
|
While turning |
Steering head, fork, cable or hose routing |
Check routing and steering movement |
|
At one specific speed |
Tire, spoke, loose panel, resonance |
Press suspected panels and inspect the wheel |
|
Only with the motor powered |
Motor, controller, wiring, motor mount |
External inspection only. Escalate if grinding |
|
With the motor off and the wheel turning |
Mechanical: wheel, brake, tire, chain, bearing |
Rotate by hand and listen |
|
Only after washing or wet riding |
Moisture, displaced debris, brake surfaces |
Often temporary. Recheck when dry |
Use Noise Frequency to Narrow the Source
The second clue is repetition. A sound repeating on a fixed cycle tells you which rotating component it belongs to.
- Once per wheel revolution. Rotor, tire, a spoke, or something in the wheel. Rotate the wheel slowly and count.
- Once per chain revolution. A stiff link, a damaged roller, or a sprocket tooth. Slower repeat than wheel speed on most setups.
- Rising and falling with motor speed. Motor, reduction components or the electrical system.
- Random, mostly over bumps. Suspension, battery mount or loose hardware.
- Only at one exact speed. Resonance. A panel, guard or accessory vibrating at its natural frequency.
A rhythmic scrape once per wheel turn is a different problem from a grind that appears only under motor load, even if both sound harsh.
Electric Dirt Bike Noise Diagnosis Matrix

|
Noise |
When |
Most likely area |
Safe first check |
Urgency |
|
Clicking |
Under acceleration |
Chain, sprocket, motor mount |
Chain slack and sprocket teeth |
Medium |
|
Clicking |
Once per wheel turn |
Spoke, rotor, tire, wheel hardware |
Rotate the wheel slowly |
Medium |
|
Grinding |
Coasting |
Wheel bearing, hub |
Spin the wheel; check hub play |
High |
|
Grinding |
Braking |
Pads worn to backing, rotor |
Pad thickness and rotor surface |
High |
|
Scraping |
Wheel turning |
Rotor or caliper contact |
Rotor clearance in the caliper |
Medium |
|
Squeal |
Braking |
Pads, rotor, contamination |
Pad and rotor condition |
Medium to high |
|
Motor whine |
Under power |
Motor or controller |
Compare with the familiar sound |
Low to medium |
|
Motor grinding |
Under power |
Motor internals or mount |
Stop riding. Do not open the motor |
High |
|
Chain knock |
Acceleration |
Chain, sprockets, guide |
Slack, tooth profile, guide contact |
Medium |
|
Clunk |
Over bumps |
Suspension, linkage, battery mount |
Compress suspension; check fasteners |
Medium to high |
|
Rattle |
Rough ground |
Guard, panel, accessory |
Press parts by hand while stationary |
Low to medium |
|
Pinging |
Over bumps |
Spokes |
Compare neighbouring spoke tension |
Medium |
|
Rumble |
Rises with wheel speed |
Bearing or tire |
Spin the wheel; feel for roughness |
High |
Treat every row as a first suspect rather than a verdict. Several of these produce near-identical sounds.
How to Safely Diagnose an Electric Dirt Bike Noise
- Switch the bike off and remove or isolate the battery where that is practical for your model.
- Support the bike securely so it cannot shift, and let the brake rotors cool.
- Note whether the noise occurs at all while stationary.
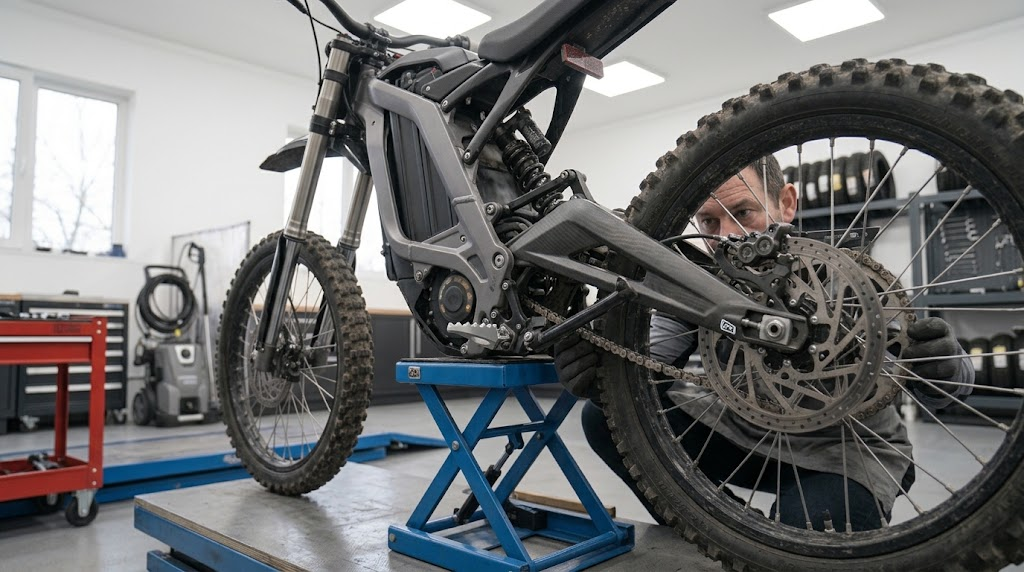
- Raise one wheel at a time and rotate it slowly by hand, listening and feeling for roughness.
- Inspect the brakes: pad condition, rotor surface, caliper alignment, any continuous contact.
- Inspect the chain and sprockets visually, using a light. Keep fingers clear of the chain and sprocket teeth.
- Inspect spokes, rim and tire for looseness, damage or embedded debris.
- Compress the suspension by hand and listen for knocking or squeaking.
- Check accessible hardware: guards, fenders, battery mount, accessories, cable and wiring routing.
- Determine whether the noise depends on motor power at all.
- If the source cannot be located safely, stop and arrange professional inspection rather than continuing to test.
If a low-speed test is genuinely needed, do it in a controlled traffic-free area, only after the basic safety checks above, and never with any of the stop-riding symptoms present. Do not ride at speed simply to reproduce a noise.
What Causes an Electric Dirt Bike Clicking Noise?

Clicking has three distinct signatures, and they point at different components.
Clicking once per wheel revolution
Rotate the wheel slowly and the click repeats on a fixed cycle. Possible sources: a loose spoke, a bent or contacting rotor, debris in the tire, valve or hardware contact. Easy to confirm, because you can reproduce it by hand with the bike off.
Clicking only under acceleration
Load-dependent clicking moves the drivetrain up the list: chain, sprockets, motor mount, rear-wheel hardware. ZEXUS attributes a chain riding up on sprocket teeth to wear elongation, excessive slack or worn sprockets, all of which show under load rather than at rest.
Random clicking or rattling
If it will not repeat on a cycle and mostly happens on rough ground, look at what is bolted on rather than what rotates: battery mount and latch, panels, chain guard, fenders, cable routing, accessories. Press each by hand while stationary; a rattle often reproduces that way.
What Causes Electric Dirt Bike Grinding?
Grinding is the one noise here that should always shorten the ride. What it means depends on when it happens.
Grinding while braking
Usually the friction material is gone and the metal backing plate is contacting the rotor, which damages the rotor with every application. It can also be trapped debris or a caliper fault. Park Tool pad guidance also notes that contaminated pads produce squeal and extra effort at the lever, with a darkness on rotor and pads that smears when rubbed. Stop riding for grinding.
Grinding while coasting
Wheel bearing, hub or axle move to the front. UK DVSA inspection guidance assesses bearings by rocking each raised wheel for excessive play and spinning it to listen for roughness, and grades roughness severe enough that the bearing may overheat or break up as a dangerous defect. RevZilla is equally direct once a bearing can be turned by finger: any play or roughness whatsoever warrants replacement.
It may also be a rotor contacting a pad, a tire fouling something, or debris in the caliper. Rotate the wheel by hand and locate it.
Grinding from the motor area
The highest-risk finding here, and the smallest amount of owner-level work. Possible sources include motor bearings, reduction components, an internal fault or a loose motor mount. Check accessible mounting hardware and wiring for looseness, then stop. Do not open the motor.
Is Motor Whine Normal on an Electric Dirt Bike?

It can be. A smooth, consistent whine that rises and falls predictably with motor speed and load is often just how the machine sounds.
More concerning: a whine that has newly appeared, has got suddenly louder, has turned grinding or crunching, has become irregular, or arrives with vibration, power loss, overheating, an error condition or a burning electrical smell.
No normal sound level appears here, because none exists for a model without manufacturer data. The comparison that matters is how your own bike sounded last month. One useful split: a noise present whether or not the motor is powered is more likely mechanical, while a noise that appears only when the motor is engaged raises the motor, controller, wiring and mount.
How to Diagnose Brake Rub
Brake rub usually shows up as a rhythmic scrape once per wheel revolution with the bike off. Park Tool alignment guidance treats pad and rotor rub as a key symptom of caliper misalignment, and notes a wheel that is not properly seated can produce the same appearance.
Possible causes: caliper alignment, a bent rotor, contaminated or worn pads, loose hardware, debris. The diagnostic clue is what happens when you brake. If the noise changes significantly with the lever applied, the brake system moves up the list.
Not every brake noise is a fault. SRAM support guidance notes disc brake noise can simply be water or dirt temporarily on the rotor, with cleaning as the first step. Persistent noise instead points toward contaminated pads or improper bed-in.
|
Brake safety Never spray lubricant, chain lube or general degreaser near the rotor or pads. Clean rotors with isopropyl alcohol or a residue-free method approved for your brake. If braking performance has reduced, or grinding is present, stop riding. A quiet brake is not automatically a safe brake, and noise diagnosis is incomplete without checking how the bike actually stops. |
How to Diagnose Chain Knock

Chain knock is load-dependent, which is the giveaway. It appears or worsens under acceleration and often changes on the overrun.
Work through chain slack against the manual figure, a dry or dirty chain, stiff links, elongation, hooked sprocket teeth, chain guide contact, rear wheel alignment, and sprocket and motor mounting security.
ZEXUS technical guidance attributes abnormal chain noise to excessive tension or looseness, contact with the chain cover, and loose bolts, with adjustment rather than replacement as the countermeasure in several cases. So check tension and contact before assuming the chain is finished.
Instant electric torque makes drivetrain wear more audible under acceleration, which is a reason to check the chain early rather than to assume it is the cause. Rotate the wheel using the tire, never by pulling the chain, and keep fingers clear of the sprocket.
How to Tell Wheel Bearing Noise From Other Wheel Problems
Bearing noise typically rumbles or growls and rises with wheel speed, often with rough or gritty rotation and sometimes hub play.
The hand check: bike off, securely supported, wheel raised, rotate slowly and listen, feel for roughness, then hold the tire at opposite sides and rock it. Note where the movement originates.
Noise alone does not prove a bearing has failed. Brake drag, a bent rotor, a loose axle, loose spokes, a damaged tire or a distorted rim all do something similar. RevZilla adds a point worth remembering: the quick push-pull play test reveals only major problems, and a bearing can be close to failure while still passing it.
The distinction that helps most: if the rim moves relative to the hub, look at spokes and rim. If the hub moves relative to the axle, look at bearings and axle installation.
What Causes a Suspension Clunk?
If the sound appears mainly when the suspension compresses or the bike crosses bumps, inspect the chassis before the motor.
Candidates: fork, shock, swingarm, linkage, pivot hardware, axle, battery mount and latch, chain guard, bodywork, accessories. Compress the suspension by hand with the bike supported and listen.
While you are there, check the fork tubes for oil. FOX notes that a small amount of oil or grease on the upper tubes is normal on its own forks, so a light film is not automatically a fault; oil running down the leg is.
Do not randomly tighten suspension or axle hardware by feel. Use the manufacturer torque specification from your manual.
Can Spokes, Rim or Tire Cause Strange Noise?
Yes, and wheel noise gets misdiagnosed as bearing or motor noise more than almost anything else.
- Spokes. Pinging or clicking, often over bumps. Compare neighbouring spokes rather than expecting uniform tension across the wheel; Park Tool notes bracing angle makes one side of a wheel read lower by design.
- Rim. Lateral wobble or radial hop after an impact. DVSA guidance treats a missing, cracked, excessively loose, bent or corroded spoke as a major defect in its own right.
- Tire. Embedded debris, casing damage, an unseated bead, or an abnormal tread pattern noise.
Is It the Motor, Brake, Chain, Wheel or Suspension?
|
Symptom |
Most likely area |
Alternative causes |
Useful distinction |
|
Noise only under braking |
Brake system |
Rotor contact independent of braking |
Does it change when the lever is applied |
|
Noise only under acceleration |
Chain, sprockets |
Motor, mount, electrical |
Does it persist when coasting |
|
Noise while coasting |
Wheel bearing, tire |
Rotor, axle, spokes |
Reproduce it by rotating the wheel by hand |
|
Noise over bumps |
Suspension, hardware |
Battery mount, guards |
Compress the suspension while stationary |
|
Once per wheel revolution |
Rotor, spoke, tire |
Wheel hardware |
Count the repeats against wheel rotation |
|
Changes with motor speed |
Motor, controller |
Reduction components |
Compare powered against coasting |
|
Present with motor off |
Mechanical component |
Any rotating part |
Rules the motor down the list |
|
Noise plus wheel play |
Bearing or axle |
Loose spokes, suspension bush |
Locate where movement originates |
|
Noise plus weak braking |
Brake system |
Contaminated pads |
Stop riding and inspect |
|
Noise plus power loss |
Motor or electrical |
Controller, wiring |
Stop riding. Professional diagnosis |
When Should You Stop Riding Because of a Noise?
|
Stop riding and arrange inspection if you have
Two things worth holding onto. A quiet brake is not necessarily a safe brake, and a quiet motor is not necessarily a healthy one. Noise diagnosis is incomplete until you have also checked how the bike stops, steers and holds a line. Do not diagnose a potentially dangerous fault by repeatedly test-riding the bike. |
When Does a Noise Need Professional Diagnosis?

Escalate for internal motor faults, controller or electrical faults, anything battery-related, severe bearing damage, suspension damage, a cracked rim, hydraulic brake faults, repeated drivetrain failure, or any noise you cannot safely localize. Valtinsu’s own guidance is not to force components that do not align and to seek qualified technician assistance for unfamiliar electrical, brake, throttle, wiring or drivetrain work, which covers most of that list.
Noise Prevention Checklist
Before every ride
- Brake lever feel and stopping response
- Tire condition and any embedded debris
- Spin both wheels and listen for rubbing
- Wheel play and spoke security
- Chain slack and lubrication
- Battery seated and latched
- Visible bolts, guards and accessories
- Fork tubes for oil
After muddy or wet rides
- Clean the drivetrain and relubricate the chain
- Inspect brake rotors and pads for contamination
- Inspect wheel hubs and fork seals
- Rinse gently, keeping pressure away from bearings, seals and electrical parts
- Listen for new noises on the next low-speed check
Using the Valtinsu User Manual for Model-Specific Checks
Model-specific torque values, brake procedures, suspension procedures, axle procedures and maintenance requirements should come from the Valtinsu electric dirt bike user manual for your exact model. Valtinsu currently provides manuals for the EM-5, EM-5 Pro in green and black, EM-5 Ultra and EM23, and the models should not be assumed to share components or procedures.
|
What Valtinsu does not publish No normal motor sound, brake specification, bearing specification, chain specification, torque value or service interval is published in the available Valtinsu product information. Do not infer any of these from motor power, wheel size or load rating. Where a figure is needed and the manual does not contain it, contact Valtinsu support rather than using a value from another manufacturer. |
For model context, the Valtinsu EM-5 Pro electric dirt bike is listed with a 60V 5,600W geared motor, chain drive, hydraulic disc brakes, front hydraulic shocks, rear air suspension, a 52 mph top speed and a 287 lb maximum load, for riders 18 and over. That is a lot of systems capable of making noise around one drivetrain, which is exactly why condition-first diagnosis beats guessing.
Specifications differ across the adult electric dirt bike collection, so a check for one machine may not transfer to another. Compare the current range of Valtinsu electric dirt bikes by wheel size, suspension and brake setup.
Final Takeaway
Diagnose in this order: operating condition, frequency, location, component isolation, then performance and safety symptoms. That sequence separates a brake rub from a bearing rumble from a chain knock without replacing anything.
Do not blame the motor because the sound seems to come from the middle of the bike. And when a noise arrives with weak braking, wheel play, power loss or an electrical smell, stop riding and get it inspected. For model-specific figures, the Valtinsu electric dirt bike user manual is the reference.
Frequently Asked Questions
Why is my electric dirt bike making a strange noise?
Because something mechanical changed, and an e-moto has no engine noise to hide it. The useful question is not what the sound is like. It is when it happens.
Braking, acceleration, coasting, bumps, turning, or only with the motor powered. That one question separates brake, drivetrain, wheel, suspension and motor noises faster than any description of the sound.
What causes an electric dirt bike clicking noise?
Three different faults, and the repetition pattern tells you which:
- Once per wheel revolution: a spoke, rotor, tire or wheel hardware. Reproducible by hand.
- Only under acceleration: chain, sprockets or motor mount.
- Random, mostly over rough ground: loose hardware, a guard, a panel or an accessory.
Why is my electric dirt bike grinding?
Grinding is never a wait-and-see noise. Under braking it usually means the pads are worn to the backing plate and contacting the rotor. While coasting it points at a wheel bearing or hub. From the motor area it needs professional diagnosis. In all three cases, stop riding and inspect.
Is motor whine normal on an electric dirt bike?
Often, yes. A smooth, consistent whine that tracks motor speed and load can simply be how the machine sounds.
What matters is change. Investigate a whine that newly appeared, got suddenly louder, turned grinding or irregular, or arrived with vibration, power loss, overheating or a burning electrical smell.
How can I tell brake rub from wheel-bearing noise?
Rotate the raised wheel by hand with the bike off and listen to the pattern rather than the tone. Brake rub is usually a rhythmic scrape once per wheel revolution and often changes when the lever is applied. Bearing noise rumbles, rises with wheel speed, and tends to come with rough rotation or hub play.
What causes chain knock on an electric dirt bike?
It is load-dependent, which is the giveaway. Check in this order:
- Chain slack against the manual figure
- A dry, dirty or elongated chain, and stiff links
- Hooked or pointed sprocket teeth
- Chain guide or cover contact, and rear wheel alignment
ZEXUS attributes abnormal chain noise to excessive tension or looseness, cover contact and loose bolts, with adjustment rather than replacement as the fix in several of those cases.
Why does an electric dirt bike clunk over bumps?
Because the source moves when the suspension moves. Check the fork, shock, swingarm, linkage, pivot hardware, axle, battery mount and any guards or accessories, compressing the suspension by hand with the bike supported. Do not tighten suspension hardware by feel; use the manual torque figure.
When should I stop riding because of an unusual noise?
Any of these ends the ride:
- Severe brake grinding, or reduced braking power
- Bearing grinding, especially with hub play
- A loose axle, broken spoke or cracked rim
- A skipping chain, or loud new motor grinding
- Smoke, a burning electrical smell, or sudden power loss
Also stop for any noise getting rapidly worse, or one you cannot safely locate.
SOURCES AND REFERENCES
- Valtinsu Sport, Valtinsu electric dirt bike user manual. Retrieved 11 Aug 2026. Supports: model-specific manuals for EM-5, EM-5 Pro Green, EM-5 Pro Black, EM-5 Ultra and EM23, and their role as the authority for torque values and maintenance procedures.
- Valtinsu Sport, EM-5 Pro Black Electric Dirt Bike. Retrieved 11 Aug 2026. Supports: 60V 5,600W geared motor, chain drive, hydraulic disc brakes, front hydraulic shocks, rear air suspension, 52 mph top speed, 287 lb maximum load, age grade 18+. Model context only.
- Valtinsu Sport, Electric Dirt Bike Collection. Retrieved 11 Aug 2026. Supports: lineup context, hydraulic disc brakes across the range, differing specifications between models, off-road use only positioning.
- Valtinsu Sport, Parts and Accessories. Retrieved 11 Aug 2026. Supports: the guidance not to force components that do not align and to seek qualified technician assistance for unfamiliar electrical, brake, throttle, wiring or drivetrain work.
- Driver and Vehicle Standards Agency (GOV.UK), MOT Inspection Manual for Motorcycles, Section 5. Updated 1 April 2026. Retrieved 11 Aug 2026. Supports: assessing wheel bearings by rocking each raised wheel for excessive play and spinning it to listen for roughness; roughness severe enough to overheat or break up graded as a dangerous defect; a missing, cracked, excessively loose, bent or corroded spoke as a major defect.
- RevZilla Common Tread, Ari Henning, How to check and replace your motorcycle wheel bearings. Published 11 November 2025. Retrieved 11 Aug 2026. Supports: any play or roughness warranting replacement once a bearing can be turned by finger; the limitation that the quick push-pull test reveals only major problems and a failing bearing can pass it.
- Park Tool Co., Disc Brake Pad Removal and Installation. Published 1 April 2022. Retrieved 11 Aug 2026. Supports: contaminated pads producing squeal and extra effort at the lever, and a darkness on rotor and pads that smears when rubbed with a finger.
- Park Tool Co., Hydraulic Disc Brake Alignment. Retrieved 11 Aug 2026. Supports: pad and rotor rub as a key symptom of caliper misalignment, and an improperly seated wheel producing the same appearance.
- SRAM, Why are my SRAM road disc brakes noisy?. Retrieved 11 Aug 2026. Supports: disc brake noise sometimes being water or dirt temporarily on the rotor with cleaning as the first step, and persistent noise pointing toward contaminated pads or improper bed-in.
- ZEXUS, Handling of Chains and Sprockets. Retrieved 11 Aug 2026. Supports: abnormal chain noise attributed to excessive tension or looseness, contact with the chain cover and loose bolts, with adjustment as the countermeasure; and a chain riding up on sprocket teeth attributed to wear elongation, excessive slack or worn sprockets.
- Park Tool Co., Spoke Tension Measurement and Adjustment. Published 6 April 2021. Retrieved 11 Aug 2026. Supports: bracing angle causing one side of a wheel to read lower by design, so uniform tension across a whole wheel is not the goal.
- FOX Racing Shox, Seals and Foam Rings. Publication date not confirmed. Retrieved 11 Aug 2026. Supports: a small amount of oil or grease on fork upper tubes being normal on FOX forks. Attributed to FOX for FOX forks, not generalised to Valtinsu.


Looking for something else?
Electric Dirt Bike Replacement Parts Availability: What Buyers Should Verify Before Ordering
LEARN MORE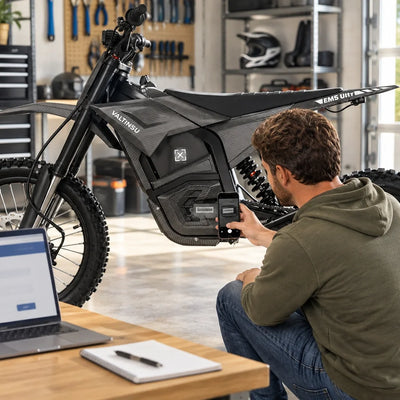
How to Check an Electric Dirt Bike for Safety Recalls by Model and Serial Number
LEARN MORE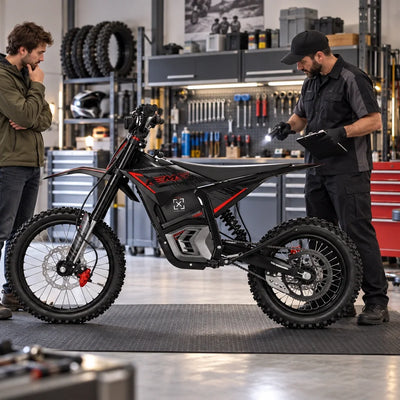
How to Choose an Electric Dirt Bike Repair Shop: Questions to Ask Before Service
LEARN MORE
How to Lift a Fallen Electric Dirt Bike Without Hurting Yourself or the Bike
LEARN MORELooking for something else?
Electric Dirt Bike Fall Riding on Wet Leaves: Grip, Hidden Obstacles and Braking
LEARN MORE
Electric Dirt Bike Trailside Power Loss: Recovery Plan When the Battery Is Dead
LEARN MORE