How We Test Electric Dirt Bike Range: A Repeatable Real-World Protocol
An electric dirt bike range number is only useful when the conditions behind it are visible. "Up to 75 miles" and "22 miles in hard trail riding" can both be honest results for the same battery if speed, elevation, surface, temperature, rider mass and stopping rules are different. A trustworthy test therefore begins with the protocol, not the headline mileage.
This page defines a repeatable electric dirt bike range test methodology for Valtinsu model testing and for riders who want to check range on their own trails. It answers three questions:
- What exactly was tested?
- Could another rider repeat the test under similar conditions?
- How much confidence should we place in the final number?
The protocol is deliberately stricter than a casual weekend ride. It records the variables that consume energy, sets a clear end point, and requires repeated runs. The result is not a promise that every rider will travel the same distance. It is a transparent measurement that can be compared with another measurement.
Valtinsu editorial rule: record enough context that a skeptical owner could repeat the test. If the route, load, pace or stopping rule cannot be reconstructed, publish the ride as an anecdote or manufacturer claim—not as a controlled range result.

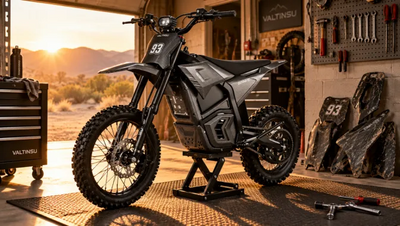
Figure 1. A credible range test begins with a defined route, calibrated checks and a written record.
What a Range Test Actually Measures
A range test measures the distance travelled between a defined starting battery state and a defined finishing state under documented conditions. It does not represent every possible route, rider, temperature, pace, or surface.
For dirt riding, range is a system result. Battery energy matters, but so do:
- total mass of bike, rider, clothing, tools and cargo;
- average moving speed and repeated acceleration;
- cumulative elevation gain and the steepness of individual climbs;
- loose sand, mud, grass, gravel, packed soil or pavement;
- tire type and pressure;
- ambient and battery temperature;
- riding mode, throttle behaviour and controller limits;
- wind, water, stops and wheelspin.
|
That is why we report range together with energy use, test conditions and variation. A single mileage figure without these fields is a claim. A complete test record is evidence. Formal procedures for electric motorcycles - SAE J2982 and the MIC recommended practice - exist for exactly this reason: repeatability and complete reporting are industry expectations, not editorial preference. |
The Minimum Test Record
Every published test should include the following, in the same order:
- Bike model, production configuration, and odometer reading.
- Battery nominal voltage and amp-hour rating.
- Battery age, approximate cycle count if known, and starting state of charge.
- Rider-plus-gear mass and bike mass.
- Tire model, tire condition, and cold tire pressure.
- Route distance per lap, surface mix and cumulative elevation gain.
- Ambient temperature, wind and precipitation.
- Ride mode, target speed, and average moving speed.
- Total distance, moving time and elapsed time.
- Ending state of charge, end-point rule and any thermal or low-voltage warning.
- Energy consumed when the bike or meter records it.
- Number of repetitions, mean result, and spread.
If a field cannot be measured, say so. "Not recorded" is more credible than false precision, and it tells the reader exactly how far to trust the number.
Step 1 - Define the Question Before the Route
Choose one question per test. Mixing objectives produces a number nobody can interpret afterwards.
- Range-to-empty: how far the bike travels before a defined low-battery end point.
- Fixed-distance efficiency: how many watt-hours the bike consumes on the same loop.
- Mode comparison: how energy use changes between two speed or power settings.
- Cold-weather test: how temperature changes the result.
For repeatable product documentation, use a fixed route with a defined low-battery stop rule. For owner diagnostics, a fixed-distance loop is usually safer because it reduces the risk of being stranded or deeply depleting the battery.

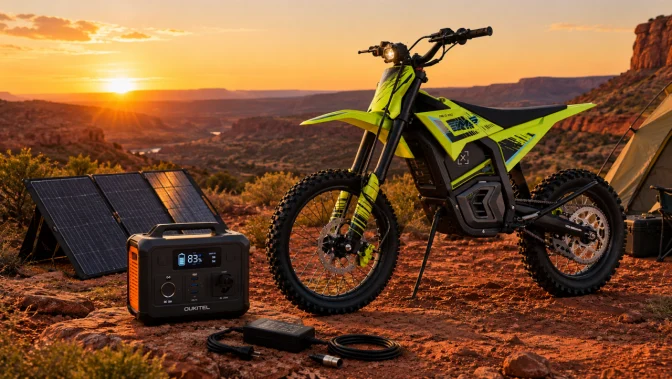
Figure 2. Record tire pressure, rider mass, battery start procedure and ambient conditions before every run.
Step 2 - Prepare the Bike and Battery
Use the production bike in standard configuration unless the test is explicitly about a modification. Record any non-stock tires, sprockets, controller settings, accessories or suspension changes - an undocumented change makes every later comparison invalid.
Before each run:
- Inspect wheels, brakes, chain, throttle and visible battery connections;
- Set cold tire pressures to the documented values;
- Charged with the approved charger, attended, in a safe location;
- Let the battery rest until its temperature stabilises;
- Reset the trip meter and energy meter;
- Confirm the same ride mode and display settings;
- Weigh the rider in the helmet, boots, protective gear and pack they will actually wear.
|
Never open the battery pack, bypass its management system, or defeat a low-voltage cutoff for a range test. End the run at the predefined safe stop condition. Follow CPSC micromobility guidance and the manufacturer’s safety instructions during every test. |

Figure 3. A repeatable route controls direction, surface, grade and pace instead of chasing a single ideal ride.
Step 3 - Choose a Repeatable Route
The best test route is not the most dramatic trail. It is a loop you can ride safely and repeat, with limited traffic, consistent access and reliable GPS coverage.
Document lap length, start and finish coordinates or a route file, elevation gain per lap, the longest and steepest climb, approximate surface percentages, known stop points, and emergency exits.
For a dirt-focused result, the route has to contain the terrain the article claims to represent. Calling a mostly paved test "trail range" misleads readers even when the distance is measured accurately.
Avoid testing immediately after heavy rain, trail grading or a large temperature swing unless those conditions are the subject of the test. Loose or wet surfaces change rolling resistance and wheelspin enough to make two runs incomparable.
Step 4 - Control Speed and Rider Input
Throttle position is not a usable control. The same position produces different power on a climb, at speed, or at a lower battery voltage. Use speed targets and mode rules instead:
- maintain a stated target speed where the route and safety allow;
- stay in one ride mode for the full run;
- accelerate progressively rather than launching repeatedly at full throttle;
- stop only at mapped points;
- record any detour, fall, blocked trail or unscheduled delay.
Publish average moving speed beside maximum speed. A high peak captured on one straight section says nothing about how hard the whole route was ridden.

Figure 4. End the run at the defined safety threshold, then document the result at the support point.
Step 5 - Use a Clear End Point
The end point must be written down before the first run, otherwise the result quietly becomes whatever the rider felt like doing that day. Acceptable end points include the first persistent low-battery warning specified by the manufacturer, a defined display state of charge such as 10%, a controller power-reduction state that prevents holding the target pace, or completion of a fixed number of laps.
|
Stop immediately for abnormal heat, swelling, odour, smoke, damaged wiring or repeated electrical cutouts. Move away from combustible material if it is safe to do so and contact qualified support. Range testing never justifies overriding a protection system. |

Figure 5. Log route, display, GPS and weather data at the same checkpoints so each run can be compared.
Step 6 - Repeat the Test
One run is a case study. Three comparable runs begin to show repeatability.
After each run, recharge with the approved charger, let the system return to a similar temperature, and repeat the same preparation. Where possible, alternate the order of mode-comparison runs so warming, weather or rider fatigue does not always favour the same mode.
Report each individual result, the arithmetic mean, the minimum and maximum, the percentage spread, and any excluded run with the reason it was excluded.
|
Mean range = sum of valid run distances ÷ number of valid runs Report variation as the gap between highest and lowest run, or as a standard deviation once you have enough runs. The goal is not to make the number look precise - it is to show how stable it was. |
Data Quality Grades: What a Range Result Can Support
A mileage number becomes more credible when the evidence behind it is visible. The following grades describe the strength of the test record, not the quality of the bike. They help editors, buyers and future Valtinsu tests avoid presenting every number with the same confidence.
Grade A - Controlled comparative result
At least three valid runs per bike use the same documented route, rider, target pace, tire setup and endpoint. Weather and surface conditions are recorded, order is rotated when two models are compared, all valid runs are published, and energy returned by the charger is measured with a suitable meter. This grade can support a careful bike-to-bike comparison within the tested conditions.
Grade B - Repeatable single-model estimate
At least three valid runs use one documented bike, route, rider and endpoint. The record includes starting procedure, tire pressure, temperature, distance and run-to-run spread. Charger energy may be absent. This grade can support an owner-planning range for similar conditions, but not a strong comparison with another test performed elsewhere.
Grade C - Documented real-world ride
One ride has a known route, rider, temperature, surface and start/end display, but no repeat runs or measured recharge energy. It is useful as a field example and can reveal large planning issues. It should be labeled as a single observation, not a definitive model range.
Grade D - Uncontrolled claim
The number lacks a route, rider mass, speed or mode, temperature, endpoint and repeat record. A manufacturer maximum-range claim and an owner's casual “I got about...” report can both fall into this category unless their conditions are disclosed. The number may be a starting hypothesis, but the protocol should not treat it as comparable test evidence.
The wording must follow the grade
Use “measured under this protocol” for controlled results, “observed on one documented ride” for Grade C evidence, and “manufacturer claim” for a published maximum that Valtinsu has not reproduced. Never use an instrumented tone to describe a result that was not instrumented.
How We Calculate Energy Use
When the bike or an approved external meter records energy delivered from the battery:
|
Wh per mile = watt-hours consumed ÷ miles travelled |
If you only measured energy at the wall after the run, label it "wall-to-battery recharge energy." It includes charger losses and is not the same number as battery-output energy - conflating the two inflates consumption and quietly ruins any comparison.
For comparisons, energy per mile often explains more than mileage alone. Two riders may stop at different distances, but a documented Wh/mi result shows how the route and pace actually loaded the battery. To turn that number back into planning miles, divide the usable energy you are willing to spend by a conservative Wh/mi value, then keep a separate return reserve.


Figure 6. Finish the test by recording recharge energy and reviewing every valid run, not by publishing the longest ride alone.
Report Uncertainty, Not False Precision
A repeatable protocol still produces a range of results. Publish every valid run, the median, the minimum and maximum, and the spread; do not report extra decimal places that the route, GPS and battery display cannot support.
Use the median as the headline when one unusually long or short run would pull the arithmetic mean. Keep the mean in the data table for transparency. If the order of two bikes changes from run to run, the honest conclusion is that this protocol has not shown a stable winner.
State why any run was excluded. A detour, fall, mode change, tire-pressure error or different stopping threshold can invalidate a comparison. Excluding a result only because it is inconvenient is selection bias, not quality control.
SAE J2982 and the MIC recommended practice are on-highway motorcycle procedures. This off-road protocol borrows their discipline—defined conditions, endpoints and reporting—but it is not a claim of SAE or MIC compliance.
How to Read a Published Range Result
Ask five questions before you compare any two numbers:
- Were the starting and ending battery states defined?
- Were rider mass, speed, elevation and surface published?
- Was the bike stock?
- Was the result repeated?
- Is the number measured, estimated, or supplied by the manufacturer?
|
If two reports use different end points or terrain, do not rank them as if they came from the same test. Compare the protocol quality and the Wh/mi data instead - those travel between tests; headline miles do not. |
How to Compare Two Electric Dirt Bikes Fairly
A single-bike range test answers “what happened under these conditions?” A two-bike comparison asks a harder question: whether the observed difference came from the machines rather than the day, rider or route. The comparison therefore needs a crossover design, not two unrelated rides.
Hold the route and rider constant
Use the same closed course, direction, rider, protective gear, luggage and approximate riding posture. Record total rider mass with gear. If different riders must be used, do not present the result as a clean bike-to-bike comparison; label rider mass and technique as uncontrolled variables.
Match the operating state
Set tire model and pressure according to each bike's approved setup, record the actual cold pressure, and begin with batteries at comparable temperature and the same defined charge procedure. Use a riding mode that represents the comparison question. “Highest mode on both” may not be fair if the modes produce very different speed profiles; a matched target pace can be more informative for route-efficiency testing.
Rotate test order
If Bike A always runs first and Bike B always runs later, warming temperatures, drying soil, wind or rider fatigue can bias the outcome. Alternate the order across runs: A-B on one cycle, then B-A on the next. Use the same rest and recharge procedure, and record any route change, traffic interruption or fall that could invalidate a run.
Compare energy use as well as distance
Distance tells the practical story; watt-hours per mile explains how quickly the test consumed measured energy. Report nominal pack energy separately from energy returned by the charger. Do not award a bike extra efficiency because its display hides a larger reserve, and do not assume voltage multiplied by amp-hours equals energy available to the rider under every condition.
Publish the result as a range, not a winner's trophy
Show every valid run, the mean, the minimum and maximum, and the conditions. If the gap between models is smaller than ordinary run-to-run spread, say so. A defensible conclusion may be “no stable difference under this protocol,” which is more useful than forcing a ranking the measurements cannot support.
Applying the Protocol to the Valtinsu EM Series
Use the current EM-series product pages to record nominal battery configuration, wheel setup, listed output, and other model-specific inputs before testing. Those specifications describe the equipment; by themselves, they do not predict a rider’s trail range.
Any later model-level range report should link back to this methodology and publish the test-specific route, total mass, temperature, ride mode, elevation, and repeat-run results. Readers should be able to distinguish an official specification, a controlled measurement, and an estimate.
|
COMPARE THE CONDITIONS, NOT JUST THE MILES → See current specifications across theValtinsu EM-series, then use this protocol to check any range figure - ours or anyone else’s - against the conditions that produced it. |
Editorial Verdict: Repeatability Beats the Biggest Number
A practical editorial rule is simple: without total moving mass, average speed, elevation, surface, temperature, tire setup, and defined start and end states, a mileage figure is not comparable range evidence. A smaller result with disclosed conditions can be more useful than a larger “up to” claim that hides its test conditions.
For Valtinsu, this protocol should function as an evidence contract. Every model-level test should link back here, show the individual valid runs as well as the mean, and explain any meaningful spread instead of smoothing it away. The goal is not to manufacture the largest number. It is to publish a result a skeptical owner can understand, repeat and use to plan a safe return reserve.
FAQs
Why is real electric dirt bike range lower than the advertised range?
Published range usually reflects a defined or favorable test condition, while trail riding adds variables that consume more energy. The largest changes usually come from:
- Higher speed, frequent acceleration, and aggressive throttle use
- Elevation gain, loose soil, sand, mud, and wheelspin
- Rider and gear mass, tire selection and pressure, and low temperature
- Battery condition and the usable state-of-charge window
What should a repeatable electric dirt bike range test record?
Record enough information for another run to reproduce the same conditions. At minimum include the bike and battery, start and end state of charge, route and direction, distance, elapsed time, speed band, elevation, surface, rider-plus-gear mass, tire setup, temperature, ride mode, and reason the test ended.
Should a range test end when the battery reaches 0%?
No. Define a conservative safety threshold before the run and end at that threshold, close to a support point. Deep depletion on a remote trail adds recovery and battery risk without making the comparison more useful.
How many runs are needed for a useful range result?
One run is a documented observation. Use at least three comparable valid runs when practical, then report the median, minimum, maximum, and full observed spread. Exclude a run only when route, speed, weather, surface, load, tire setup, or end criteria changed materially.
Can two electric dirt bikes be compared using manufacturer range claims?
Only when the claims use comparable methods and conditions, which is often unclear. A stronger comparison tests both bikes on the same route, direction, rider or declared load, speed band, tire setup, weather, state-of-charge window, and stopping rule.
Does a bigger battery always give proportionally more trail range?
No. More nominal watt-hours increase the available energy scale, but weight, controller behavior, speed, terrain, tires, thermal limits, and usable battery window determine how much additional distance appears in the real test.
Sources
- SAE J2982 - Riding Range Test Procedure for On-Highway Electric Motorcycles
- MIC Recommended Practice - Riding Range Test Procedure for On-Highway Electric Motorcycles
- U.S. CPSC - Micromobility Information Center
- U.S. DOE Alternative Fuels Data Center - EV range factors
- Valtinsu - Electric dirt bike collection and EM-series specifications


Looking for something else?
Electric Dirt Bike Replacement Parts Availability: What Buyers Should Verify Before Ordering
LEARN MORE
How to Check an Electric Dirt Bike for Safety Recalls by Model and Serial Number
LEARN MORE
How to Choose an Electric Dirt Bike Repair Shop: Questions to Ask Before Service
LEARN MORE
How to Lift a Fallen Electric Dirt Bike Without Hurting Yourself or the Bike
LEARN MORELooking for something else?
Electric Dirt Bike Fall Riding on Wet Leaves: Grip, Hidden Obstacles and Braking
LEARN MORE
Electric Dirt Bike Trailside Power Loss: Recovery Plan When the Battery Is Dead
LEARN MORE