


Electric Dirt Bike Spare Parts Kit: What to Keep at Home and on the Trail
The best electric dirt bike spare-parts kit is not the largest. It contains model-compatible, safely stored items that address likely problems without encouraging repairs beyond the rider’s skill. Split the inventory into a compact trail kit for mobility and stabilization, and a home kit for scheduled wear items and properly equipped service.
Confirm every fitment through Valtinsu accessories and the current Valtinsu user manual. The electric dirt bike collection can identify model families, but a product name alone may not define wheel, brake, connector or hardware compatibility.
Choose spares with a four-part filter
 Figure 1. Official Valtinsu EM-5 product image accompanying choose spares with a four-part filter. Confirm component locations and limits against the exact model page and current manual.
Trail kit: preserve mobility, not workshop capability
● Correct tube or manufacturer-approved puncture solution for the fitted tire system.
● Valve tool, pressure gauge and inflation method suitable for the tire volume.
● Model-appropriate master link only if the chain system and manual permit field replacement.
● A small selection of confirmed body-panel or cable-retention hardware, never structural substitutes.
● Basic hand tools that exactly fit approved owner procedures.
● Clean gloves, wipes and bags to isolate dirty or damaged items.
● First-aid, communication and navigation equipment carried separately from greasy parts.
A trail kit should support assessment and a conservative exit. It should not include a random controller, battery connector, hydraulic fluid or wiring bypass. High-energy electrical work, structural repair, brake bleeding and bearing service require controlled conditions.
 Figure 2. Official Valtinsu EM5 Pro product image accompanying trail kit: preserve mobility, not workshop capability. Confirm component locations and limits against the exact model page and current manual.
Home kit: support planned wear and diagnosis
● Correct brake pads and any specified retention hardware.
● Compatible tube, tire consumables and rim-protection items.
● Chain, guide or slider wear parts matched to the fitted drivetrain.
● Approved fuses only where the manual identifies owner-replaceable fuses.
● Model-specific levers, grips or guards when compatibility is documented.
● Original fasteners, clips, spacers and washers for known service points.
● Approved cleaning products and sealed service consumables with labeled dates.
Do not stock chemistry by generic category. Brake fluid, grease, thread treatment and cleaner must match the exact component procedure. An opened container can absorb moisture or become contaminated; label opening dates and disposal requirements.
 Figure 3. Official Valtinsu EM-5 product image accompanying home kit: support planned wear and diagnosis. Confirm component locations and limits against the exact model page and current manual.
Build a compatibility card for each part
Keep a screenshot or PDF of the source at purchase time because online listings can change. When the bike configuration changes, quarantine old spares until compatibility is rechecked.
 Figure 4. Official Valtinsu EM5 Ultra product image accompanying build a compatibility card for each part. Confirm component locations and limits against the exact model page and current manual.
Tire spares require system knowledge
Identify tire size, tube size, valve type, rim lock if fitted and approved repair method. A patch kit without surface preparation, a tube with the wrong valve orientation or an inflation tool that cannot reach operating pressure is dead weight. Practice wheel removal and repair only in a controlled workshop using the manual, then decide whether the same task is realistic on the trail.
Brake spares belong clean and sealed
Pads and rotors can be ruined by oil, chain lubricant or dirty gloves. Keep friction parts in original packaging inside a separate sealed bag. Carrying pads does not make trail replacement appropriate: a missing retainer, piston problem, fluid leak or damaged rotor may require transport. Bedding and verification still apply after installation.
Treat electrical spares conservatively
Use only the supplied or explicitly approved charger and battery system. Do not carry loose high-current connectors, improvised jump leads or unverified fuses as universal fixes. Small external parts such as documented owner-replaceable fuses may be reasonable when protected from moisture and labeled, but repeated fuse operation signals a fault that must be diagnosed.
Do not treat a spare battery as ordinary luggage
A traction battery adds energy, weight and transport restrictions. Use only an approved battery, protective retention and the manufacturer’s storage/transport method. Do not carry a loose pack in a trail bag or hot vehicle, and do not use a damaged pack as an emergency spare. Airline and carrier rules can change, so verify them directly for travel.
Match tools to the planned action
Every tool should correspond to a documented task. Test fit before the trip and avoid multipurpose tools that round fasteners. Include a torque tool at home where required, but do not assume trail torque can be guessed. A compact recovery strap may help move an unpowered bike only if the route rules and tow method permit it; powered towing can create new hazards.
Audit the kit quarterly
● Compare inventory with the actual bike configuration.
● Inspect packaging, corrosion, contamination and rubber condition.
● Check dates on adhesives, sealants, first-aid items and opened consumables.
● Replace anything used and record the source.
● Remove parts whose compatibility or installation procedure is uncertain.
● Run a tabletop scenario to confirm that tools and instructions are present.
Plan recovery before choosing repair parts
The route, group size, weather, communication coverage and distance to vehicle access determine what the kit must accomplish. On a short loop near the trailhead, a puncture repair and walking plan may be enough. In remote terrain, navigation, emergency communication, water, insulation and a documented extraction contact can matter more than another mechanical spare. Do not let the presence of tools justify entering a route beyond the group’s recovery capability.
Distinguish a permanent repair from a get-out measure
A field action may only stabilize the bike for walking or very slow movement. Label temporary fasteners, patches and cable retention in the service log and replace or inspect them before the next normal ride. Never use improvised hardware in brakes, steering, suspension, battery retention or structural mounts. If the fault can worsen or affect control, recovery means transport, not riding.
 Figure 5. Official Valtinsu EM5 Pro product image accompanying plan recovery before choosing repair parts. Confirm component locations and limits against the exact model page and current manual.
Prioritize Spares by Consequence and Repairability
A spare earns space only when it addresses a credible failure and can be installed safely with the tools and knowledge available. Rank candidates by consequence: a small item that enables a safe exit may be more valuable than an expensive component that cannot be diagnosed trailside. Then verify storage life, model fit and whether installation changes a safety-critical system.
Carry only realistic trail-exit items
A trail kit may include confirmed tube or plug equipment for the tire system, a compact inflation method, basic model-approved tools, protective gloves and small hardware already identified in the manual. It should not become a mobile electrical workshop. Batteries, controllers, hydraulic repairs and damaged high-current connectors belong in a controlled service environment.
Keep workshop spares labeled and traceable
Store model-specific parts in their original packaging with part number, revision, purchase date and compatibility confirmation. Protect electrical items from moisture, metal contact and extreme temperature. Rotate consumables before age or contamination makes them unreliable. When a part is used, record why it failed so the next purchase addresses the cause rather than replenishing the same mistake.
Choose Spares by Model, Not by Appearance
A useful spare-parts kit is built around verified fitment and failure consequence, not a generic list. Use the Valtinsu electric dirt bike collection to record the exact model, battery platform, wheel format and brake type before buying anything. Separate parts that support a safe trail exit from components that require workshop diagnosis.
For a Valtinsu EM-5 Pro, use the product page as the model reference when confirming tubes, brake parts, controls, charger or drivetrain items with support. The page identifies the 60V/27Ah platform and 17-inch front and 14-inch rear wheels, but compatibility still depends on the current part number and revision. Never test-fit an electrical component by energizing it.
Use Valtinsu's electric dirt bike ownership and parts resources as the broad ownership reference, then confirm every procedure, part and limit against the exact model page and current manual.
Quick Decision Table
|
Spare category |
Trail or home |
Selection rule |
|
Tube and inflation item |
Trail |
Carry only when the rider can install and verify it safely. |
|
Brake friction parts |
Home |
Keep clean, labeled and matched to the exact caliper. |
|
Electrical component |
Usually home or service |
Confirm connector, rating and revision before purchase. |
|
Recovery equipment |
Trail or vehicle |
Choose it around bike weight, access and transport method. |
FAQs
Should I always carry a spare tube?
It is useful for tube-type systems when it matches the wheel and the rider can perform the repair safely. Otherwise recovery planning may be more valuable.
Use this quick classification:
● Trail kit: light items that can restore safe exit mobility within the rider's actual skills.
● Home kit: planned wear parts and tools that support documented maintenance.
● Compatibility record: exact model, revision, part number, dimensions, connector and storage date.
Are brake pads universal?
No. Shape, compound, thickness and retention vary. Use the exact compatible part.
Should I carry a spare controller?
Usually no. Diagnosis and replacement involve compatibility, wiring and high-current safety better handled in a workshop.
Can I carry a spare battery on the trail?
Only with manufacturer-approved fit, retention and transport practices. A loose pack is unsafe.
Follow this check sequence:
1. Confirm the bike identity and manufacturer part reference before ordering.
2. Practice with the required tools at home and define which repairs remain technician-only.
3. Store parts clean, dry and labeled; review expiry, corrosion and inventory before each remote trip.
What is the most important trail tool?
The one tied to the most likely approved task. For many riders, a pressure gauge, inflation method and correct fastener tools are more useful than a large generic kit.
Can a universal bolt replace a lost fastener?
Not for safety-critical locations. Diameter, pitch, length, grade, head, coating and locking method all matter.
Should I test every spare part before storing it?
Verify fitment and condition before storage, but do not install safety-critical or sealed electrical parts merely to prove they work unless the manufacturer directs that test. Check the label, dimensions, connector, voltage or specification, revision and return window while the purchase can still be corrected. Keep friction parts clean and electrical parts dry in labeled packaging. For a trail kit, practice using the tools on a normal maintenance task at home. A spare is only useful when the rider can identify it, install it within the permitted service boundary and verify the repair safely.


Looking for something else?

Electric Dirt Bike Brake Fade: Causes, Warning Signs and a Safe Test Method
LEARN MORE
Electric Dirt Bike Climbing Angle: Degrees, Grade and Real Trail Limits
LEARN MORE
Electric Dirt Bike Braking Distance: What Changes Stopping Length?
LEARN MORE
Electric Dirt Bike Cuts Out Over Bumps: Diagnose Intermittent Power Loss
LEARN MORELooking for something else?

Electric Dirt Bike Tire Pressure: How to Find the Right PSI
LEARN MORE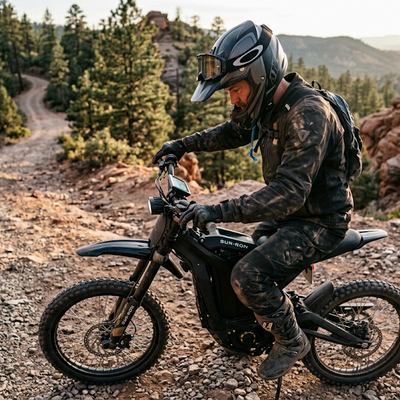
Electric Dirt Bike Loses Power Under Load: Causes and How to Fix It
LEARN MORE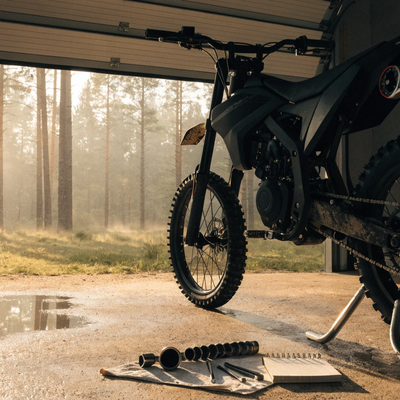
Electric Dirt Bike Bolt Torque Checklist: What to Check and Where the Numbers Come From
LEARN MOREYou may also like
VALTINSU EM-5 Off-Road Electric Dirt Bike
VALTINSU EM-5 Pro Off-Road Black Electric Dirt Bike
VALTINSU EM-5 Pro Green Electric Dirt Bike
VALTINSU EM-5 Ultra Electric Dirt Bike
VALTINSU EM-5 & EM-5 Pro Combo
Further reading

Electric Dirt Bike Replacement Parts Availability: What Buyers Should Verify Before Ordering

Electric Dirt Bike Warranty Claim Checklist: Photos, Logs and Questions to Prepare
Electric Dirt Bike Spare Parts Kit: What to Keep at Home and on the Trail
