Seated vs Standing on an Electric Dirt Bike: When Each Position Works
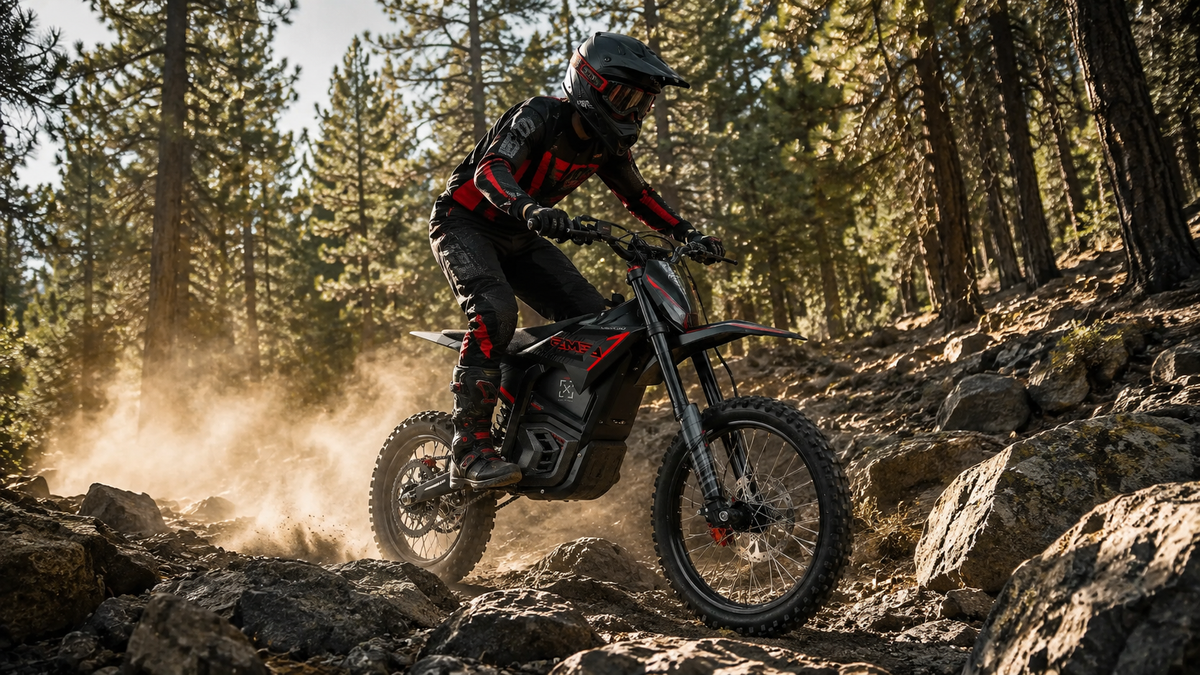
Both, and the useful part is knowing when.Stand when the ground is rough, broken, or steep. The motorcycle needs room to move underneath you. Sit when the surface is smooth and predictable. Your legs need the rest. The rear tyre can use the weight.
An adult electric off-road motorcycle rewards that discipline more than a gas bike does. Torque arrives the moment the throttle moves. So timing matters as much as the position you land in.
Below: the terrain call, the mechanics of each position, how electric power delivery shifts the timing, and the fit questions that decide whether you can stand comfortably on the electric dirt bike you already own.
The Short Answer, by Terrain
Terrain picks the position. Speed, traction and sight distance refine it. Fatigue overrides all three. Most riding guides leave that part out.
|
Terrain or maneuver |
Position |
Why it works |
Change when |
|
Smooth trail, open dirt road |
Seated |
Lower leg effort, weight settled through the seat |
Surface breaks up or you can see less far |
|
Rocks, roots, embedded ledges |
Standing |
Legs absorb what short-travel suspension cannot |
Both wheels track clean again |
|
Ruts and off-camber edges |
Standing |
Room to shift pressure as a wheel follows the wall |
You are clear of the rut |
|
Whoops and repeated bumps |
Standing |
The chassis cycles faster than a seated rider reacts |
The bumps end |
|
Corner approach and exit |
Both, in sequence |
Stand to brake, sit to load the front, stand as it straightens |
Read every corner separately |
|
Steep climb |
Forward, either position |
Front stays down, rear keeps enough load to drive |
The climb turns rocky or rutted |
|
Technical descent |
Standing, hips back |
Legs manage the pitch, front keeps load to steer |
The gradient eases |
|
Recovery section |
Seated |
Hands, forearms and legs reset |
Before the next technical feature, not after |
Starting points, not rules. Conditions change inside fifty feet.
What Actually Changes When You Stand

Your support point moves. Almost every real benefit follows from that one fact.
Support Moves to the Footpegs
When seated, your weight is transmitted to the chassis through the saddle. High, and behind the pegs. Standing, most of it enters through the pegs instead, low and near the motor and battery mass. Steering then comes from feet, knees, and hips. The bike can lean without dragging your torso along.
The Motorcycle Safety Foundation teaches this directly. Its DirtBike School curriculum includes a lower-body control lesson: correct posture, steady throttle, look ahead, and initiate the turn with the lower body rather than the bars.
Your Legs Become Part of the Suspension
Rear travel is one reason. Among the three models compared in this section, the EM-5 lists 1.6 inches of rear stroke, the EM-5 Pro 2.0, and the EM23 2.8. Each lists 5.9 inches at the front. These figures do not describe every model in the current range, so confirm the live product page for the exact bike.
Short numbers, read off the live product pages. The shock has little room to work. Ankles, knees and hips take up the rest. Lock them and the job goes back to your spine.
What Standing Does Not Do
It does not lower your center of gravity. You raised your body mass, not dropped it. The claim gets republished constantly anyway, usually as settled physics.
What moves is the control point. Standing, you steer the chassis from the pegs near the heaviest parts of the bike, gaining more leverage over pitch and roll for the same effort. Real advantage, wrong explanation. Riders who believe the myth crouch too low. Chasing a benefit that was never there.
|
The one-line version Standing does not make you lower. It connects you to the bike at a lower point, with more leverage and less of your body along for the ride. |
What Sitting Actually Buys You

Two things, and neither one is laziness.
Load Through the Seat and Rear Tyre
Sitting puts more of your weight over the rear. On firm ground that reads as planted, and on a smooth climb it can be exactly what the rear tire needs to keep driving instead of spinning. You are now bolted to every upward movement of the chassis.
Recovery Is a Skill, Not a Break
Standing costs effort. Sitting on predictable ground preserves enough leg and trunk endurance to stand well when the trail turns rough again.
Riders who treat the seat as a reward get this backward. They sit through the technical section. Then stand through the easy one.
Build a Standing Position That Works
A good stance feels ready, not rigid. It shifts under braking, acceleration, climbs and descents. Treat these four checks as a neutral starting shape.
Weight Over the Pegs, Not the Bars
Start balanced over the pegs. Not falling onto the bars. Not hanging backward off them. From neutral, you have room to move either way. Palms burning out early means one thing. The weight is going through your hands.
Ankles and Knees Flexed
Keep enough bend to absorb a hit you did not see. Locked legs absorb nothing. A deep crouch is the opposite error. It feels secure. It drains leg strength and pushes weight forward.
Elbows Up, Hands Light
Elbows out far enough to keep steering range and resist a sudden bar movement. Natural bend in both arms. Grip firmly enough to work the controls, no more. Hands guide the bike. Legs carry you.
Eyes Far Enough Ahead to Act
Point your head where you intend to go. Let peripheral vision handle the ground near the front tyre. Staring at the fender makes every correction late. Late corrections turn a rideable rut into a crash.
Use the Seat as an Active Position
Sitting is still an active position. Passive seated riding leaves the rider fixed in the middle of the bike and is usually corrected by choosing a deliberate forward, neutral, or rearward position for the next input.
Forward When the Front Needs Load
Sliding forward puts pressure nearer the front wheel, which helps it hold a line through some corners and keeps it down on a climb. Do not crowd the bars until your arms lose room. The goal is weight transfer. Not folding your chest over the controls.
Rearward for Braking and Descents
Move the hips back as braking force builds or the ground drops away. Match the amount to the slope and the traction. Go too far back and the front tyre goes light, exactly when you still need it to steer.
|
Do not hang from the handlebars On a steep descent the bars are for steering and braking, not for holding your body up. Support your weight through the pegs and legs and let a controlled hip shift carry the load. Hanging off the bars makes the front end feel heavy and takes away the movement you need. |
Timing Beats Position

A rider in the right position at the wrong moment is still late. That is the whole gap between comfortable and merely surviving.
Stand while the surface is still smooth. Sit only after the rough section ends. Both wheels tracking predictably. Rising out of the seat as the front tyre reaches the rock leaves you no room to absorb anything, and you are almost certainly pulling on the bars to get up.
Rise from the legs and hips. Lower yourself the same way, rather than dropping onto the saddle.
Corners Use Both Positions

Most corners are a sequence. Stand through the approach and the braking bumps, sit near turn-in if the surface and corner shape call for it, then rise again as the bike straightens and the power comes on.
Weight the Outside Peg
Pressure on the outside footpeg settles the chassis. It also supports traction through the turn. MSF teaches it as counterbalancing: standing posture, look ahead, lean the motorcycle into the turn, weight the outside peg, keep the upper body to the outside. Deliberate pressure, not stamping.
It is one input among several. Treat it as the whole technique and you fight the bars.
The Inside-Leg Question
Some riders put the inside leg forward in seated dirt-bike corners. If you do, it stays forward. Clear of the ground, well away from the chain and wheel. Never a support wheel, never dragged.
On trails with rocks, roots or a narrow edge, both feet on the pegs is often safer. Loose, off-camber and deeply rutted turns often want a standing technique.
Electric Power Delivery Changes the Timing
Instant torque is the real difference from a gas trail bike. It lands on the transition, not the position.
Set the Body, Then Add Power
No clutch to slip, no revs to build. Ask for power halfway through standing up, and the bike moves before your feet and hands are settled. Finish the change. Take a moment of balance. Then roll the throttle on. This matters most on loose climbs, corner exits, and narrow trails.
Closing the Throttle Can Pitch You Forward
Some electric off-road motorcycles slow noticeably the instant the throttle shuts. Same with an active regenerative setting. That deceleration can shift your weight forward without you touching a lever. Learn how your own machine behaves in a flat, controlled area, and do not assume every power mode or state of charge produces the same drag.
Ride Modes Are a Position Tool
The three comparison models provide stepped ride modes that can simplify low-speed practice: EM-5 at 22, 32 and 40 mph; EM-5 Pro at 26, 40 and 52 mph; and EM23 at 16, 28 and 43.5 mph. A lower ceiling is not a substitute for throttle control, and actual mapping remains model-specific.
Confirm mode behavior, control layout and any regenerative setting in your model manual before relying on it. Never change an unfamiliar setting mid-trail.
Fit Decides How Well You Can Stand

You can hold correct technique in your head and still be unable to use it. Seat height sets a limit. So do bar reach, peg position and overall weight. A cramped rider burns hip and knee effort just to rise. A stretched rider pulls on the bars to stay put.
|
Position-relevant spec |
EM-5 |
EM-5 Pro |
EM23 |
|
Seat height |
28.3 in |
31.5 in |
31.9 in |
|
Handlebar width |
27.2 in |
27.2 in |
30.7 in |
|
Wheelbase |
43.3 in |
41.7 in |
41.7 in |
|
Front suspension travel |
5.9 in |
5.9 in |
5.9 in |
|
Rear suspension travel |
1.6 in |
2.0 in |
2.8 in |
|
Wheels, front and rear |
14 / 12 in |
17 / 14 in |
19 / 17 in |
|
Maximum load |
243 lb |
287 lb |
265 lb |
|
Net weight |
126 lb |
143 lb |
131 lb |
|
Water resistance |
IPX6 |
IPX6 |
IPX4 |
|
Age rating |
13+ |
18+ adults only |
16+ |
Figures confirmed against the live Valtinsu product and collection pages on August 10, 2026, then cross-checked against the manufacturer spec workbook. Where the two disagreed, the live page won.
Seat-to-Peg Room and Bar Reach
Stand neutral and check two things. Can your hands reach the bars without rounding your back or locking your elbows? Can you move forward and rearward without losing the controls. If either answer is no, fit is the limit, not fitness.
Sizing is a separate exercise. It comes first. Our fit guide by height and weight covers inseam, standover, and load limits. Any bar or control adjustment stays inside the manufacturer limits, and after a change you check full steering movement and cable clearance before riding.
Where Each Model Lands

Lower seat, shorter rear travel, smaller wheels. On the EM-5 that makes it easy to plant a foot and easy to learn transitions on, and it puts more of the absorption job on your legs. Rated 13+. Its published 13+ age rating is lower than the EM23 and EM-5 Pro ratings compared here; supervision, fit, skill, and local law still control suitability.
The EM-5 Pro sits taller at 31.5 inches. Wheels are 17 and 14 inch, rear travel 2.0 inches. More usable for an adult who plans real time on the pegs. Rated 18+, adults only, and height never overrides that.
The EM23 is the outlier. Tallest seat. Widest bars at 30.7 inches, most rear travel at 2.8 inches, biggest wheels at 19 and 17. Long-legged riders get room, and the wider bars change leverage noticeably. Its IPX4 rating points it at road and light trail rather than wet technical ground, so it is the least likely of the three to spend a whole ride standing.
|
The age ladder is not a suggestion EM-5 is 13+. EM23 is 16+. EM-5 Pro is 18+ adults only. A tall fifteen-year-old still cannot ride the Pro. CPSC makes the same point about off-highway vehicles generally: riders under sixteen belong on age-appropriate youth models, never adult machines. |
The Advice We Are Not Going to Give You
Some things are confidently published about riding position. We will not repeat them.
- "Always stand. Sitting is a mistake." Racetrack doctrine. It holds up reasonably well over a motocross lap. Trail riding is a different job, and standing through every mile burns the legs that were meant to be your suspension.
- Standing lowers your center of gravity. It does not. The benefit is real; the explanation is not.
- A fixed calorie figure for standing. The research is mixed, and all of it is pedal cycling. See the FAQs.
- Universal setup numbers. No sag percentages, no lever angles, no peg positions, no torque specs. A number lifted from another bike is worse than no number. Your manual has yours.
- A target for how much of a lap you should stand. Some coaches time the fastest rider at the track. Fine for racing, poor instruction for an unfamiliar trail.
- Scooter deck technique applied to a dirt bike. Standing on a platform and standing on pegs with your knees gripping a frame are not the same skill. Our adult electric dirt bike buyer guide keeps the categories separate for the same reason.
Practice, and the Fatigue That Undoes It

Position skills are learned at low speed on flat ground. NHTSA makes the general point for motorcycles: machines vary in handling and responsiveness, so get used to an unfamiliar one in a controlled area first. Off-road that applies harder, because the surface is unfamiliar too.
Drills for a Flat, Legal Practice Area
- Ride a straight line standing, at low speed. Watch for drift, which usually means you are pulling one side of the bar.
- Alternate seated and standing at a steady speed. Hold speed and direction. Use the legs, not the bars.
- Ride one wide turn seated, then standing. Compare steering effort and where the tension shows up.
- On a wide circle, apply measured outside-peg pressure. Both directions, because coordination is rarely symmetrical.
- Shift slightly forward before smooth acceleration, then rearward before progressive braking.
- Finish with one small, visible bump. Stand before you reach it and let the legs work as the wheels cross.
Wear what the manufacturer and your riding area require. MSF lists the off-highway baseline. DOT-compliant helmet, goggles, long sleeves, long trousers, over-the-ankle boots, gloves.
The Signs Your Technique Is Going
Fatigue shows up before it feels like fatigue. Tight hands. Dropped elbows. Knees that stopped bending. Changes that arrive a beat late. Any one of those is a reason to reduce difficulty.
A higher power mode does not compensate for tired technique. It raises the demand on balance and reaction time. At the worst moment. If you cannot stand smoothly or hold a line, stop.
How We Built This Guide
Specs Verified Against Live Pages
Every seat height, travel figure, wheel size, load limit, and ride mode set here was read off the live Valtinsu product and collection pages, then cross-checked against the manufacturer workbook. Where they disagreed, the live page won. Every conflict was logged. Two figures remained unresolved, so they are not included in this article at all.
Technique Anchored to Rider Training
The mechanics follow published rider-training material rather than forum consensus. MSF DirtBike School teaches riding posture, lower body control, counterbalancing and obstacle crossing as separate lessons, and the obstacle lesson is explicit: slow before the obstacle, stand on the footpegs with knees and elbows bent, unweight the front.
Honest About What Is Unsettled
Where the evidence is mixed, we say so. Where a value belongs to your specific machine, we point at the manual. No invented ranges. No repair procedure, no bypass test, no universal measurement.
Conclusion
Seated and standing riding styles are not two competing for your loyalty. They are two tools. The trail decides which one is in your hand.
Standing gives the bike room to move across rocks, roots, ruts, whoops, and rough descents, and turns your legs into the travel a 1.6- to 2.8-inch rear shock does not have. Sitting saves the strength you will need later and can put useful load through the rear tyre on smooth ground and predictable climbs.
The riders who look smooth do not have a better stance. They moved before the ground made them. Scan far enough ahead, move from the legs and hips, keep the hands light, and let the throttle wait until your feet have arrived.
Practice both positions at low speed in a legal, flat area, and read the manual for your own machine rather than a number from someone else's. Still deciding which bike gives you room to stand properly? Compare the full range by seat height, bar width and rear travel. Not by top speed.
FAQs
Is it better to ride an electric dirt bike seated or standing?
Neither position is always better. Stand for bumps, ruts, rough descents, and scanning; sit for traction, tight low-speed turns, and recovery on smoother ground.
Good riders transition before the terrain demands it. The mistake is treating one position as a rule instead of matching support, traction, and fatigue to the next section.
Practical tip: Choose the next position while the bike is settled, not after the obstacle starts moving you.
When should you stand on an electric dirt bike?
Stand when the bike needs to move beneath you or when the trail surface can deliver repeated impacts.
- Rock gardens, roots, whoops, and deep ruts.
- Rough descents where legs can absorb movement.
- Sections where a higher eye line reveals the exit or next obstacle.
- Short acceleration zones when the surface is unpredictable.
Practical tip: Keep the knees and ankles flexed; locked legs remove the suspension benefit.
When should you sit?
Sit when the surface is smoother, when a low-speed corner benefits from a lower effort level, or when rear-tire load helps traction.
Sitting is still active. Move forward when the front needs grip and rearward under controlled braking, without hanging from the handlebar. Use smoother sections to recover before technique deteriorates.
Practical tip: If sitting makes you stop moving, reset your posture instead of staying fixed in the middle of the seat.
How do you transition without pulling the bars or twisting the throttle?
Load the footpegs, hinge from the hips, and keep a neutral wrist before lifting or lowering your body.
- Set a steady low-speed mode first.
- Grip the bike lightly with the lower legs.
- Move vertically through the pegs rather than hauling on the grips.
- Complete the body movement before adding power.
Practical tip: Practice repeated sit-stand transitions on flat ground with soft elbows and no change in speed.
Does standing improve traction or lower the center of gravity?
Standing does not automatically create more tire grip, and it does not move the rider's body mass lower.
Its real benefit is allowing the bike to move under the rider while forces are supported through the pegs. That can make the combined system easier to manage over rough terrain, but traction still depends on tire load, surface, braking, steering, and throttle.
Practical tip: Use standing to manage movement—not as permission to add more power on a slick surface.
Does standing use more energy, and how should fatigue be managed?
Usually yes in practical trail riding, because the legs and trunk stay active, but no universal calorie figure applies.
Cycle between positions before form collapses. Sit on predictable ground, reduce pace when the grip on the bars gets tight, and stop when transitions become jerky. Pedal-cycling studies do not directly measure electric dirt bike riding, so treat calorie claims as estimates rather than setup guidance.
Practical tip: The goal is not to stand for a percentage of the ride; it is to stand well when the terrain needs it.
Sources
- Motorcycle Safety Foundation, DirtBike School (2026)
- Motorcycle Safety Foundation, Tips and Practice Guide for the Off-Highway Motorcyclist (2024)
- U.S. Consumer Product Safety Commission, OHV and ATV Safety (2026)
- National Highway Traffic Safety Administration, Motorcycle Safety (2026)
- Arkesteijn, Jobson, Hopker and Passfield, The Effect of Cycling Intensity on Cycling Economy During Seated and Standing Cycling, International Journal of Sports Physiology and Performance (2016)
- Millet, Tronche, Fuster and Candau, Level Ground and Uphill Cycling Efficiency in Seated and Standing Positions, Medicine and Science in Sports and Exercise (2002)
- Valtinsu, Electric Dirt Bike Collection (2026)
- Valtinsu, User Manuals (2026).


Looking for something else?
Electric Dirt Bike Loses Power Under Load: Causes and How to Fix It
LEARN MORE
Electric Dirt Bike Bolt Torque Checklist: What to Check and Where the Numbers Come From
LEARN MORE
How to Bleed Electric Dirt Bike Brakes Safely
LEARN MORE
Electric Dirt Bike Throttle Not Working: What to Check First
LEARN MORELooking for something else?
Electric Bike Battery Not Charging? Work Through This Before You Buy a New One
LEARN MORE
Electric Dirt Bike Error Codes: What They Mean and What to Check First
LEARN MORE
Electric Dirt Bike Brake Rotor Rubbing: Diagnose the Cause Before Adjusting
LEARN MOREYou may also like
VALTINSU EM-5 Off-Road Electric Dirt Bike
VALTINSU EM-5 Pro Off-Road Black Electric Dirt Bike
VALTINSU EM-5 Pro Green Electric Dirt Bike
VALTINSU EM-5 Ultra Electric Dirt Bike
VALTINSU EM-5 & EM-5 Pro Combo
Further reading
Electric Dirt Bike Trailside Power Loss: Recovery Plan When the Battery Is Dead
Electric Dirt Bike Fall Riding on Wet Leaves: Grip, Hidden Obstacles and Braking
How to Lift a Fallen Electric Dirt Bike Without Hurting Yourself or the Bike