

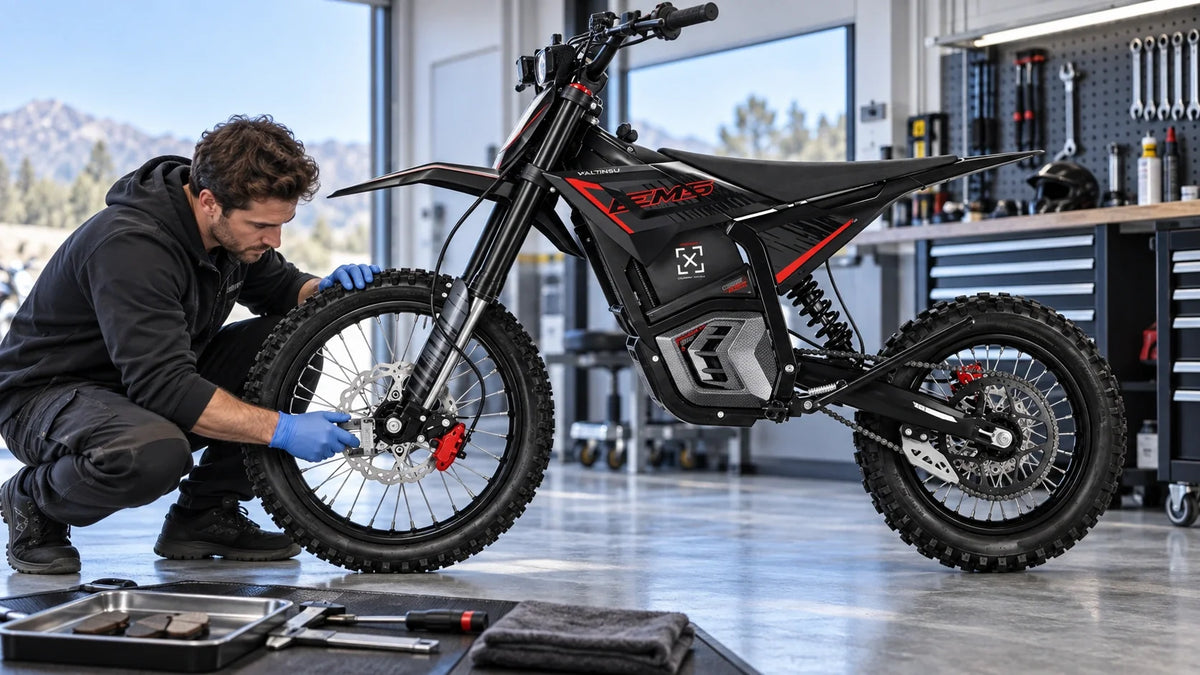
Electric Dirt Bike Brake Pads Wearing Unevenly: Caliper, Rotor and Piston Checks
Uneven brake pad wear is evidence that the two friction surfaces have not been sharing load in the same way. A small visual difference can occur, but one pad that is much thinner, a pad worn into a wedge, or a glazed edge should prompt inspection of caliper alignment, rotor position, pad movement and piston return before new pads are installed. Replacing pads without correcting the cause can reproduce the wear and reduce predictable braking.
Do not judge the system through the caliper slot while it is dirty. Power the bike off, support it securely, and follow the fitted brake manufacturer procedure. Keep fingers away from the rotor, never squeeze the lever with the wheel or required spacer removed, and do not contaminate pads or rotors with lubricant. If the lever feels abnormal, fluid is visible, the rotor is cracked, or braking is weak, stop riding.
Read the wear pattern before moving hardware
One pad is thinner than the other
This pattern can point to a caliper that is not centered, a piston that does not extend or retract normally, a pad that binds in its seat, or a rotor that runs closer to one side. The caliper design matters: do not assume every system moves both sides in the same way. Photograph the pads in their original positions and label inner and outer before removal.
The pad is tapered from front to back
Tapered wear suggests that the pad face and rotor were not parallel through the contact area. Possible contributors include caliper alignment, a mounting surface problem, pad seating, loose hardware or a rotor that is not running true. Measure the thick and thin ends rather than describing the pad as merely uneven.
Only an edge is polished or glazed
Edge contact may appear when the pad and rotor do not overlap correctly, a pad sits incorrectly, or heat and contamination affect part of the surface. A shiny patch is not automatically proof of overheating. Record color, odor, surface texture and whether braking produced noise, fade or vibration.
 Figure 1. Official Valtinsu EM-5 product image accompanying read the wear pattern before moving hardware. Confirm component locations and limits against the exact model page and current manual.
Measure both pads consistently
● Clean the outside of the caliper and photograph the installed position.
● Remove pads only by the brake manual procedure and keep left/right or inner/outer identity.
● Measure friction material at matching points with a suitable gauge; do not include the backing plate.
● Compare the result with the exact manufacturer service limit, not a generic online number.
● Inspect the spring, retention pin and pad edges for damage or binding.
A single center measurement can miss taper. Record leading, center and trailing thickness on both pads. The purpose is not to create false precision; it is to show whether the difference is uniform, tapered or localized. If material is near the stated limit anywhere, replace the pad set and address the cause.
 Figure 2. Official Valtinsu EM5 Pro product image accompanying measure both pads consistently. Confirm component locations and limits against the exact model page and current manual.
Check rotor position and caliper alignment
Reinstall the wheel correctly and confirm the axle, spacers and hardware match the Valtinsu user manual. Rotate the wheel while viewing the rotor gap from a safe angle. A gap that changes once per revolution suggests runout; a consistent offset suggests centering. Do not bend a rotor by hand as a diagnostic step.
Caliper centering procedures vary. Some systems allow a controlled alignment through mounting bolts; others require specific shims or service steps. Use the fitted brake manual and model torque values. If the mounting surface is damaged, the threads are suspect or the caliper will not remain centered, stop and arrange service.
 Figure 3. Official Valtinsu EM5 Pro product image accompanying check rotor position and caliper alignment. Confirm component locations and limits against the exact model page and current manual.
Distinguish piston movement from pad drag
A piston can accumulate dirt around its exposed surface or develop a hydraulic problem. Do not pull pistons beyond their service range or apply general-purpose lubricant. With the correct spacer and procedure, a technician can compare controlled piston movement and return. The owner-level conclusion should be limited: one side is not moving or returning like the other. Internal seal service belongs to a qualified person using the correct fluid and parts.
After assembly, spin the wheel and apply the brake several times. The lever should feel consistent, the pads should engage predictably, and severe drag should not remain. A brief light contact can differ from a wheel that stops quickly. Record spin time only as a repeatable before-and-after observation, not a universal pass number.
 Figure 4. Official Valtinsu EM5 Ultra product image accompanying distinguish piston movement from pad drag. Confirm component locations and limits against the exact model page and current manual.
Replace pads or correct the cause first
If pads are below limit, contaminated, cracked or heat-damaged, replace the complete axle set specified by the manufacturer. Never replace only the visibly thinner pad to save material. Correct alignment, rotor or piston problems before bedding the new set. Confirm the replacement compound and backing shape through compatible accessories or support.
Bed-in follows the brake manufacturer instructions and must occur in a safe closed area. Recheck pad position, lever feel, wheel rotation and fastener security afterward. If wear becomes uneven again in a short period, the original cause remains or a mounting component needs deeper inspection.
 Figure 5. Official Valtinsu EM-5 product image accompanying replace pads or correct the cause first. Confirm component locations and limits against the exact model page and current manual.
Use the wear pattern to choose the next test
Uneven wear is useful evidence only when the inspection conditions are controlled. Photograph the pads before cleaning, label the inboard and outboard sides, and note which end faced the front of the caliper. Then compare thickness at the same points on both pads. This prevents a tapered pad, a chamfer, or a shadow in the photograph from being mistaken for a large thickness difference.
If one pad is consistently thinner
A consistent side-to-side difference points first to unequal pad movement. Reinstall only serviceable parts, apply the brake several times, release it, and spin the wheel. If the same side remains close to the rotor, inspect caliper centering and visible piston return according to the brake manufacturer’s procedure. Do not pry, lubricate, or expose a piston beyond the service limit. Brake fluid, mineral oil, grease, and aerosol cleaners can damage seals or contaminate friction surfaces when used in the wrong system.
If the pad is wedge-shaped
Front-to-back taper usually directs attention to caliper angle, mounting surfaces, hardware seating, or a rotor that does not pass squarely through the pad slot. Clean the mounting interfaces, confirm that adapters and washers are in the documented order, and check the rotor from a fixed reference while the wheel turns. A quick caliper recenter can reduce noise, but it does not correct a bent mount, damaged adapter, loose axle, or rotor outside the maker’s service limit.
If the new pads begin wearing unevenly again
Treat rapid recurrence as confirmation that the root cause remains. Record pad thickness, rotor condition, wheel installation, and drag immediately after service, then repeat the same checks after one or two short rides. A repeatable log is more reliable than judging by appearance months later. Stop using the bike if braking force changes, the lever travels farther, the rotor becomes unusually hot, or any pad approaches its stated minimum thickness.
Braking Hardware Matters More Than Motor Output
Uneven pad wear is a fit and alignment problem before it is a shopping problem. Use the Valtinsu electric dirt bike collection to identify the wheel and brake configuration for the exact model, then compare both pads, the rotor and caliper position as a system. Do not mix pads or assume a caliper procedure from another bike applies.
The Valtinsu EM-5 Pro is currently specified with hydraulic disc brakes. That hardware can deliver consistent control only when the rotor, caliper and pistons are working evenly. If one pad is thinning faster, correct the cause before installing new pads; replacing friction material alone can hide a binding piston, shifted caliper or damaged rotor.
Use Valtinsu's electric dirt bike brake service resources as the broad ownership reference, then confirm every procedure, part and limit against the exact model page and current manual.
Quick Decision Table
|
Wear pattern |
Likely cause |
Service response |
|
Inner pad much thinner |
Caliper position or piston movement |
Measure both pads and inspect alignment before replacement. |
|
One edge wears first |
Rotor alignment or caliper angle |
Check runout and mounting before bedding new pads. |
|
Glazed or dark surface |
Heat or contamination |
Correct the source and replace friction material as required. |
|
Rotor deeply scored or discolored |
Rotor damage or overheating |
Keep the bike out of service until inspected. |
FAQs
Why is one brake pad thinner than the other?
The pads may not be sharing load because the caliper is offset, one piston moves differently, a pad binds, or the rotor sits closer to one side. Preserve pad position and measure the pattern before adjustment.
Use this quick classification:
● One-sided thickness loss points toward alignment, piston movement or rotor position rather than normal wear alone.
● Glazing, dark patches or odor can indicate heat or contamination and should be documented separately.
● A bent, cracked, deeply scored or heat-discolored rotor requires inspection before new pads are installed.
Can I replace only one pad?
No. Replace pads as the set specified for that caliper so friction material and thickness match. Correct the cause of the uneven wear first.
Can a bent rotor cause uneven pad wear?
Rotor runout can change clearance and contact during each revolution, but do not assume the rotor is bent from noise alone. Confirm wheel installation and observe the gap using the service procedure.
How much difference is acceptable?
Use the fitted brake manufacturer guidance. There is no reliable universal millimeter difference for every caliper. A worsening or clearly asymmetric pattern deserves inspection even above the wear limit.
Follow this check sequence:
1. Measure both pads at comparable points and photograph the wear pattern before moving the caliper.
2. Rotate the wheel and observe rotor position, drag and piston response using the brake maker's service method.
3. Correct the cause, replace friction parts as a set when required, then complete the specified bedding and release checks.
Do new pads need bedding after an alignment repair?
New pads normally require the specified bedding process. Reused pads may also need a controlled recheck if their contact changed, but contaminated or badly tapered pads should not be salvaged.
Should rotor thickness be checked when brake pads wear unevenly?
Yes, inspect rotor thickness, runout, heat marks and the contact band according to the brake specification. Uneven pads can accompany a shifted or worn rotor. Replace or service only after identifying the cause, and never estimate rotor condition from appearance alone.
Can contaminated pads wear unevenly?
Contamination can change friction and heat across the pad surface, but a repeated thickness difference still calls for a caliper, piston and rotor check. Oil, cleaner residue or brake fluid may create dark, glazed or noisy areas without explaining why one side is consistently thinner. Do not sand or chemically wash pads unless the brake manufacturer permits it. Replace contaminated friction material as a set, correct the leak or contact source, verify rotor condition and complete the specified bedding procedure before returning to normal speed.


Looking for something else?

Electric Dirt Bike Whoops Setup: Suspension, Stance and Timing
LEARN MORE
Electric Dirt Bike Steep Descent Technique: Braking and Body Control
LEARN MORE
How to Store an Electric Dirt Bike Battery Safely: Charge Level, Temperature and Long-Term Storage
LEARN MORE
Electric Dirt Bike Water Crossings: Depth, Electrical Risk and Recovery
LEARN MORELooking for something else?

High-Altitude Electric Dirt Bike Performance Guide
LEARN MORE
How We Test Electric Dirt Bike Range: A Repeatable Real-World Protocol
LEARN MORE
Rated Power vs Peak Power on Electric Dirt Bikes: What the Numbers Actually Mean
LEARN MOREYou may also like
VALTINSU EM-5 Off-Road Electric Dirt Bike
VALTINSU EM-5 Pro Off-Road Black Electric Dirt Bike
VALTINSU EM-5 Pro Green Electric Dirt Bike
VALTINSU EM-5 Ultra Electric Dirt Bike
VALTINSU EM-5 & EM-5 Pro Combo
Further reading

Electric Dirt Bike Valve Stem Leaning: Tire Creep, Tube Damage and Safe Fixes

Electric Dirt Bike Chain Guide and Slider Wear: When to Adjust or Replace

Electric Dirt Bike Rear Suspension Linkage: Play, Binding and Service Signs
