Electric Dirt Bike Hill Start: Prevent Uncontrolled Rollback
To start an electric dirt bike uphill safely, first hold the bike in the manufacturer-approved state, then use only the control transition verified for that exact stock model. Confirm predictable forward traction before changing the holding input, and abort at the first rollback, wheelspin, cutoff, lateral movement, or loss of line. If a brake switch inhibits motor drive, do not use a brake-and-throttle overlap method unless the manufacturer documents an approved alternative.
An electric dirt bike hill start is not solved by adding more throttle. On an adult electric off-road motorcycle the rider has to manage gravity, the brake hold, motor response, rear-tire traction, steering alignment, personal balance, forward confirmation and the decision to abort, all inside a few seconds.
No universal slope, brake selection, lever force, throttle percentage, mode, body position, foot placement, rollback distance or rescue technique fits every rider and machine. Nothing here assumes your motorcycle has a hill-hold feature, because most do not, and the ones that do document it.
Define a Hill Start Without Promising Zero Movement
Hill Start
A hill start is the controlled transition from a stable uphill stop to confirmed forward travel. The rider first has to prevent uncontrolled rearward movement, and then coordinate the brake and drive systems of that exact motorcycle in the order their coach has taught.
Rollback Prevention
Rollback prevention means controlling rearward movement both before and during the transition. This article does not promise that every practiced start will involve literally zero tire movement, because that would be a claim nobody can keep. The safety goal is to avoid uncontrolled rollback, a loss of balance, wheelspin, the motorcycle crossing the trail, or contact with a rider or obstacle positioned behind.
Start vs Climb
- A hill start is the transition from a stationary hold to stable forward movement.
- A hill climb is the continuing task of maintaining traction, line, momentum and motor control once the motorcycle is already moving.
This article stays with the restart sequence, because that is the part existing guidance skips.
Explain Why Hill Starts Create a Different Control Problem

Gravity Pulls the Motorcycle Rearward
On a slope the motorcycle will begin moving backward unless the braking system, the terrain or another approved holding method resists that force. How hard the hill looks is only part of the picture, because surface grip, the combined mass of rider and machine, tire condition, wheel alignment and the motorcycle’s orientation on the slope all change how strongly gravity works against you.
Motor Torque Must Become Forward Traction
Motor output on its own does not complete the start. The rear tire has to transfer that drive force into the ground without spinning, stepping sideways, digging into loose soil, lifting the front excessively, or pulling the motorcycle off the intended line.
Transition Timing Matters
There are two opposite errors to avoid. Releasing the holding system before forward force is established invites rollback, and applying excessive drive while the brake remains fully engaged loads the motorcycle against itself. No universal overlap period sits between those two mistakes, because the right timing depends on the machine and the coach.
Stable Hold vs Forward Drive vs Confirmed Movement
These three states form the framework for everything that follows, and the rider should be able to name which one they are in at any moment.
Stable Hold
The motorcycle remains stationary, pointed along the intended path, and under the control of the rider and coach. The rider can identify every required control without confusion or hunting for it.
Forward Drive Request
The rider introduces the exact-model drive input according to the coach and the manual, while the stable hold is still preserved. No throttle percentage or ride mode is specified here, because both are model-specific and coach-selected.
Confirmed Forward Movement
Use the branch verified for the exact motorcycle. If the manual expressly permits controlled drive while the approved hold is applied, confirm uphill wheel travel, a stable line, and no wheelspin before reducing that hold. If any brake input inhibits motor drive, do not attempt this overlap sequence; obtain the manufacturer-approved alternate transition and qualified instruction first. Motor sound, display changes, or suspension movement never prove forward traction.
Choose an Easy Legal Closed Slope
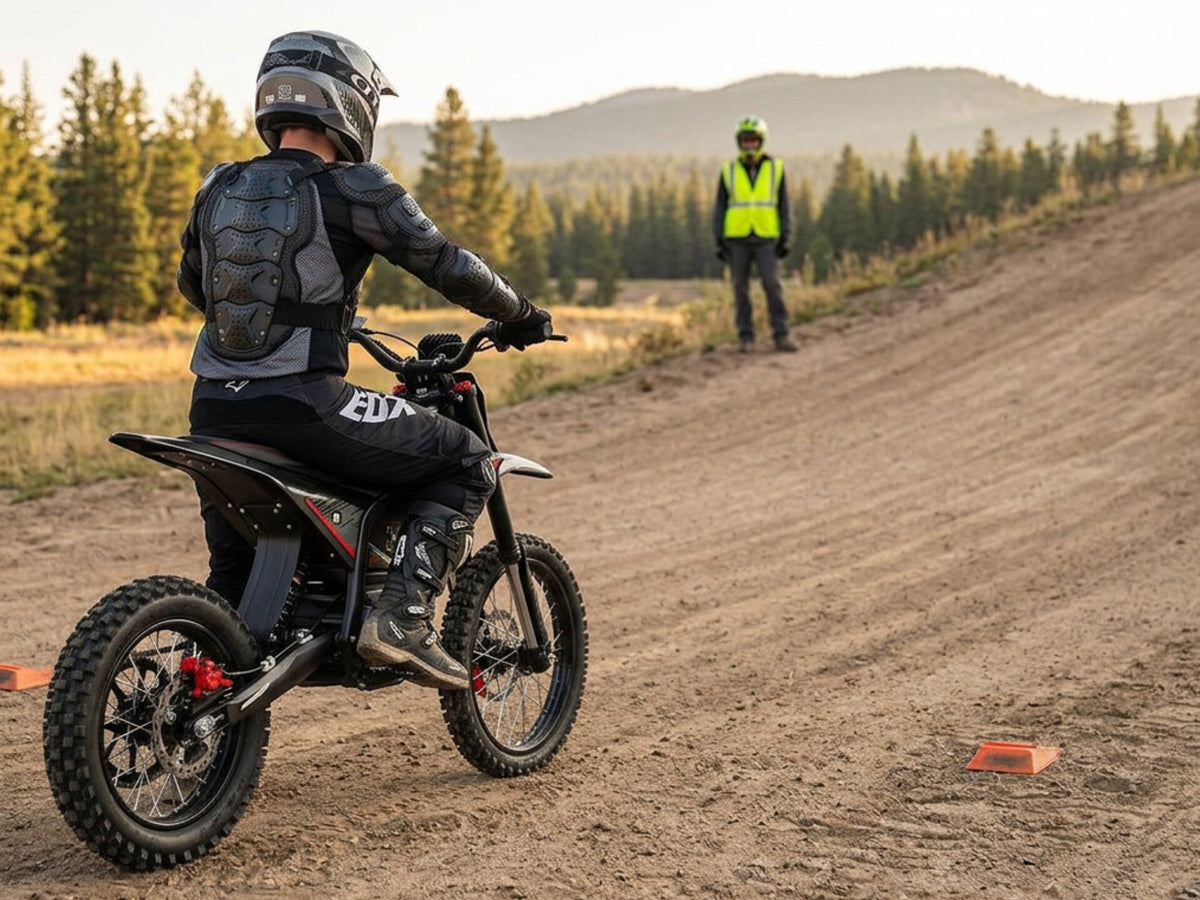
The slope is part of the training system rather than a backdrop for it, and full protective equipment is assumed throughout. Our protective equipment checklist covers what a hill session takes for granted.
Start Below the Rider’s Trail Ambition
Use legal private property, a motorcycle training facility, an approved off-highway practice area, or another closed location that expressly permits the motorcycle. The slope should offer a consistent surface, clear sightlines, predictable traction, a straight uphill line, space above the start point and adequate rollback runoff. It should have none of the following: traffic, pedestrians, animals, a cliff edge, a deep rut, a loose ledge, a blind crest or a technical obstacle.
No slope angle or length is prescribed anywhere in this article, because the coach has to select it against the rider and the motorcycle in front of them.
Inspect the Rollback Zone
Confirm that no rider, coach, motorcycle, vehicle, tree, barrier, drop or trail user sits directly behind the machine. This is the check most often skipped, and it is the one that determines what a mistake costs.
Mark the Practice States
Identify a staging area, a flat-ground rehearsal area, the stable-hold point, the forward-confirmation point, a continue zone, an abort zone, the coach position and an exit route.
Inspect the Motorcycle Before Hill-Start Practice
Motorcycle condition is the first pass gate, not a disclaimer at the end.
Check Both Braking Systems
Following the exact manual, check lever or pedal condition, brake response, hydraulic hoses or cables, calipers, rotors and pads, brake-cutoff sensors where fitted, any fluid leakage, abnormal travel, delayed release, new rubbing and warning indicators. Do not practice hill starts when either brake feels different from its known baseline, because the brake is the only thing holding the motorcycle on the slope.
Check Drive and Traction Components
Inspect the throttle return, the ride-mode control, the motor-inhibit system, the chain and sprockets, the rear tire, the rear wheel and axle, the swingarm, battery security, external wiring and display warnings. Our maintenance guide covers the routine version of these checks between sessions.
Check Steering and Foot Support
Confirm free steering movement, a secure handlebar and footpegs, reliable boot contact, access to every control, and no cable tension through the steering range. Use the owner’s manual matched to the exact motorcycle and serial range; record its revision and the sections covering operating state, brakes, throttle, interlocks, and shutdown. MSF’s T-CLOCS checklist supports the general pre-ride inspection but does not establish EM-5 Pro control logic.
Pass Gate
Do not begin when any brake, throttle, drive, tire, wheel, steering, battery or control concern remains unresolved.
Verify the Exact Motorcycle State Sequence

Identify the Ready-to-Drive State
Before slope practice, document the exact ready-to-drive indicator, manufacturer-designated non-driving state, throttle activation conditions, brake-cutoff behavior for each brake, side-stand or motor interlock, selected ride mode, regeneration behavior, warnings, and any expressly documented hill-hold function. If any item is unknown—or observed behavior differs from the manual—stop and obtain Valtinsu technical confirmation. Do not infer a safety state from silence or the display alone.
Do Not Assume Hill Hold
A competitor may advertise hill hold, a parking mode, automatic brake pressure or rollback control. None of that should be assumed on the Valtinsu EM-5 Pro, on any other Valtinsu model, on a Sur-Ron, on a Talaria, or on any motorcycle whose manual does not expressly document it. Assuming a feature that is not there is one of the most direct routes to a rollback.
Silent Motor vs Inactive Motor
- A silent motor may still be powered and ready to deliver torque the moment the throttle moves.
- A documented non-driving state uses the exact model’s approved controls to prevent unintended drive.
The rider needs to recognize both states before going anywhere near a slope.
Build the Sequence on Flat Ground First
The hill should not be the place where a rider first learns these controls. Begin slope practice only after the rider can repeat smooth starts, straight-line stops, the verified shutdown sequence, and the abort cue on level ground without control confusion or coach intervention.
Rehearse Stable Hold
On level ground the rider should demonstrate correct control identification, motorcycle stability, brake application, throttle closure, straight steering, the correct ready state and the correct shutdown state.
Rehearse the Drive Transition
Use a coach-approved flat-ground exercise that separates holding, drive preparation, initial forward movement, forward confirmation, brake reduction and continued travel into distinct steps. No universal brake choice or throttle input is prescribed for any of them.
Rehearse the Abort Cue
The coach and rider agree on one clear cue that means the rider should close drive, re-establish the approved hold, stabilize the motorcycle, return to the documented non-driving state if required, and wait rather than improvising another attempt.
Pass Gate
Move to a slope only when the rider can repeat the flat-ground sequence without control confusion, abrupt acceleration or coach intervention.
Use Pass, Reset, and Stop Decisions
Pass
The rider maintains a stable hold, introduces drive predictably, confirms forward movement, reduces brake input as coached, and continues along the planned line.
Reset
The motorcycle and rider both remain controlled, but the start includes a late drive response, an abrupt drive input, hesitation, a poor line, an early brake release that did not produce rollback, an excessive brake hold without overheating or fault, or a single coaching correction. Return to the start state and simplify the same drill.
Stop
End the session for any uncontrolled rollback, wheelspin, sideways rear-wheel movement, front-wheel lift, brake confusion, an unexpected motor response, a fall or tip-over, panic, a mechanical warning, or another person entering the rollback zone.
Stage 1: Establish a Stable Uphill Hold
Align the Motorcycle With the Intended Path
The motorcycle should face the coach-approved uphill line rather than sitting across the slope. No universal wheel angle or trail position is prescribed, because that depends on the ground and the route.
Use the Coach-Approved Holding Method
Which brake holds the motorcycle, or which combination of brakes, depends on the layout of that machine, its brake configuration, the rider’s reach, access to any foot control, the surface, the coaching method and the intended transition. This article does not tell any rider to use only the rear brake, only the front brake, or one fixed combination.
Confirm Stability Before Drive
Before any drive request, the rider should be able to hold the motorcycle stationary, keep the throttle closed, keep steering controlled, see the intended line, reach every required control, hear and follow the coach, and abort without delay.
Pass Gate
Proceed only when the motorcycle remains stable without rearward drift, crossed controls or excessive rider strain.
Stage 2: Prepare the Drive Request Without Releasing the Hold
Select One Approved Configuration
Record one manufacturer-approved stock configuration before the drill: operating state, ride mode, brake-cutoff branch, regeneration setting if adjustable, and any active interlock. The coach must explain why that configuration is suitable and keep it unchanged. If the configuration or control logic cannot be verified, the session remains on level ground.
Confirm Control Independence
The rider has to be able to prepare the drive request without unintentionally releasing the holding brake, increasing steering input, moving a foot off its support, pressing another control, looking down for too long, or pulling on the handlebar.
Ready State vs Drive State
- The ready state means every required control is identified and the motorcycle is still held.
- The drive state means the motor has begun delivering forward wheel force through the exact-model control.
Motor sound is not proof that usable forward force has arrived.
Pass Gate
Proceed only when the rider can prepare the transition while the motorcycle remains stationary and aligned.
Stage 3: Introduce Drive Progressively
Add One Deliberate Drive Input
The rider introduces drive progressively, using the exact method their coach has taught. This article gives no throttle percentage, wrist angle, lever force, motor-current target, fixed duration or motor-sound cue, because every one of those varies with the machine.
Progressive Drive vs Abrupt Drive
- Progressive drive builds rear-wheel force in a predictable sequence, gives the tire time to establish traction, and lets the rider monitor line and balance while reducing the chance of a surge.
- Abrupt drive demands high rear-tire force immediately, and can spin the tire, move the rear sideways, lift the front, or pull the rider off the chosen line.
Brake Hold Is Still Active
The coach controls when and how the holding-brake input changes. Nobody should release the brake simply because the throttle has begun to move, which is the single most common cause of a rollback on a practice slope.
Pass Gate
Advance only when the response matches the verified branch: an overlap-capable configuration produces smooth uphill traction through its documented transition, while a brake-cutoff configuration stays out of this drill until an approved alternate method is documented. Any ambiguity, rollback, wheelspin, or unexpected cutoff ends the attempt.
Stage 4: Confirm Forward Movement Before Reducing the Hold
Identify Real Forward Movement
Observable signs include the motorcycle travelling uphill, the rear tire rolling rather than spinning, the motorcycle staying on line, controlled steering, a balanced rider, the machine no longer loading rearward against the brake, and a coach who can see sustained forward progress. No universal confirmation distance is given, because the coach judges it against the slope in front of them.
Forward Movement vs Rear-Wheel Spin
- Forward movement means the tire is transmitting motor force into uphill travel.
- Wheelspin means the tire is rotating faster than the motorcycle advances, and it may move sideways or displace the surface.
Wheelspin is never successful forward confirmation, however encouraging the noise sounds.
Forward Movement vs Suspension Movement
A motorcycle may squat, rise or shift under drive without actually travelling uphill at all. Chassis movement should never be mistaken for a completed transition.
Pass Gate
The holding-brake input should change only after the coach confirms stable forward travel through the exact practiced method.
Stage 5: Reduce Holding-Brake Input as Coached
Coordinate Rather Than Drop the Brake
The rider reduces the holding input through the coach-taught sequence while continuing stable forward drive. This article does not specify which brake releases first, how quickly it releases, how far a lever or pedal travels, how long the overlap lasts, or what percentage of pressure remains.
Brake Release vs Brake Abandonment
- Controlled reduction preserves enough control for the rider to respond if forward motion weakens.
- Brake abandonment removes the hold before the motorcycle has reached a stable uphill state.
Monitor the Motorcycle During Transition
The coach watches for rearward drift, wheelspin, sideways movement, steering correction, front-wheel lift, rider tension, control confusion, loss of foot support, brake drag and any unexpected motor cutoff.
Pass Gate
Proceed only when the motorcycle continues uphill without rollback, excessive brake drag or loss of direction.
Stage 6: Continue Through the Exit Zone

Hold the Intended Uphill Line
The rider should continue through the marked exit area rather than stopping again immediately above the start point. Relaxing the instant the motorcycle moves is how a completed start turns into a second, unplanned one.
Keep Drive Predictable
Avoid suddenly adding throttle, changing modes, looking back, steering sharply, switching between standing and sitting outside the drill, or celebrating with acceleration.
Confirm the Start Is Complete
The start is complete only when the motorcycle is moving uphill under traction, both brakes respond normally, the rider is balanced, the motorcycle follows the chosen line, the rollback area is still clear, and the rider reaches the coach-approved continue or stopping zone.
Pass Gate
Record the attempt as passed only after the rider reaches the defined exit state, rather than at the first inch of forward movement.
Rollback Warning vs Rollback Stop
Rollback Warning
Warning signs include forward movement pausing, rearward load returning through the motorcycle, motor response weakening, brake release happening too early, the rider looking down, the rider losing the chosen line, foot support changing, or the steering turning across the slope. A warning should trigger the practiced abort cue before uncontrolled movement develops.
Rollback Stop Condition
Stop the attempt when the motorcycle moves rearward unexpectedly, the rider loses balance, a wheel crosses the intended line, the rider cannot re-establish the hold, the coach enters the danger zone, another person or motorcycle is behind, the rear tire slides sideways, or the rider applies an unintended control.
No Universal Rollback Allowance
This article does not state that some number of inches or feet is acceptable. Whether an attempt remains controlled is decided by the coach, the terrain, the motorcycle and the runoff you actually have behind you.
Abort the Start Before It Becomes a Failed Climb
Use the Pre-Agreed Abort Cue
At the first unexpected rollback, wheelspin, cutoff, lateral movement, or loss of line: close drive immediately, reapply the manufacturer-approved braking hold, keep the motorcycle aligned, stabilize only after it is stopped, and return to the documented non-driving state. If the hold cannot be restored, use only the instructor’s pre-briefed emergency exit; do not improvise or add throttle.
Abort vs Rescue
- An abort ends the start while the motorcycle is still inside the planned training state.
- A rescue responds after control, line, traction or balance has already deteriorated.
Early aborts are the whole point of this drill, and they are also the skill that transfers to real terrain.
Do Not Improvise
This article does not advise jumping off, running beside the motorcycle, walking it uphill under throttle, turning across the slope, using a walk mode, dragging a foot, spinning the rear tire or reversing downhill. Every one of those requires exact coaching and terrain-specific judgment that no article can supply.
Hill Start vs Failed Hill-Climb Recovery
Hill Start
A hill start begins from a planned stable stop on an easy practice slope, with clear runoff, coach supervision, known controls, a known surface and a prepared exit.
Failed Hill-Climb Recovery
A failed hill-climb recovery begins after the rider has already lost momentum during an active climb, and it may involve a poor motorcycle position, steeper terrain, a loose surface, limited footing, other riders, obstacles, heat, fatigue, a reduced battery state or a blocked rollback path. That is a different problem with a different sequence, and it should not be folded into a beginner hill-start drill. Our guide to failed hill-climb recovery works through the stop, stabilize and exit sequence that situation needs, and the rest of our riding guides cover the surrounding skills.
Firm Hardpack vs Loose Hill Start
Firm Consistent Hardpack
Firm ground may provide more predictable traction and a clearer relationship between drive input and forward movement. It still needs inspecting for dust, loose stones, polished areas, ruts, moisture and cross-slope camber.
Loose or Variable Surface
Looser ground may produce earlier wheelspin, sideways rear-wheel movement, delayed forward confirmation, surface displacement, and grip that changes between attempts. Tread pattern and tire condition matter here too, which our tire guide works through by terrain.
Training Decision
Begin on the more predictable coach-approved surface. Moving to loose terrain creates a new exercise, so the rider returns to the lowest-demand state sequence rather than carrying forward the same throttle, brake, line and timing assumptions.
Seated Hill Start vs Standing Hill Start
Seated Start
A seated start may offer different ground access, different brake-control access, different rear-tire loading and a lower physical transition demand. Whether it suits a particular rider depends on motorcycle geometry and rider fit.
Standing Start
A standing start may offer more space for the motorcycle to move, different foot-control access and different balance options, at the cost of greater physical demand. It can also make control coordination harder for a beginner.
Decision Rule
The coach selects the position based on rider fit, brake layout, foot control, surface, motorcycle geometry, whichever standing skills the rider has already passed, and the intended transition. No foot placement, knee width, hip location or torso angle is prescribed here.
Front-Brake Hold vs Rear-Brake Hold vs Combined Hold
Front-Brake Hold
Holding with the front brake may preserve access to a foot control, but it places the holding task in the rider’s hand. Its usefulness depends on control reach, traction, steering alignment and the coaching method.
Rear-Brake Hold
A rear brake may be hand-operated or foot-operated depending on the motorcycle. Its usefulness depends on whether the rider can maintain stable foot support while coordinating drive.
Combined Hold
Using both brakes may provide additional stationary control, though it also creates a more complex transition to manage.
Why This Article Will Not Choose for You
No brake selection, brake combination, split or lever force is given, because the machine decides most of it. The exact motorcycle layout and a qualified coach determine which brake holds the motorcycle, whether both are used, when each input changes, and how motor cutoff interacts with brake use on that specific model.
Brake-Cutoff Behavior vs Hill-Hold Technology
Brake-Cutoff Function
A brake sensor may interrupt motor drive when a brake is applied, and that directly affects the timing of a hill-start transition. The exact behavior has to be confirmed from the manual rather than inferred from another machine.
Hill-Hold Function
A documented hill-hold system may maintain a holding state temporarily through braking or controller logic. Its existence should never be assumed from electric drive, regenerative braking, a parking mode or a competitor’s advertising.
Why the Difference Matters
One rider may apply drive while a brake-cutoff sensor prevents any motor output. Another motorcycle may allow a controlled overlap. A third may have automatic hill hold. Generic timing instructions copied from a forum can therefore produce either rollback or unexpected acceleration, which is why uncertain behavior goes to the manual or the support team.
Wheelspin vs Insufficient Drive vs Motor Cutoff
Wheelspin
The rear tire rotates without matching forward travel, the rear may move sideways, loose material gets displaced, and the motorcycle loses its planned line. Possible categories include excessive drive, poor traction or a surface change.
Insufficient Drive
The motorcycle stays loaded against the brake, forward movement begins and then stops, motor response feels weaker than the established baseline, or the rider released the brake before forward force was stable. Nobody should diagnose a motor fault from a single attempt.
Motor Cutoff
Drive stops when a brake is applied, the display shows an interlock or warning, a side stand or another control prevents drive, or motor response differs from what flat-ground practice established.
Next Decision
Return to the stable hold and work out which category applies. Adding more throttle should never be the automatic response to any of the three.
Normal Hill-Start Difficulty vs Motorcycle Fault
This matrix helps a rider describe what happened so that a technician has something to work with. It does not diagnose a fault, and no single symptom identifies a controller, sensor, battery, throttle, motor or chain failure on its own.
|
Observed symptom |
Conditions to record |
Low-risk checks |
Required next decision |
|
Motorcycle rolls back before drive |
Slope, brake used, hold duration |
Brake response and lever travel |
Return to flat ground, reassess the hold |
|
Motor does not respond |
Display state, ride mode, stand position |
Ready state per the manual |
Verify the state sequence before retrying |
|
Motor responds only after brake release |
Which brake, when drive arrived |
Brake-cutoff behavior in the manual |
Confirm documented behavior, then coach the timing |
|
Rear tire spins |
Surface, drive input, tire condition |
Tire tread and surface consistency |
Reset the drill, consider a firmer surface |
|
Rear tire steps sideways |
Alignment, surface, drive rate |
Wheel and axle security |
Stop the attempt, reassess alignment |
|
Front wheel lifts |
Drive rate, slope, rider position |
None beyond observation |
Stop the session |
|
Throttle response feels abrupt |
Mode, whether it is new |
Throttle return and free play |
Stop if it differs from baseline |
|
Throttle response is delayed |
Battery state, temperature, mode |
Display warnings |
Stop and follow the manual |
|
Brake does not hold consistently |
Slope, duration, temperature |
Leakage, travel, rubbing |
Stop immediately, get service |
|
Brake releases slowly |
Temperature, whether it worsens |
Lever or pedal return |
Stop and get service |
|
Error code appears |
Exact message and moment |
Visible wiring and connectors |
Stop and follow the manual |
|
Drive cuts in and out |
Frequency, any pattern |
Battery security, visible wiring |
Stop immediately, do not retry |
|
Chain skips or knocks |
When the noise started |
Chain tension and sprocket condition |
Stop and get service |
|
Cannot maintain forward movement |
Slope, surface, battery state |
Tire, chain, brake drag |
Return to flat ground and reassess |
|
Battery output changes unexpectedly |
State of charge, temperature, warnings |
External battery and mount condition |
Stop and follow the manual |
Common Hill-Start Mistakes
|
Mistake |
Why it creates rollback risk |
Better decision |
|
Practicing first on a steep trail |
Consequence arrives before the skill does |
Use an easy closed slope |
|
Assuming the motorcycle has hill hold |
The rider relies on a hold that does not exist |
Verify the feature in the manual |
|
Releasing the brake before forward confirmation |
Gravity acts before drive is established |
Confirm movement first |
|
Adding full or abrupt throttle |
Produces wheelspin or a surge instead of traction |
Introduce drive progressively |
|
Looking down at the controls |
Balance and line both deteriorate |
Know the controls by feel beforehand |
|
Pointing across the slope |
Any rollback turns into a sideways fall |
Align with the intended uphill line |
|
Letting riders wait directly behind |
A rollback becomes a collision |
Keep the rollback zone clear |
|
Changing mode between attempts |
Rider and machine changes become indistinguishable |
Hold one approved configuration |
|
Treating motor sound as forward movement |
The brake gets released with no traction established |
Confirm wheel travel and machine movement |
|
Confusing suspension squat with movement |
Chassis movement is not uphill progress |
Watch the ground, not the shock |
|
Continuing after wheelspin |
Traction and surface both degrade further |
Stop and reset |
|
Using walk mode without authorization |
Behavior may differ entirely from expectation |
Follow the manual only |
|
Walking beside a powered motorcycle |
Unintended drive with a rider off the pegs |
Isolate drive before moving on foot |
|
Letting fatigue change control timing |
Timing errors grow as the hand tires |
End the session |
|
Repeating a failed attempt without resetting |
The same error compounds on a worse surface |
Return to the start state |
|
Using a test start to diagnose a fault |
Puts a rider on a slope with a known problem |
Diagnose off the hill, with service |
EM-5 Pro Hill-Start Control-Logic Checklists
Complete this table for the exact stock motorcycle before any slope drill. If a control state, brake-cutoff branch, or shutdown action is not documented and confirmed, stop at level-ground practice..
|
Verification iteml |
Evidence to recordt |
Observed stock behaviort |
Approved decisions |
Training consequencen |
|
Exact motorcycle |
Model, serial range, manual revision, tire setup, and brake configurationd |
Ready-to-drive indicator, throttle activation conditions, and controller or firmware states |
Record; never assumel |
Use only the control branch validated for this exact motorcycle.. |
|
Holding method |
Approved brake or brake combination, rider reach, and stable foot supportk |
Whether drive is permitted while the holding input is appliedt |
Use only the documented methodl |
If the transition is not documented, keep practice on level ground.r |
|
Brake-cutoff branch |
Front- and rear-brake inputs checked against the exact manuald |
Expected motor response with each brake input—without an improvised powered testt |
Select the matching approved branchl |
Unexpected or inconsistent cutoff ends the session.t |
|
Hill-hold claimX |
Exact manual feature name and activation conditionsy |
Documented indicator and release behavior, if the feature existsr |
Absent unless expressly documentedl |
Do not infer hill hold from regeneration, silence, parking mode, or display state.r |
|
Abort plan and coach position4 |
Coach uphill and outside both travel and rollback paths; no helper downhilln |
Pre-briefed abort cue, clear runoff, exit route, and non-driving staten |
Stop at the first mismatchl |
Rollback, wheelspin, cutoff, lateral movement, or loss of line ends the attempt.t |
Do not import control sequences from another brand, model, or modified motorcycle. Hill-start instructions are valid only for the exact stock bike, manual revision, control layout, firmware/controller state, and verified brake-cutoff branch used in training.
Available motor output does not replace brake control, traction, alignment, qualified coaching, or a deterministic abort plan. Omit commercial comparisons and disputed specifications from this safety procedure.
Determine Whether the EM-5 Pro Fits the Hill Rider
Work through the control and fit checks before the purchase decision rather than after it. Can the rider:
- Mount and dismount safely on an incline
- Hold and walk the 143-pound motorcycle with drive isolated
- Reach both brake controls
- Reach the throttle without unintentionally changing brake input
- Identify the ready state and the documented non-driving state
- Establish a stable uphill hold
- Add drive progressively
- Confirm forward movement before reducing the hold
- Abort before rollback develops
- Manage the 31.5-inch seat height
- Stay within the 287-pound maximum load
- Access legal hill-practice terrain
- Work with a qualified off-road coach
If every answer is yes, the Valtinsu EM-5 Pro is worth evaluating properly, and the electric dirt bike collection shows where it sits against the rest of the range. If any answer is no, that is the thing to resolve first.
Stop the Hill-Start Session When

End the session for any of the following, regardless of how much practice time remains:
- Any uncontrolled rollback
- Rear-wheel spin
- Sideways tire movement
- Front-wheel lift
- Repeated loss of line
- A brake that does not hold
- Changed brake feel
- A throttle that sticks or responds unexpectedly
- Motor drive continuing against the documented brake behavior
- Motor drive cutting unexpectedly
- An error indicator
- A chain that skips
- A tire losing pressure
- A rider who cannot reach a control
- A fall or tip-over
- Pain, panic or fatigue
- A deteriorating surface
- A rollback path that has become blocked
- Another person entering the rollback area
Unused practice time never justifies another attempt after a stop condition appears, and the hill will still be there next session. After any fall or tip-over, work through our tip-over inspection triagebefore the motorcycle is ridden again, because a slope drop can move controls and disturb a battery mount without leaving an obvious mark.
Conclusion
Inspect the motorcycle, choose an easy closed slope, and rehearse the sequence on flat ground before the hill sees it. Establish a stable uphill hold, verify the exact ready state for your machine, introduce drive progressively, and confirm real forward movement before the holding brake changes at all. Reduce brake input only as coached, then continue through the exit zone rather than stopping again above the start.
Abort early, before a rollback becomes uncontrolled, and stop the session for wheelspin, faults, fatigue or a lost line.
Practice the hill-start state sequence on an easy closed slope with a qualified off-road coach, and review the Valtinsu EM-5 Pro after those checks rather than before them.
FAQs
How do you start an electric dirt bike on a hill without uncontrolled rollback?
Establish the brake hold before requesting drive, and do not reduce that hold until the motorcycle is producing verified forward movement. Use the model-approved sequence:
- Choose an easy, legal closed slope with a clear uphill exit and empty rollback zone.
- Confirm the motorcycle’s ready state, ride mode, brake-cutoff behavior, and abort cue on flat ground.
- Hold the motorcycle stationary with the brake method approved for that model and rider.
- Introduce drive progressively without changing the line.
- Reduce the holding brake only after forward movement is clear, then continue through the exit zone.
Can you hold the brake and use the throttle at the same time?
Only if the exact motorcycle manual permits brake–throttle overlap. Many electric motorcycles use a brake-cutoff sensor that interrupts motor drive, so an overlap method may produce rollback instead of forward movement.
Why does the motor cut out when the brake is held?
A brake-cutoff switch or controller interlock may be doing exactly what it was designed to do. Verify the feature in the manual; if the behavior is new, intermittent, or continues after the brake is released, stop and inspect the sensor and wiring rather than changing hill-start timing around a possible fault.
How steep should a beginner’s hill-start practice slope be?
Use the easiest slope that still allows the skill to be practiced—not an arbitrary angle. The site should meet every condition:
- The rider can hold the motorcycle stationary without strain
- The surface is firm, consistent, straight, and visible
- The uphill exit is clear and long enough to finish the start
- The downhill rollback path is long, unobstructed, and completely empty
What should you do if the bike starts rolling back or spinning the rear tire?
Abort immediately; do not add throttle to rescue the attempt. Close the throttle, restore the approved brake hold, stabilize the motorcycle, isolate drive if repositioning is required, and use assistance or the planned recovery route before another attempt.
Sources and review status
- Motorcycle Safety Foundation, DirtBike School
- Motorcycle Safety Foundation, Tips & Practice Guide for the Off-Highway Motorcyclist
- Motorcycle Safety Foundation, T-CLOCS Pre-Ride Inspection Checklist
- National Highway Traffic Safety Administration, Motorcycle Safety
- Bureau of Land Management, Off-Highway Vehicles
- USDA Forest Service, Off-Highway Vehicles, San Juan National Forest (Motor Vehicle Use Maps, permits, registration and local restrictions)


Looking for something else?
Electric Dirt Bike Loses Power Under Load: Causes and How to Fix It
LEARN MORE
Electric Dirt Bike Bolt Torque Checklist: What to Check and Where the Numbers Come From
LEARN MORE
How to Bleed Electric Dirt Bike Brakes Safely
LEARN MORE
Electric Dirt Bike Throttle Not Working: What to Check First
LEARN MORELooking for something else?
Electric Bike Battery Not Charging? Work Through This Before You Buy a New One
LEARN MORE
Electric Dirt Bike Error Codes: What They Mean and What to Check First
LEARN MORE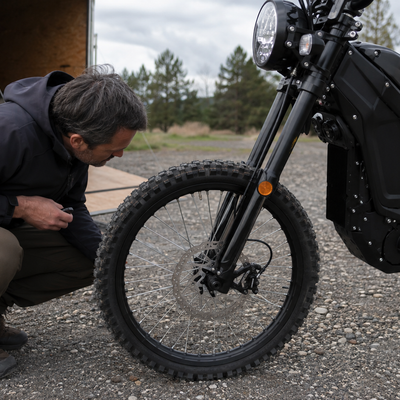
Electric Dirt Bike Brake Rotor Rubbing: Diagnose the Cause Before Adjusting
LEARN MOREYou may also like
VALTINSU EM-5 Off-Road Electric Dirt Bike
VALTINSU EM-5 Pro Off-Road Black Electric Dirt Bike
VALTINSU EM-5 Pro Green Electric Dirt Bike
VALTINSU EM-5 Ultra Electric Dirt Bike
VALTINSU EM-5 & EM-5 Pro Combo
Further reading
Electric Dirt Bike Trailside Power Loss: Recovery Plan When the Battery Is Dead
Electric Dirt Bike Fall Riding on Wet Leaves: Grip, Hidden Obstacles and Braking
How to Lift a Fallen Electric Dirt Bike Without Hurting Yourself or the Bike