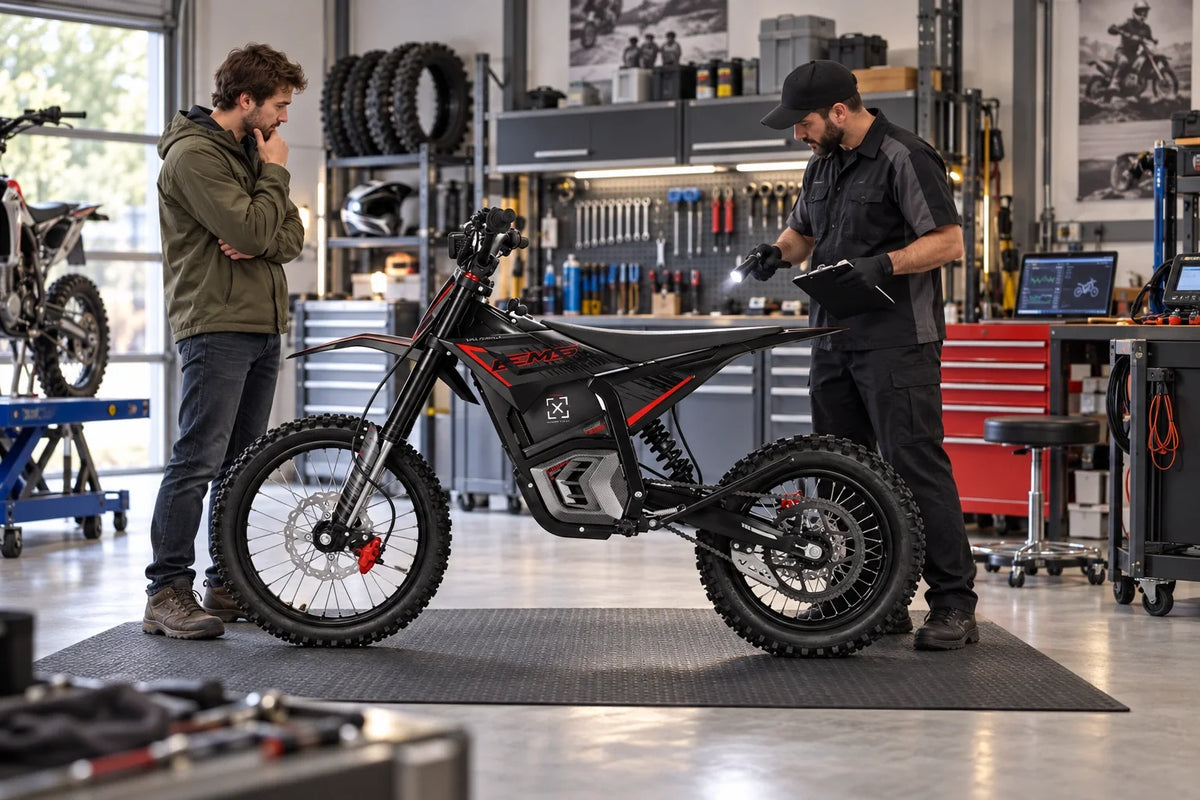
Electric Dirt Bike Log Crossing: A Beginner Method for Small Obstacles
For a beginner log crossing, approach a secured, fully visible obstacle as close to 90 degrees as the site allows, from a straight low-speed lane. Stand with knees and elbows flexed, eyes through the exit, and controls neutral; briefly unweight the front as coached without pulling a wheelie, then let the rear wheel roll across under steady drive. Continue to a planned stop. Abort before contact if alignment changes, and isolate drive after any hang-up.
This article covers one narrow thing: rolling an adult electric off-road motorcycle over a small, stable, fully visible obstacle under coach direction. It does not teach jumping a log, doubling obstacles, wheelie techniques, clutch techniques, downhill crossings, large-log methods, moving-log crossings or high-speed impact methods. Those belong to a different level of rider and a different article.
Use a near-perpendicular line and the conservative standing baseline described below. Obstacle height, exact speed, drive input, and clearance still depend on the loaded motorcycle, verified controls, surface, and qualified coach; if those cannot be confirmed, remain on the flat-marker stage.
Define the Small-Obstacle Method
Small Fixed Obstacle
A training obstacle for this ladder should be low consequence, stable, secured against movement, fully visible, free from hidden branches and sharp projections, positioned on predictable ground, surrounded by adequate runoff, and selected by a qualified coach. No height or diameter is given here, because the coach has to match the obstacle to the rider and machine in front of them.
Crossing vs Jumping
- Crossing means the wheels maintain a controlled relationship with the obstacle and the ground as the motorcycle passes over it.
- Jumping introduces takeoff, flight, landing, impact and timing, along with considerably greater consequence.
This method stays firmly on the crossing side of that boundary.
Small Obstacle vs Large Log
A larger log may require advanced wheel placement, suspension timing, clutch work on a gas machine, deliberate wheel lift or active pressure management. Every one of those skills sits outside this article, and attempting them from written instructions is how riders get hurt.
Confirm the Rider Is Ready for Obstacle Practice
Required Skills Before the First Attempt
Before any obstacle, the rider must demonstrate correct control identification, predictable throttle closure, smooth straight starts, planned straight stops, wide turns both ways, stable standing transitions, straight standing movement, mild acceleration and deceleration, one-cue compliance, and the exact shutdown sequence. Repeat these on level ground until the coach records three clean repetitions without intervention.
Required Motorcycle Management
The rider should also be able to hold and walk the motorcycle with drive isolated, mount and dismount safely, reach both brakes, keep the throttle closed while repositioning, recover to a stable stop before the obstacle, and stop inside a marked area after it.
Readiness vs Confidence
- Confidence means the rider feels willing to attempt the obstacle.
- Readiness means the rider has repeatable control skills and passes the coach’s observable gates.
Confidence on its own never justifies progression, and it is usually the thing that arrives first.
Choose a Legal Closed Training Area
The site is part of the obstacle system, and full protective equipment is assumed throughout. Our protective equipment checklist covers what an obstacle session takes for granted.
Use an Approved Practice Location
Use legal private property, a motorcycle training facility, a designated off-highway training area, or another location that expressly permits both the motorcycle and obstacle practice. The area should have clear sightlines and adequate runoff, with no public traffic, pedestrians, animals, blind approach, steep slope, cliff or drop, water crossing, deep mud, hidden rocks or crossing trail.
Separate the Practice Zones
Mark a straight approach of at least three motorcycle lengths, then place the abort cone one demonstrated stopping distance before the obstacle. Keep an exit lane of at least three motorcycle lengths beyond it and a side buffer wider than the motorcycle’s likely fall radius. The coach stands outside the approach, exit, handlebar sweep, and fall path; spectators remain beyond the buffer. Scale every distance up when the rider needs more room.
Inspect the Obstacle Before Inspecting the Line

Confirm the Obstacle Cannot Roll or Shift
The coach should verify that the log or training object is fixed, chocked or secured where appropriate, not resting loosely on round surfaces, not balanced on branches, not capable of rolling under tire contact, not likely to collapse or rotate, and not hiding a gap beneath it. Moving-log crossings are not taught anywhere in this article.
Inspect the Surface Around It
Check the approach, the contact zone and the exit for loose dust, wet bark, mud, grass, roots, ruts, embedded rocks, holes, cross-slope camber, water, debris and any tire tracks that would pull the line off course.
Inspect the Obstacle Surface
Record whether the obstacle is dry or wet, smooth or rough, decayed, split, covered in bark, partly buried, or angled across the ground. None of those conditions is universally safe, and the point of recording them is to notice when they change between sessions.
Fixed Log vs Loose Log vs Hidden Log
Fixed Training Log
A coach-selected obstacle that cannot roll, is fully visible, and has a prepared approach and exit may be suitable for controlled instruction.
Loose or Unstable Log
A loose log may rotate, roll, split or move sideways the moment a tire contacts it. Nothing in that category belongs in beginner practice.
Hidden or Partly Hidden Log
Grass, brush, mud, shadows, leaves or water may conceal the obstacle’s actual size, hidden branches, gaps beneath it, its surface angle, decay, nearby rocks or exit hazards. A hidden obstacle is a trail hazard rather than a training object.
Decision Rule
If the coach cannot confirm the obstacle’s stability, shape, approach and exit, it comes out of the exercise. That decision is easier to make before a rider is sitting on the bike looking at it.
Inspect the Electric Dirt Bike Before Crossing
Check Tires and Wheels
Following the exact manual, inspect tire condition, tire pressure against the model requirements, rim condition, spokes or wheel hardware, axles, bearings, front and rear alignment, and tire clearance. No universal obstacle pressure is given, because the manual and the tire requirements govern it. Our tire guide covers how tread and condition change contact behavior.
Check Controls and Brakes
Confirm throttle return, front-brake response, rear-brake response, lever or pedal condition, brake-cutoff behavior where fitted, handlebar security, steering movement, control access while standing, and any warning indicators.
Check Chassis and Drivetrain
Inspect the footpegs and peg mounts, fork, rear suspension, frame, skid protection where fitted, chain, sprockets, motor mount, battery security and external wiring. Model-specific procedures sit on the Valtinsu user manual page, and MSF’s T-CLOCS checklist covers the same ground for tires, wheels, controls, brakes, steering, suspension, chassis, stands and fasteners.
Pass Gate
Do not begin when any tire, wheel, brake, throttle, peg, suspension, battery, chain, steering or control concern remains unresolved. An obstacle is the worst place to discover a loose footpeg.
Verify the Exact Electric Control Behavior
Confirm Throttle Response
The rider and coach should already know how the motorcycle answers a small drive request on level ground before the obstacle is involved. No throttle percentage is prescribed, and gas-bike tutorials skip this check entirely because they have a clutch to meter drive instead.
Confirm Brake-Cutoff Behavior
Use the owner’s manual matched to the exact motorcycle and serial range to record what each brake input does to motor drive. If either brake inhibits drive, the coach must use only the manufacturer-approved branch and keep brake application out of the powered contact phase unless the manual says otherwise. If the behavior is undocumented, inconsistent, or differs from the manual, stop at level-ground practice—do not improvise a powered test.
Confirm Regenerative Behavior
Identify whether closing the throttle or selecting a setting produces programmed deceleration. Regenerative braking should never be assumed to exist on a given model.
Confirm the Selected Configuration
Use one documented, coach-selected configuration for the whole practice block. No universal mode is recommended, and modes should not change between attempts, because that makes rider progress and machine behavior impossible to separate. The Valtinsu user manual page carries the documented options for each model.
Build a Recovery Plan Before the First Attempt
Define the Abort Point
Mark the location before which the rider can stop normally and reset without contacting the obstacle. Having that point agreed and visible is what turns a hesitant attempt into a clean reset rather than a committed mistake.
Define the Post-Contact Stop Rule
After contact, continue straight only while both wheels keep rolling predictably. If a wheel stops, deflects, spins, or the chassis rests on the obstacle: close the throttle, apply the approved brakes, switch to the manufacturer-designated non-driving state, and hold the motorcycle stable. Do not add power or rock it free. Dismount only into the pre-briefed safe side, then use assistance with drive isolated and every helper outside the wheel, handlebar, and fall paths.
Keep Helpers Outside the Wheel Path
No coach, spotter, rider or spectator should stand directly in front, directly behind, beside the likely fall path, within the handlebar sweep, or in the exit lane the motorcycle will use.
Prepare for a Stuck Motorcycle
The coach should decide in advance when the rider powers down, when the rider dismounts, whether assistance is required, how the motorcycle will be stabilized, whether the obstacle must be removed, and whether the session ends. Using the throttle to free a motorcycle resting on an obstacle is never part of that plan.
Use Pass, Reset, and Stop Decisions
Pass
Pass a stage only after three consecutive coach-recorded repetitions with the same setup: stable line, predictable drive, controlled wheel contact, eyes through the exit, and no cue or intervention. A reset or stop condition restarts the count. Before progression, repeat one clean attempt after a short rest.
Reset
The rider stays controlled and the motorcycle behaves normally, but the attempt includes a poor line, looking down, hesitation before the obstacle, an abrupt drive input without wheelspin, abrupt deceleration, sitting down early, or a single coaching correction. Return to an earlier stage rather than repeating the same attempt harder.
Stop
End the session for obstacle movement, wheelspin, wheel deflection, sideways movement, a hard component strike, a motorcycle hang-up, a fall or tip-over, an unexpected motor response, brake confusion, rider panic, a mechanical warning, or a blocked exit.
Stage 1: Walk and Inspect the Intended Line
View the Obstacle From Both Directions
The coach and rider examine the approach, the obstacle face, the obstacle angle, the contact area, the far side, the exit, the stopping zone and recovery access. The near side rarely reveals what the far side is hiding, which is why both directions get walked.
Choose One Clear Line
Select a line as close to 90 degrees to the obstacle as the site safely permits. A near-perpendicular approach reduces the tire’s tendency to track sideways along the log. If the site cannot provide a straight, near-square approach and clear exit, use another obstacle.
Identify Visual References
Before mounting, the rider identifies four visual references: approach centerline, near edge of the obstacle, exit centerline, and planned stopping marker. During motion, eyes stay through the exit rather than fixed on the front tire.
Pass Gate
The rider should be able to describe the complete line, start to finish, before mounting the motorcycle.
Stage 2: Rehearse the Approach Without Crossing
Approach the Decision Point
The rider travels toward the obstacle using a coach-approved low-demand approach and stops before contact. No speed or stopping distance is prescribed, and the exercise is deliberately incomplete.
Hold Direction Without Target Fixation
The rider looks through the exercise rather than staring continuously at the front tire or the obstacle face. Target fixation on a log tends to produce exactly the steering correction that causes lateral tire movement later.
Prepared Approach vs Last-Second Correction
- A prepared approach has the motorcycle aligned before it enters the obstacle zone.
- A last-second correction means the rider turns, brakes abruptly or changes drive immediately before contact.
The second condition requires a reset rather than a push through.
Pass Gate
Proceed only when the rider can enter on line, maintain predictable drive, stop at the decision point, avoid steering corrections, keep the motorcycle upright and reset calmly.
Stage 3: Cross a Flat Training Marker

Use a Visible Low-Consequence Marker
A flat marker lets the rider rehearse the straight approach, standing readiness, looking through the exit, stable drive, front-wheel passage, rear-wheel passage, continued movement and a planned stop, with almost no vertical demand. The marker dimensions are for the coach to choose.
Front Wheel vs Rear Wheel Awareness
The exercise is not complete when the front wheel passes. The rider holds the selected line until the rear wheel clears and the motorcycle reaches the exit zone, which is the habit that matters most once a real obstacle is involved.
Pass Gate
The rider should cross without looking down, without abrupt throttle or braking, without sitting unexpectedly, without turning during the marker, without losing foot support, and without stopping the moment the front wheel is through.
Stage 4: Use a Very Low Fixed Obstacle
Keep the Approach Predictable
Use the same lane, surface, motorcycle configuration, coach position, visual references and exit zone as the flat-marker exercise. Passing that exercise is not a reason to increase speed.
Use a Conservative Front-Wheel Unweighting Method
Approach straight in the verified low-demand configuration. Stand with feet centered on the pegs, knees and elbows flexed, hips above the pegs, head up, and a light grip. Just before front-tire contact, briefly unload the front by rising slightly and shifting body mass a little rearward as coached—without pulling the handlebar, abrupt throttle, or a deliberate wheelie. As the front clears, return toward neutral so the rear wheel can roll across under steady drive.
Preserve Steering Alignment
The motorcycle should stay on the chosen line throughout contact, since a steering correction at the obstacle is what produces lateral tire movement.
Pass Gate
Proceed only when front-wheel contact and passage stay predictable, with no wheel deflection, no abrupt motor response and no loss of balance.
Stage 5: Manage Front-Wheel Passage
Front-Wheel Contact vs Front-Wheel Impact
- Controlled contact means the motorcycle stays aligned and the wheel follows the coach-selected path over the obstacle.
- Uncontrolled impact means the wheel strikes abruptly, stops, deflects or changes direction.
An uncontrolled impact ends the attempt, and nobody should be told to hit the obstacle harder next time.
Keep the Controls Independent
Front-wheel movement should not cause the rider to open the throttle unintentionally, apply a brake unexpectedly, pull on the handlebar, lose foot support, look down or sit abruptly. Those six reactions are what a coach is watching for at this stage.
Do Not Celebrate Early Clearance
The rider continues following the exit line. The obstacle remains active until the rear wheel has passed and the motorcycle is stable beyond it.
Pass Gate
Pass only when the front wheel clears while the motorcycle retains alignment, drive predictability and control access.
Stage 6: Manage Rear-Wheel Contact

Expect a Second Motorcycle Movement
The rear wheel often produces a different chassis response from the front, because it carries drive force, follows a slightly different wheel path, contacts after the front suspension has already moved, can spin or move sideways, and can lift or unsettle the rear of the motorcycle.
Rear-Wheel Roll vs Rear-Wheel Spin
- Rear-wheel roll means the tire keeps usable traction and advances over the obstacle.
- Rear-wheel spin means the tire rotates without matching forward movement, and it may travel sideways along the obstacle.
Wheelspin here is a stop condition rather than a cue to add power, which is the opposite of what most forum advice suggests.
Maintain the Chosen Direction
The rider should not be steering while the rear tire is on the obstacle. Alignment is established before contact, through the coach’s method, precisely so that no steering input is needed during it.
Pass Gate
Pass only when the rear wheel clears without spinning, sliding sideways, stopping on top, striking a component heavily, pulling the motorcycle off line, or requiring coach intervention.
Stage 7: Continue Through the Exit Zone
Maintain a Clear Exit
The rider continues along the marked line until both wheels are on stable ground and the motorcycle has settled. No exit speed or distance is prescribed.
Front Wheel Clear vs Crossing Complete
- Front wheel clear means only the first part of the motorcycle has passed.
- Crossing complete means both wheels have cleared, the motorcycle is aligned, the rider is balanced, and the planned stopping area is available.
Use a Planned Stop
The rider completes the coach-approved stopping process beyond the obstacle. This is not the moment to introduce immediate turning, a second obstacle, an acceleration test, a jump, a hill, a loose exit or a downhill exit.
Pass Gate
Record the attempt as passed only after the controlled stop is complete.
Low-Speed Roll-Over vs Wheel-Lift Technique
Low-Speed Controlled Crossing
This method suits an obstacle where the coach and the motorcycle can pass the wheels over without an advanced lift, jump or clutch maneuver. The focus stays on alignment, predictable drive, controlled contact, rear-wheel traction and a clear exit.
Deliberate Wheel-Lift Technique
Advanced methods may involve suspension timing, body timing, stronger drive input, precise front-wheel placement, clutch work on gas motorcycles, greater balance demands and considerably greater consequence when mistimed. None of that is taught here, and our other riding guides stay on the same conservative side of that line.
Decision Rule
When an obstacle cannot be crossed through the conservative coach-approved method, the obstacle is too advanced for this ladder. That is a statement about the obstacle rather than about the rider.
Dry Fixed Log vs Wet or Angled Log
Dry Fixed Training Log
A dry log may provide more predictable tire contact when it is stable, fully visible, free from loose bark, positioned on consistent ground and approached through a clear line. Dry does not mean automatically safe.
Wet, Muddy, Smooth, or Angled Log
These conditions may increase tire slip, sideways deflection, surface rotation, unpredictable contact, rear-wheel movement and exit difficulty.
Training Decision
The difficult version is never used to test commitment. A changed obstacle surface creates a new exercise, and depending on what changed, it may mean ending the session rather than adapting to it.
Square Approach vs Angled Approach
More Direct Approach
A coach may select a line that reduces lateral tire travel and keeps both wheels following a similar path across the obstacle.
Angled Approach
An angled line may increase the chance that a tire travels along the obstacle rather than over it, that the front and rear wheels follow different directions, that steering changes during contact, that the motorcycle moves sideways, or that the far-side exit becomes harder.
Why No Angle Is Given
Obstacle shape, trail width, surface, motorcycle geometry and coaching method govern the line, so an exact angle in print would be guesswork. If a sufficiently controlled approach is not available, the crossing does not get attempted.
Seated Crossing vs Standing Crossing
Seated Crossing
Sitting may reduce transition complexity for some riders, though it also transfers more obstacle movement through the seat and limits how the rider can move. Its suitability depends on obstacle size, the motorcycle, rider fit and coaching method.
Standing Crossing
Standing may give the motorcycle more room to move beneath the rider, at the cost of requiring passing standing control and greater physical coordination.
Which Position to Use
For this beginner ladder, use the stable standing baseline: feet centered on secure pegs, knees and elbows flexed, hips over the pegs, torso relaxed, head and eyes through the exit, and one finger ready for each required brake only if that control position is documented for the model. If the rider cannot maintain that posture through the flat-marker stage, do not add obstacle height.
Electric Dirt Bike vs Gas Dirt Bike Obstacle Controls
Gas Dirt Bike
Advanced log methods on a gas machine may use clutch timing, gear selection, engine speed, throttle blips, engine braking and suspension timing. Those instructions do not transfer directly to an electric motorcycle, and most log tutorials online assume them without saying so.
Electric Dirt Bike
An electric dirt bike may remove clutch and manual-shifting tasks depending on the model. It still requires management of immediate motor torque, throttle closure, brake-cutoff behavior, regenerative behavior, traction, steering, suspension movement, battery and motor mass, and the exact ride configuration.
Training Implication
Simpler controls do not make obstacle crossings automatic. An abrupt or poorly timed drive input can cause wheelspin, lateral movement, or an unexpected chassis response; the exact behavior depends on the motorcycle and surface.
Obstacle Contact vs Mechanical Strike
Tire Contact
The tires are expected to meet the obstacle through the coach-approved line, and the rider and coach watch whether wheel travel stays predictable.
Mechanical Strike
A component may contact the obstacle instead, including the frame, skid area, motor housing, chain, sprocket, brake rotor, footpeg, battery enclosure, wiring guard or a suspension component.
Stop and Inspect
Any hard, unusual or uncertain mechanical strike triggers a shutdown, an external inspection, documentation, a review against the exact manual, and qualified service where necessary. The motorcycle still moving is not evidence that nothing was damaged, and our maintenance guide covers the routine checks that make a change easier to spot.
Clear Crossing vs Hang-Up vs Tip-Over
Clear Crossing
Both wheels pass, no component strike occurs, the motorcycle stays on line, and the rider reaches the planned stop.
Hang-Up
The motorcycle stops with a wheel or chassis component resting against or on the obstacle. Nobody should add throttle to force it free, because a machine that breaks loose under power goes somewhere nobody chose.
Tip-Over
After any fall, check the rider first, isolate drive, and inspect controls, levers, bars, wheels, brakes, footpegs, battery retention, wiring, and warning indicators before moving the motorcycle. Reinspect the obstacle, approach, and exit. Do not ride again until every change is resolved; end the session for injury, battery damage, leakage, heat, smoke, odor, or an unresolved fault.
Decision Rule
A hang-up or a tip-over is not a failed score to retry immediately. Both change the motorcycle and the training conditions, and a tip-over is never a routine repetition.
Diagnose Why an Attempt Was Stopped
This matrix helps a coach and rider describe what happened. No single attempt identifies one cause, and the possible categories include the line, the surface, obstacle stability, rider timing, control input, motorcycle fit, tire condition, suspension, brake-cutoff behavior and mechanical faults.
|
Observation |
Conditions to record |
Low-risk checks |
Next decision |
|
Rider stops before contact |
Where, and whether it was planned |
None needed |
Reset at Stage 2 |
|
Front wheel deflects |
Line, obstacle angle, surface |
Obstacle stability and surface |
Stop, reinspect the obstacle |
|
Front wheel stops at the obstacle |
Drive input, approach, obstacle size |
Obstacle size against the method |
Return to an earlier stage |
|
Motorcycle turns during contact |
Steering input, alignment |
Line and approach |
Reset the approach rehearsal |
|
Rear tire spins |
Surface, drive input, tire condition |
Tire and obstacle surface |
Stop the session |
|
Rear tire slides sideways |
Obstacle angle, moisture, alignment |
Obstacle surface and stability |
Stop the session |
|
Motorcycle stops on top |
Position, drive state |
None while mounted |
Isolate drive, follow the recovery plan |
|
Chassis or motor area strikes |
Which component, how hard |
External inspection, powered off |
Stop and inspect fully |
|
Rider sits abruptly |
When in the sequence |
None needed |
Reset at Stage 3 |
|
Throttle changes during contact |
Whether intended |
Throttle return and free play |
Stop if unintended |
|
Brake activates unexpectedly |
Which brake, when |
Lever and pedal position |
Reset, review control access |
|
Motor cuts during the crossing |
Display state, brake input |
Brake-cutoff behavior in the manual |
Stop and verify documented behavior |
|
Chain knocks or skips |
When the noise started |
Chain tension and sprocket condition |
Stop and get service |
|
Warning indicator appears |
Exact message and moment |
Visible wiring and connectors |
Stop and follow the manual |
|
Motorcycle tips over |
Direction, contact point |
Rider first, then the machine |
Stop, inspect, decide on ending |
|
Obstacle moves |
How far, and in which direction |
Obstacle security |
Stop, remove or re-secure it |
EM-5 Pro Small-Obstacle Verification Checklists
Complete this table for the exact stock motorcycle and loaded rider before adding obstacle height. If a control state, clearance margin, or recovery action is unknown, remain on the flat-marker stage..
|
Verification iteml |
Evidence to recordt |
Observed stock behaviory |
Training decisionn |
|
Exact motorcycle |
Model, serial range, manual revision, wheel and tire setup, and tire pressuree |
Ready-to-drive state, non-driving state, brake-cutoff branch, and regeneration behaviorn |
Use only the configuration validated for this exact motorcycle.t |
|
Loaded clearance |
Lowest hard component measured with rider aboard and suspension settledk |
Measured obstacle height plus margin for suspension compressiont |
If clearance or margin is unknown, use a flat marker.e |
|
Obstacle selection |
Dry, secured, fully visible obstacle with a straight near-square approach and clear exitd |
Tires can roll across without planned chassis, motor, battery, rotor, peg, or skid contactt |
Reject the obstacle if any condition is not met.r |
|
Rider baselineX |
Repeatable standing, straight starts, stops, line choice, and flat-marker passagey |
Stable posture, eyes through the exit, and controls independent through both wheel phasesr |
If the baseline fails, do not add obstacle height.r |
|
Course and recovery4 |
Three-bike-length approach and exit, demonstrated stopping-distance abort cone, and fall-radius side bufferss |
Coach and helpers outside wheel, handlebar, fall, and exit paths; shutdown action pre-briefedn |
Any hang-up requires drive isolation before dismount or assistance.k |
|
Mastery gate0 |
Three consecutive clean, coach-recorded repetitions plus one clean repeat after a short rests |
Same setup, no cue or intervention, both wheels clear, and planned stop completedn |
Any reset or stop condition restarts the count.e |

Do not import obstacle techniques from another brand, model, gas-bike clutch tutorial, or modified motorcycle. This method applies only to the exact stock bike, manual revision, control layout, firmware/controller state, wheel and tire setup, and verified brake-cutoff branch used in training.
Motor output never replaces line selection, obstacle inspection, traction, verified clearance, qualified coaching, or a recovery plan. Omit commercial comparisons and disputed specifications from this safety procedure; no published output figure guarantees clearance.
Determine Whether the EM-5 Pro Fits the Rider and Trail

Work through the site, fit and recovery checks before the purchase decision. Can the rider:
- Hold and walk the 143-pound motorcycle with drive isolated
- Reach and operate both brakes
- Keep the throttle closed while repositioning
- Maintain stable standing control
- Follow a straight obstacle line
- Stop before the decision point
- Continue through the exit zone
- Manage the 31.5-inch seat height
- Manage the 17/14-inch wheel platform
- Stay within the 287-pound load limit
- Access a legal motorized training area
- Confirm that small-obstacle practice is permitted there
- Work with a qualified off-road coach
- Recover the motorcycle without unsafe powered movement
If every answer is yes, the Valtinsu EM-5 Pro is worth evaluating properly, and the electric dirt bike collection shows where it sits against the rest of the range. Any no is the thing to resolve first.
Stop the Obstacle Session When
End the session for any of the following, regardless of remaining practice time:
- The obstacle moves
- The obstacle surface becomes wet or unstable
- The approach or exit becomes blocked
- The front wheel deflects
- The rear wheel spins
- The rear wheel moves sideways
- The motorcycle hangs on the obstacle
- A component strikes hard
- The chain skips or knocks
- The throttle responds unexpectedly
- Brake response changes
- Motor drive cuts unexpectedly
- A warning indicator appears
- A tire loses pressure
- A footpeg or control moves
- The rider cannot maintain the line
- There is a fall or tip-over
- Pain, panic or fatigue appears
- Another person enters the practice lane
Unused practice time never justifies another attempt. The obstacle is not going anywhere, and neither is the skill.
Avoid Common Log-Crossing Mistakes
|
Mistake |
Why it increases consequence |
Better decision |
|
Starting with a natural trail log |
Stability, size and far side are all unknown |
Use a coach-secured training obstacle |
|
Using an unsecured round log |
It can roll or rotate under tire contact |
Secure or chock it first |
|
Practicing alone |
Nobody can assist a hang-up or a fall |
Practice with a qualified coach |
|
Copying a double-blip video |
Clutch-based methods do not transfer to electric drive |
Use the conservative method |
|
Trying to wheelie over the obstacle |
Adds balance and timing demands beyond this ladder |
Roll the wheels across as coached |
|
Increasing speed to fix a poor line |
Raises consequence without improving alignment |
Fix the line at an earlier stage |
|
Looking only at the front wheel |
Vision drops and steering corrections grow |
Look through the exit |
|
Turning during obstacle contact |
Produces lateral tire movement on the obstacle |
Establish alignment before contact |
|
Changing ride mode between attempts |
Rider and machine changes cannot be separated |
Hold one configuration per block |
|
Adding throttle after wheelspin |
Traction and obstacle surface both degrade |
Stop the session |
|
Stopping once the front wheel clears |
The rear wheel phase is still ahead |
Continue to the exit zone |
|
Ignoring rear-wheel passage |
The second contact is the one that unsettles the bike |
Treat both wheels as separate stages |
|
Continuing after a component strike |
Hidden damage may remain |
Shut down and inspect |
|
Using a wet or angled log too early |
Lateral slip risk rises sharply |
Use a dry, stable obstacle |
|
Riding downhill over the obstacle |
Adds gravity and braking complications |
Keep the exercise level |
|
Combining two logs |
Timing demands compound |
One obstacle at a time |
|
Treating a tip-over as routine |
Machine and rider condition both change |
Stop and inspect |
|
Retrying without inspecting bike and obstacle |
The same fault repeats on worse conditions |
Reinspect both first |
Conclusion
Verify the prerequisite skills, use a legal closed area, then inspect and secure the obstacle before the motorcycle gets inspected too. Build the recovery plan before the first attempt, walk the line, rehearse the approach without crossing, and cross a flat marker before anything with height is involved.
Progress to a very low fixed obstacle only under coach direction, treat front-wheel and rear-wheel passage as separate stages, and continue through the exit zone before calling an attempt complete. Stop after obstacle movement, wheelspin, a hang-up, a component strike or a tip-over.
Complete the small-obstacle ladder with a qualified off-road coach, then evaluate whether the Valtinsu EM-5 Pro fits both the rider and the legal trail you actually have access to.
FAQs
How should a beginner cross a small log on an electric dirt bike?
Use a dry, stable, secured obstacle in a legal closed area and work with a qualified off-road instructor. Follow this conservative sequence:
- Verify starts, stops, standing control, line choice, and the recovery plan away from the obstacle.
- Measure loaded motorcycle clearance and choose an obstacle that will not require planned chassis, battery, motor, rotor, peg, or skid contact.
- Approach on a clear line as close to 90 degrees as the site allows.
- Manage front-wheel passage, then rear-wheel passage, without a sudden throttle burst.
- Continue through the exit zone before making a planned stop.
What angle should you use when crossing a log?
Approach as close to perpendicular—about 90 degrees—as the site safely allows. A shallow or diagonal approach increases lateral tire travel and the chance that a wheel will slide along the log.
How small should a beginner practice log be?
Use only an obstacle the tires can roll over without planned contact from any hard component. Measure the loaded motorcycle’s lowest point and allow for suspension compression; if that clearance cannot be verified, use a flat marker instead of a log.
Should a beginner lift the front wheel over a log?
Not as the default beginner method. Deliberate wheel-lift techniques require separate coaching and may be necessary for larger obstacles; if the selected log cannot be crossed conservatively without one, choose a smaller obstacle.
What should you do if the electric dirt bike gets stuck on the log?
Stop adding drive and use the recovery plan agreed before the attempt. Then:
- Close the throttle and place the motorcycle in the verified non-driving state.
- Stabilize the rider and motorcycle before anyone changes position.
- Use assistance to lift or move the motorcycle if solo control is uncertain.
- Inspect the battery enclosure, motor area, skid protection, wheels, brakes, pegs, and controls before riding again.
Can a beginner practice on wet or angled logs?
No. Wet, muddy, smooth, decayed, loose, or angled logs add lateral-slip risk and should not be a beginner’s training obstacle; wait for a dry, secured, near-square setup or use a flat marker.
Sources and review status
- Motorcycle Safety Foundation, DirtBike School
- Motorcycle Safety Foundation, Tips & Practice Guide for the Off-Highway Motorcyclist
- Motorcycle Safety Foundation, T-CLOCS Pre-Ride Inspection Checklist
- National Highway Traffic Safety Administration, Motorcycle Safety
- Bureau of Land Management, Off-Highway Vehicles
- USDA Forest Service, Off-Highway Vehicles, San Juan National Forest (maps, permits, registration and local restrictions)


Looking for something else?
Electric Dirt Bike Loses Power Under Load: Causes and How to Fix It
LEARN MORE
Electric Dirt Bike Bolt Torque Checklist: What to Check and Where the Numbers Come From
LEARN MORE
How to Bleed Electric Dirt Bike Brakes Safely
LEARN MORE
Electric Dirt Bike Throttle Not Working: What to Check First
LEARN MORELooking for something else?
Electric Bike Battery Not Charging? Work Through This Before You Buy a New One
LEARN MORE
Electric Dirt Bike Error Codes: What They Mean and What to Check First
LEARN MORE
Electric Dirt Bike Brake Rotor Rubbing: Diagnose the Cause Before Adjusting
LEARN MOREYou may also like
VALTINSU EM-5 Off-Road Electric Dirt Bike
VALTINSU EM-5 Pro Off-Road Black Electric Dirt Bike
VALTINSU EM-5 Pro Green Electric Dirt Bike
VALTINSU EM-5 Ultra Electric Dirt Bike
VALTINSU EM-5 & EM-5 Pro Combo
Further reading
Electric Dirt Bike Trailside Power Loss: Recovery Plan When the Battery Is Dead
Electric Dirt Bike Fall Riding on Wet Leaves: Grip, Hidden Obstacles and Braking
How to Lift a Fallen Electric Dirt Bike Without Hurting Yourself or the Bike