Electric Dirt Bike Standing Attack Position: Build a Stable Trail Foundation
Start with secure foot support and every control reachable: ankles, knees and hips unlocked; torso balanced so the hands stay light; elbows and knees softly bent; head and eyes up; and the motorcycle free to move beneath the rider. Treat this as a functional starting range, not a fixed pose. Learn it first with drive isolated and the motorcycle on a manufacturer-approved stable support.
A useful standing position is not one frozen pose copied from a motocross photograph. On an adult electric off-road motorcycle it is a balanced working range that lets the rider absorb movement, operate the controls, and allow the machine to move without hanging from the handlebar.
Geometry, control layout and rider proportions change the exact position, but the functional baseline remains: feet supported securely, knees and elbows softly bent, joints unlocked, body balanced through the pegs, hands light, eyes up and controls immediately reachable. Acceleration, braking, turning and obstacles then shift that range under qualified instruction.
Define the Standing Attack Position as a Working Range
Standing Position
Standing means supporting the rider primarily through the footpegs while keeping access to the throttle, the brakes and any other model-specific controls. The rider should stay able to adjust rather than lock into place.
Attack Position
The phrase attack position usually describes an active, ready standing range that lets a rider respond to changing terrain, acceleration, braking and direction. The word attack does not mean speed, aggression, racing or commitment to an obstacle, and reading it that way is how beginners get into trouble with it.
Position vs Movement
- Position is the rider’s temporary alignment relative to the pegs, controls, seat and handlebar.
- Movement is the rider’s ability to adjust that alignment as motorcycle forces and terrain change.
A pose that looks correct in a photograph but prevents movement is not a functional trail foundation.
Explain Why Riders Stand on an Electric Dirt Bike
Allow the Motorcycle to Move
Standing can create space for the motorcycle and its suspension to move beneath the rider, instead of transferring every surface change directly through the seat and into the rider’s spine.
Add a Second Layer of Response
The rider’s ankles, knees, hips and torso can respond to movement when they are not locked. No joint angles are prescribed here, because the useful amount of bend depends on the machine, the rider and what the ground is doing.
Improve Access to Balance Adjustments
Standing can make forward, rearward and side-to-side adjustments available when terrain or motorcycle forces change. Seated, several of those adjustments are simply not on the table.
Standing Does Not Replace Suspension or Traction
Rider movement cannot compensate for incorrect motorcycle fit, damaged suspension, loose footpegs, poor tires, incorrect pressure, mechanical faults, excessive speed or terrain beyond the rider’s skill. Standing is also not a way to lower the combined center of gravity, whatever forum posts claim, since the rider’s mass moves upward when they rise.
Standing vs Sitting on an Electric Dirt Bike
Standing
Standing suits rough or changing surfaces, short obstacle approaches, sections requiring active balance, transitions where the rider needs room to move, low-speed coached drills and mild trail irregularities. It costs greater muscular demand, faster fatigue, reduced precision when fit is poor, sometimes harder control reach, and excessive hand load when the timing is wrong.
Sitting
Sitting suits rest, smooth predictable ground, some starts and stops, some corners, low-demand sections, and any situation where the coach directs a seated method.
Decision Rule
The correct choice depends on the task, the surface, the motorcycle, the rider and the coach. Nobody should be told to stand for a fixed percentage of every ride, and our other riding guides treat seated and standing skills as complementary rather than ranked.
Prepare a Legal Closed Practice Area
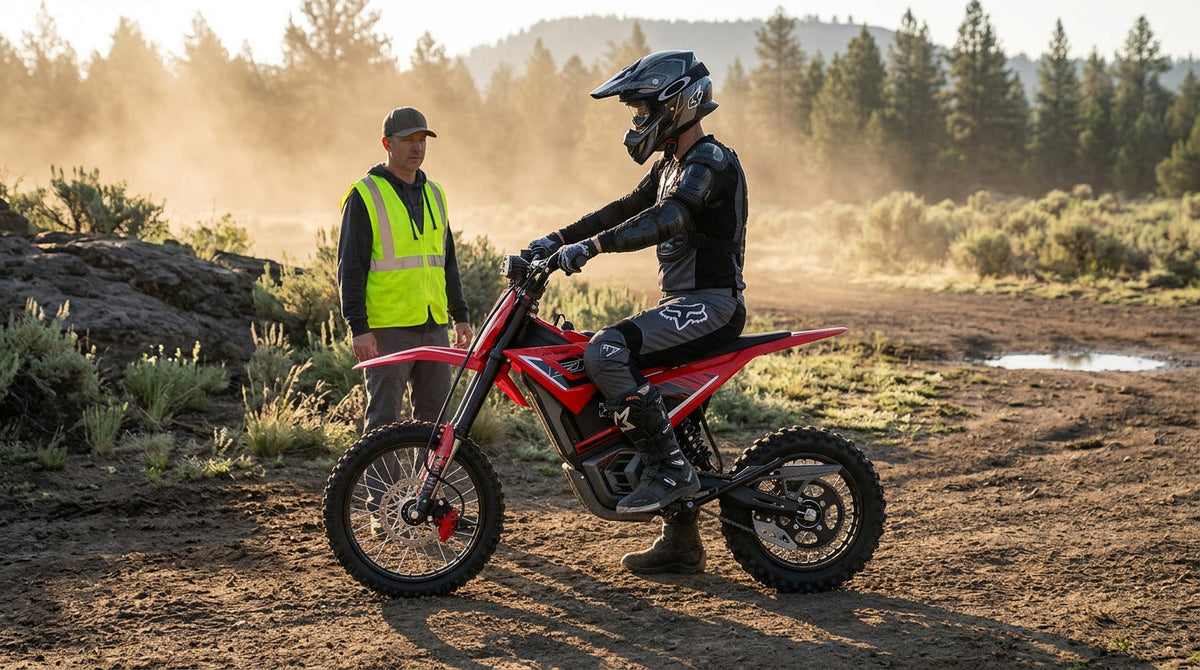
The practice environment is part of the learning system, and full protective equipment is assumed throughout. Our protective equipment checklist covers what a standing session takes for granted.
Start on Level Predictable Ground
Use legal private property, a motorcycle training facility, an approved off-highway practice area, or another location that expressly permits the motorcycle. The area should have consistent traction, clear sightlines and adequate runoff, with no public traffic, pedestrians, animals, steep slopes, mud, deep sand, loose rocks, roots or fixed obstacles. Size a straight walking-pace lane with a transition zone, planned stop zone and clear runoff. Before standing movement begins, verify the runoff exceeds the motorcycle’s no-brake coasting distance at the selected pace. Keep the instructor and observers outside the travel and fall paths.
Separate the Practice Zones
Identify a staging area, a powered-off fit area, a straight movement lane, a sitting-to-standing transition zone, a planned stopping area, the coach position, runoff and an exit path.
Keep the First Surface Consistent
Do not combine dirt, grass, gravel, pavement, mud or sand inside the first standing-position ladder. A surface change requires a new baseline rather than a continuation of the same set.
Inspect the Motorcycle Before Standing Practice

Check the Foot Support System
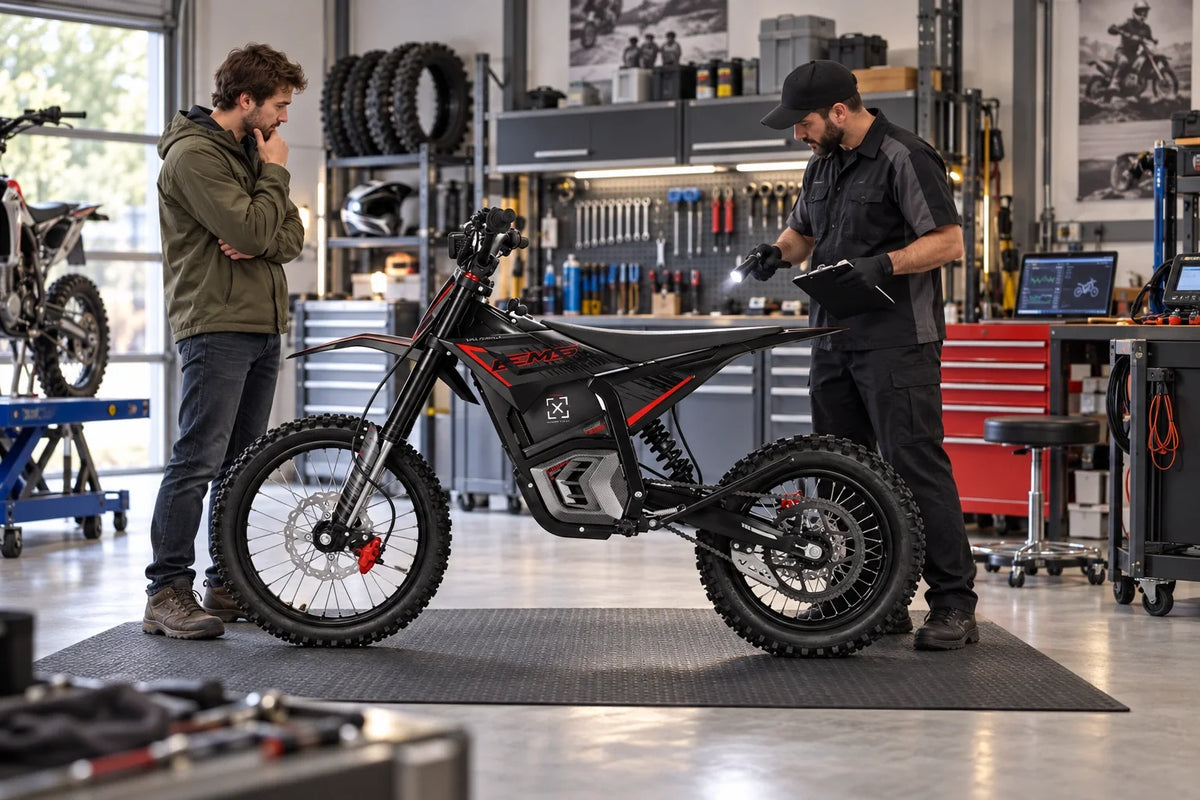
Following the exact manual, inspect the footpegs, peg mounts, pins, springs, fasteners, folding action where fitted, any damage, mud or debris, and the boot contact area. Do not continue when a peg is loose, bent, damaged, blocked or moving differently from its known baseline, because the pegs are the entire foundation of this skill. Our maintenance guide covers the routine version of these checks between sessions.
Check the Controls and Steering
Using the exact EM-5 manual and a product-accurate labeled control image, identify throttle, front-brake control, rear-brake control, manufacturer-designated power/kill state, mode controls and any documented cutoff behavior. Then confirm throttle return, brake condition, handlebar security, cable/hose routing and clearance through full steering movement.
Check the Chassis and Suspension
Inspect tire condition, wheel security, the fork, the rear suspension, battery security, seat security, the frame, the side stand and external wiring. Model-specific procedures sit on the Valtinsu user manual page, and MSF’s T-CLOCS checklist covers the same ground for tires, wheels, controls, levers, steering, suspension, chassis, stands, fasteners and electrical items.
Pass Gate
Begin only when no unresolved mechanical, electrical, fit or control concern remains.
Verify Rider Fit With Drive Isolated
This is the check that gas-bike posture tutorials skip entirely, and it belongs before the motor can deliver any torque at all.
Confirm Safe Mounting and Dismounting
Check whether the rider can mount and dismount without catching a boot, pulling the throttle, pressing an unintended control, losing motorcycle balance, or needing to jump onto or away from the machine.
Confirm Standing Reach
Use only a stable workshop stand or other exact-model support method approved for rider loading; do not load both pegs while the motorcycle rests on an unapproved side stand, and do not make a coach hold the bike by hand unless that method is formally approved. With the manufacturer-designated non-driving state confirmed, stop immediately for stand movement, bike lean, boot snag, control movement or any unexpected power/display state.
Identify Fit Failure
Fit concerns include controls outside usable reach, a wrist forced into an unusable position, knees or boots contacting controls, a rider who cannot rise without pulling the bars, a rider who cannot lower safely, severe crowding, excessive stretch, and a peg-to-handlebar relationship that prevents control access.
Bar, lever, seat, peg and suspension changes are deliberately not recommended in this article. Those questions go to the exact manual and to qualified service, because a guessed modification can make a fit problem worse while looking like a solution.
Use Pass, Reset, and Stop Decisions
Pass
The rider repeats the intended movement with stable support, control access, relaxed steering input and no coach intervention.
Reset
The rider stays calm and the motorcycle behaves normally, but the movement is inconsistent. That might mean pulling lightly on the handlebar, looking down, rising too quickly, returning to the seat abruptly, losing foot position, or needing one coaching reminder. Repeat or simplify the same drill.
Stop
End the session for throttle confusion, brake confusion, an unexpected motor response, peg movement, control interference, rider panic, repeated loss of balance, a fall or tip-over, pain, fatigue, a warning indicator, a mechanical concern, or another user entering the practice area.
Stage 1: Establish Foot Support With the Motorcycle Powered Off
Find a Usable Support Area
Begin with a stable part of each boot supported on the peg, clear of chain, tire and other moving parts, while preserving immediate access to the rear brake or other foot control without resting on it. Foot position changes by task; on narrow trails, keep toes from hanging below the frame. Show the safe zones on exact-model top and side peg images.
Check Left vs Right Support
- The left side may differ because of model-specific controls, peg shape, rider mobility or a previous injury.
- The right side may require different control access or boot clearance.
Do not assume both sides feel identical, because most riders find they do not.
Pass Gate
Proceed only when the rider can support weight through both pegs without standing on a control, catching a boot, leaning heavily on the handlebar, losing motorcycle balance, or moving the throttle.
Stage 2: Rise Without Pulling on the Handlebar

Begin From a Stable Seated State
Before rising, the rider should know that the motorcycle is in its documented non-driving state, the controls are correctly identified, the machine is supported, the coach is positioned safely, and both feet are correctly placed.
Build the Rise Through the Lower Body
With the motorcycle securely supported and drive isolated, rise smoothly through the pegs and lower body without moving the throttle, pulling the bars rearward or leaning the bike. Pause only long enough to confirm light hands and access to both brakes, then lower under control.
Handlebar Support vs Handlebar Dependence
- Handlebar support means the hands maintain steering and control access.
- Handlebar dependence means the rider uses the bar to hold body weight or to avoid falling forward or backward.
Dependence is the single most common fault at this stage, and it shows up later as tired arms and slow control response.
Pass Gate
Proceed only when the rider can rise and lower smoothly while keeping the throttle closed, maintaining control access, avoiding a sudden seat impact, avoiding a heavy pull on the bars, and keeping the motorcycle stable.
Stage 3: Build a Neutral Standing Range
Keep the Lower Body Available
The ankles, knees and hips should stay able to respond. Nobody should be told to lock the knees, squat to a fixed depth, drop the heels a set amount, or grip the motorcycle with maximum force, because every one of those instructions removes the movement the position exists to provide.
Keep the Upper Body Available
The rider should retain steering movement, throttle control, brake access, vision, the ability to move forward or rearward, and the ability to absorb mild motorcycle movement. No exact elbow height or head position is prescribed.
Light Hands vs Loose Control
- Light hands means the rider keeps positive steering and control access without supporting excessive body weight through the bar.
- Loose control means the rider has lost reliable contact with the controls or cannot respond accurately.
Pass Gate
The rider should hold the standing range briefly without shaking, holding their breath, applying excessive hand pressure, locking joints, looking down, losing control access, or resting against the seat as the only means of support. Duration is not the pass gate. Require several consecutive smooth rise-hold-lower cycles, or an instructor-defined consistency threshold, with no throttle movement, bar loading, boot/control interference, joint locking, gaze drop or support movement.
Stage 4: Add Small Powered-Off Balance Movements
Move the Motorcycle Slightly Beneath the Rider
Do not rock, bounce or deliberately shift a supported motorcycle unless the exact model manufacturer approves the stand, load path, movement, spotter position and stop cue. If no approved static balance procedure exists, omit movement on the stand and progress only to the level-ground moving drill under qualified supervision.
Center Recovery vs Frozen Position
- Center recovery means the rider notices a small shift and returns to a usable standing range without grabbing the bar.
- A frozen position means the rider locks the body and lets the shift pull the whole torso along with it.
Check Control Independence
Confirm that minor body movement does not unintentionally open the throttle, apply a brake, press another control, pull wiring, or move the handlebar abruptly.
Pass Gate
Proceed only when the rider can tolerate small motorcycle movement while retaining balance, steering access and control separation.
Stage 5: Practice Sitting-to-Standing Transitions at Low Demand
Select One Documented Motorcycle Configuration
Before powered practice, the instructor must identify the exact manufacturer-documented EM-5 configuration used and why it is appropriate. Keep it unchanged for the drill. If no approved reduced-consequence setting is documented, limit this article to powered-off work and refer the rider to qualified hands-on instruction No universal beginner mode is identified here, because controller programming differs by model, and the documented options for each machine sit on the Valtinsu user manual page.
Separate Movement From the Transition
The rider should first establish predictable straight movement. The coach then cues the transition only when the motorcycle is stable, the lane is clear, the throttle input is predictable, the rider is looking ahead, and the stopping area remains available.
Controlled Transition vs Dropping Onto the Seat
- A controlled transition means the rider rises and lowers without a large handlebar input or a sudden seat impact.
- An abrupt transition means the rider pulls on the bars, changes throttle unintentionally, or drops onto the seat.
Pass Gate
Proceed only when the rider can transition in both directions while maintaining a straight path and consistent control.
Stage 6: Hold the Standing Range During Steady Movement

Use a Straight Predictable Lane
The rider focuses on looking toward the planned path, maintaining steady drive, keeping both feet supported, keeping the hands available, allowing mild chassis movement, and reaching the planned stopping area. No speed or distance is prescribed.
Observe the Motorcycle-Rider Connection
The coach watches whether the rider hangs behind the bar, falls toward the front, locks the knees or hips, changes the throttle over bumps, looks down, moves the feet off the usable support area, or loses the adjustability of the upper body. Seven things to watch, and still only one correction per set.
Pass Gate
Proceed only when the rider maintains a repeatable standing range without unintended control inputs, lane departure or coach intervention.
Stage 7: Adapt to Mild Acceleration and Deceleration
Steady Movement vs Acceleration
- Steady movement needs a balanced range for predictable travel.
- Acceleration requires the rider to anticipate the motorcycle moving forward beneath the body.
No exact forward movement, hip location or torso angle is prescribed for that anticipation.
Steady Movement vs Deceleration
Deceleration changes the force felt through the rider’s body and hands. The rider follows the exact coach-taught response rather than letting the handlebar catch their body weight, and no exact rearward position is given here either.
Throttle Closure and Brake Coordination
Keep this drill inside the starting and stopping skills the rider has already passed. Riders who have not built those yet should work through our 30-minute beginner practice plan before adding standing under drive.
Pass Gate
Proceed only when mild acceleration and deceleration do not cause a heavy handlebar pull, a sudden throttle change, loss of foot support, abrupt sitting, lane departure or panic.
Optional Next Lesson — not part of this foundation drill
Use a Coach-Approved Low-Consequence Feature
The feature should be legal, visible, predictable, consistent, within the rider’s passed control level, and supported by adequate runoff. No dimensions are specified, and this stage does not introduce logs, jumps, whoops, rocks, roots, ruts or drops.
Absorption vs Jumping
- Absorption means the rider lets the motorcycle and their own joints respond to a mild surface change while maintaining contact and direction.
- Jumping introduces takeoff, flight, landing, timing and impact demands that have no place in a foundation drill.
Pass Gate
The rider should cross the feature while maintaining the intended path, keeping control access, avoiding a throttle surge, avoiding locked joints, avoiding a sudden seat impact, and reaching the planned stopping area. Any wheel deflection, loss of line or rider panic ends the block.
Neutral Standing vs Acceleration vs Braking Position
Neutral Standing Range
The neutral range applies during predictable steady movement, where the rider needs balanced access to adjustments in any direction.
Acceleration Response
The rider anticipates drive force so that the arms do not become the only structure preventing rearward body movement.
Deceleration Response
The rider anticipates slowing force so that body weight does not collapse into the handlebar.
Core Principle
The rider moves in response to motorcycle forces rather than holding one static pose through every phase. That is why this article gives no weight percentages, no head-over-bar rule, no hip-over-peg rule, no fixed torso angle, no fixed seat gap and no universal acceleration or braking position.
Standing Position vs Motorcycle Fit Problem
Possible Technique Issue
Technique issues look like rising by pulling the bar, looking down, holding excessive hand pressure, staying too rigid, sitting abruptly, or reacting late to acceleration and deceleration. Treat them as a technique only after the motorcycle has been confirmed serviceable and reasonably fitted.
Possible Fit or Setup Issue
Fit issues look like controls that cannot be reached while standing, boots interfering with controls, a peg-to-bar relationship creating severe crowding or stretch, a lever position preventing safe use, an inability to transition without losing control, protective equipment blocking movement, or a motorcycle size the rider cannot manage safely.
Decision Rule
More practice never fixes unsafe fit, and practicing through it tends to build compensations that are harder to unlearn later. Risers, lower pegs, lever rotation, suspension changes and custom controls all require exact compatibility and qualified setup rather than a guess.
Standing Fatigue vs Poor Position
Normal Early Muscular Demand
A new rider may notice unfamiliar effort in the legs, hips, trunk, hands or shoulders. That is ordinary, and this article makes no medical claims and prescribes no exercise program.
Position Breakdown
Warning signs include increasing hand pressure, locked knees or elbows, repeated sitting without control, slower control response, looking down, holding the breath, shaking, missing the controls, pain, and a reduced ability to follow coaching.
Stop Rule
End the drill before fatigue changes control quality. A fixed standing duration proves nothing about readiness, and riders who chase one tend to keep going well past the point where the position has already broken down.
Common Standing-Position Symptoms and Next Decisions
This matrix helps a rider and coach describe what happened. It does not diagnose one cause, and the common mistake is blaming everything on weak core strength, poor fitness or the wrong bars when observation, fit verification and inspection have not been done yet.
|
Observed symptom |
Conditions to record |
Low-risk checks |
Next decision |
|
Rider hangs from the handlebar |
Which stage, how long standing |
Peg support and control reach |
Return to Stage 2 |
|
Rider falls forward when the throttle closes |
Speed, deceleration rate |
Foot position and hand pressure |
Reset at Stage 7 |
|
Rider is pulled rearward during acceleration |
Drive input, mode |
Anticipation and foot support |
Reset at Stage 7 |
|
Throttle changes over small bumps |
Surface, hand position |
Throttle return and grip pressure |
Stop if unintended drive occurs |
|
Feet repeatedly move on the pegs |
Boot type, peg condition |
Peg surface, debris, boot contact |
Return to Stage 1 |
|
Rider cannot reach a brake control |
Standing or seated, which control |
Control reach with drive isolated |
Stop, verify fit |
|
Knees or boots contact controls |
Which control, when |
Clearance through steering movement |
Stop, verify fit |
|
Rider feels cramped |
Peg-to-bar relationship, rider height |
Standing reach assessment |
Verify fit before more practice |
|
Rider feels excessively stretched |
Same conditions |
Standing reach assessment |
Verify fit before more practice |
|
Rider sits down abruptly |
Which stage, fatigue level |
None needed |
Reset or end the session |
|
Rider cannot look ahead |
Stage, confidence, helmet fit |
Vision and equipment |
Reset at an earlier stage |
|
Pain or numbness develops |
Location, onset, duration |
None. Stop first |
End the session |
|
Motorcycle feels unstable while standing |
Surface, support method, speed |
Tires, wheels, suspension, pegs |
Stop and inspect |
Electric Dirt Bike vs Gas Dirt Bike Standing Demands
Gas Dirt Bike
A gas machine may require coordination of the clutch, gear selection, engine response, engine braking, a rear foot brake and other model-specific controls, all while standing.
Electric Dirt Bike
An electric dirt bike may remove clutch and manual-shifting tasks depending on the model. It still requires management of immediate motor response, throttle closure, brakes, steering, foot support, battery mass, motorcycle weight, ride modes and regenerative behavior where fitted.
Training Implication
Fewer controls do not create a universal standing pose. The rider verifies the exact layout of their own machine before applying any gas-bike instruction to it, and most standing tutorials online assume a clutch without ever saying so.
EM-5 Standing-Fit Check and Known Measurement Gaps

No model here is universally easiest to stand on. What differs is seat height, weight, wheel size, the peg-to-control relationship and how drive arrives.
|
Model |
Seat height and weight |
Wheels and geometry |
Peg-to-control fit |
Standing-practice concern |
|
28.3-inch seat, 126 lb net, 243 lb maximum load |
14-inch front and 12-inch rear wheels, 43.3-inch wheelbase, 27.2-inch handlebar width |
Compact platform, so control reach and boot clearance both need checking with drive isolated |
An unintended throttle movement can produce unexpected drive. Keep the throttle closed during the rise/lower transition and stop immediately if drive changes. Do not use a disputed torque value or an invented rider mass to justify the rule |
|
|
31.5-inch seat, 143 lb net, 287 lb maximum load |
17-inch front and 14-inch rear wheels, 41.7-inch wheelbase |
Larger platform changes both standing reach and the peg-to-bar relationship |
A step-up machine at 5,600W peak, adults only at 18+. More output raises the cost of an unintended throttle input while standing |
|
|
Sur-Ron Light Bee X |
Light platform, removable battery |
Model-specific geometry |
Widely documented, though many bikes in circulation are modified |
Established aftermarket, large owner community, race visibility and strong resale recognition. Modified bars, pegs, seats or suspension change standing fit, so setup should be verified rather than assumed |
|
Talaria Sting R MX4 |
Larger platform, weight varies by version |
Larger wheel configuration on common versions |
A different peg-to-control relationship from the EM-5 |
Gearbox-driven with model-specific regeneration. Its standing position does not transfer directly to the EM-5 |
Competitor market claims do not help a rider build a standing position. For the EM-5, verify control reach, approved rider age, recoverable mass, peg support and the exact control state in person before powered practice.
Seat height alone cannot establish standing fit. Until Valtinsu publishes stock peg height and the horizontal and vertical peg-to-grip relationship using a documented method, treat standing fit as an in-person check using the manufacturer-approved support and non-driving state—not a spec-sheet conclusion.
Determine Whether the EM-5 Fits the Adult Learner
Work through the powered-off fit and transition checks before the purchase decision. Can the rider:
- Mount and dismount safely
- Hold and walk the 126-pound motorcycle with drive isolated
- Reach both brake controls
- Keep the throttle closed while rising
- Stand without hanging from the bars
- Maintain usable foot support on both pegs
- Transition smoothly between sitting and standing
- Manage the compact 14/12-inch wheel platform
- Stay within the 243-pound maximum load
- Access a legal practice area
- Work with a qualified off-road coach
If every answer is yes, the Valtinsu EM-5 is worth evaluating properly, and the electric dirt bike collection shows where it sits against the rest of the range. The EM-5 lists three speed settings, and those are documented settings rather than a skill ladder to climb. If any answer is no, that is the thing to resolve first.
Stop the Standing-Position Session When
End the session for any of the following, regardless of remaining practice time:
- Throttle and brake confusion
- An unexpected motor response
- The rider cannot reach a control
- A boot catches a control or component
- A footpeg moves or feels damaged
- A handlebar or steering concern appears
- The rider repeatedly hangs from the bars
- Lane departures repeat
- The rider cannot transition safely
- There is a fall or tip-over
- Pain or numbness develops
- Panic or shaking appears
- Fatigue starts changing control quality
- A warning indicator appears
- A tire, wheel, suspension, battery or drivetrain concern appears
- Another person or vehicle enters the area
- Surface conditions change unexpectedly
Unused practice time never justifies continuing after a stop condition. Pain and numbness in particular are the two most commonly ignored, and both are worth respecting the first time they appear.
Avoid Common Standing-Position Mistakes
|
Mistake |
Why it weakens control |
Better decision |
|
Copying one professional rider’s exact pose |
Their machine, proportions and terrain are all different |
Build a working range on your own bike |
|
Practicing under power before checking fit |
A fit problem gets mistaken for a skill problem |
Verify fit with drive isolated first |
|
Pulling on the handlebar to stand |
Loads the arms and reduces control response |
Rise through the pegs and lower body |
|
Locking the knees or elbows |
Removes the movement the position exists to provide |
Keep the joints available |
|
Looking at the front wheel |
Vision drops and steering corrections grow |
Look toward the planned path |
|
Standing on or against a foot control |
Unintended input and lost support |
Reposition on the peg |
|
Gripping harder when balance changes |
Adds handlebar dependence at the worst moment |
Recover through the lower body |
|
Using a higher mode to make standing feel easier |
Raises consequence without improving position |
Hold one approved configuration |
|
Moving directly onto rough terrain |
Demand outruns the foundation |
Follow the ladder in order |
|
Practicing until fatigue changes technique |
Every later repetition trains the wrong habit |
End the session earlier |
|
Adding hills or obstacles too soon |
Combines new forces with an unproven position |
Pass the earlier stages first |
|
Adjusting bars, levers, pegs or suspension by guesswork |
May create a new hazard while hiding the original one |
Use the manual and qualified service |
|
Treating standing as mandatory everywhere |
Produces fatigue and reduced precision |
Choose the position for the task |
|
Assuming gas-bike control methods transfer |
Clutch-based instructions do not apply to most electric models |
Verify the exact layout first |
Conclusion
Inspect the motorcycle, then verify rider fit with drive isolated before anything moves. Establish stable foot support, learn to rise without pulling on the bar, and build a neutral standing range you can actually adjust from.
Practice controlled transitions, hold the range during steady movement, adapt to mild acceleration and deceleration, and add only a low-consequence surface feature at the end. Stop before fatigue or deteriorating control changes the position into something else.
Complete the standing-position ladder with a qualified off-road coach and verify fit before reviewing the Valtinsu EM-5.
FAQs
What is the proper standing attack position on an electric dirt bike?
It is a flexible standing range that keeps the rider supported by the footpegs while preserving control reach, vision, and room for the motorcycle to move. Useful checkpoints are:
- Feet stable on the pegs with access to any model-specific foot controls
- Ankles, knees, and hips flexed rather than locked
- Hands light enough to steer and operate the controls without supporting body weight
- Elbows and shoulders relaxed, with eyes looking through the intended line
Should a beginner sit or stand on an electric dirt bike?
Both positions are useful. Sitting suits smooth ground, rest, and many starts and stops; standing can improve movement over rough ground, but it should be added only after basic controls, fit, starts, and stops are consistent.
Where should your feet be when standing on a dirt bike?
Place the boots where they provide stable peg support and let the rider reach the controls without twisting, hooking, or moving close to rotating parts. Exact placement varies with peg shape, boot design, rider mobility, and whether the motorcycle has foot controls.
Should your knees grip the motorcycle while standing?
Use enough lower-body contact to guide the motorcycle without clamping it rigidly. Constant maximum pressure increases fatigue and removes the joint movement that allows the bike to move beneath the rider.
Why do my arms get tired in the attack position?
Arm fatigue often means the hands are supporting body weight instead of controlling the motorcycle. Check for:
- Hips too far behind or ahead of the supporting foot position
- Locked elbows, raised shoulders, or excessive grip pressure
- Late body response during acceleration or deceleration
- Poor handlebar or lever reach, unsuitable motorcycle fit, or general fatigue
How should a beginner practice standing control?
Build the skill from stationary fit to simple movement; do not begin on a rough trail. Use this progression:
- Verify peg support and control reach with the motorcycle powered off.
- Practice smooth sit-to-stand and stand-to-sit transitions while stationary.
- Ride a straight line at walking pace in the approved low-output setting.
- Add mild acceleration and deceleration without pulling on the bars.
- Introduce one small surface feature only after the earlier stages are repeatable.
Sources
- Motorcycle Safety Foundation, DirtBike School
- Motorcycle Safety Foundation, Tips & Practice Guide for the Off-Highway Motorcyclist
- Motorcycle Safety Foundation, T-CLOCS Pre-Ride Inspection Checklist
- National Highway Traffic Safety Administration, Motorcycle Safety
- Bureau of Land Management, Off-Highway Vehicles
- USDA Forest Service, Off-Highway Vehicles, San Juan National Forest (maps, permits, registration and local rules)


Looking for something else?
Electric Dirt Bike Loses Power Under Load: Causes and How to Fix It
LEARN MORE
Electric Dirt Bike Bolt Torque Checklist: What to Check and Where the Numbers Come From
LEARN MORE
How to Bleed Electric Dirt Bike Brakes Safely
LEARN MORE
Electric Dirt Bike Throttle Not Working: What to Check First
LEARN MORELooking for something else?
Electric Bike Battery Not Charging? Work Through This Before You Buy a New One
LEARN MORE
Electric Dirt Bike Error Codes: What They Mean and What to Check First
LEARN MORE
Electric Dirt Bike Brake Rotor Rubbing: Diagnose the Cause Before Adjusting
LEARN MOREYou may also like
VALTINSU EM-5 Off-Road Electric Dirt Bike
VALTINSU EM-5 Pro Off-Road Black Electric Dirt Bike
VALTINSU EM-5 Pro Green Electric Dirt Bike
VALTINSU EM-5 Ultra Electric Dirt Bike
VALTINSU EM-5 & EM-5 Pro Combo
Further reading
Electric Dirt Bike Trailside Power Loss: Recovery Plan When the Battery Is Dead
Electric Dirt Bike Fall Riding on Wet Leaves: Grip, Hidden Obstacles and Braking
How to Lift a Fallen Electric Dirt Bike Without Hurting Yourself or the Bike