Electric Dirt Bike Spoke Tension: Safe Checks Without Warping the Wheel
A single loose spoke feels like a simple fix. Reach in with a spoke wrench, snug it up, done. That instinct is why plenty of wheels end up worse after maintenance than before, because a spoked wheel holds its shape through balanced tension across every spoke at once. Change one and you have changed the rim.
|
Before you start This guide is intended for inspection and general maintenance guidance. Model-specific wheel, axle and spoke specifications should always come from the applicable manufacturer documentation. It also assumes your bike has spoked wheels. Valtinsu publishes wheel diameters but does not state wheel construction for its models, so confirm what you actually have before working through this. If your wheels are cast, nothing in the spoke sections applies. |
What Is Electric Dirt Bike Spoke Tension?

Spoke tension is the pulling force in a spoke after the wheel is assembled. Each spoke pulls the rim toward the hub, and the rim holds its shape because those pulls balance against each other around the whole wheel. Park Tool puts it plainly: tension is not just about individual spokes, and good tension looks at the entire wheel system, aiming for consistently good tension between all of them.
Three related but separate things get confused constantly:
- Tension. How hard each spoke pulls.
- Trueness. How accurately the rim runs, side to side and up and down.
- Dish. Whether the rim sits centred relative to the hub and the fork or swingarm.
A wheel can be true and badly tensioned, or correctly tensioned and incorrectly dished. Diagnosing one while ignoring the others is how riders chase the same problem twice.
Why Spoke Tension Matters on an Electric Dirt Bike
Park Tool describes the mechanism: as a wheel rolls it flattens slightly where it meets the ground, and the spokes at the bottom briefly lose tension. That cycle repeats through every ride. If overall tension is too low, spokes relax too far, creating a snapping effect that stresses spokes and rim alike, which Park Tool links to de-tensioning, broken spokes, rim fatigue and a wheel that goes out of true more often. Too high, and the failure modes flip to cracked rims, broken spokes and damaged hubs.
An adult electric dirt bike ridden off road sits at the demanding end of that: real machine and rider weight, repeated impacts, uneven loading. That makes regular inspection worthwhile. It does not mean motor torque causes spoke failure, and this article makes no such claim.
What Are the Signs of Loose Dirt Bike Spokes?

The common signs: a spoke that feels slack against its neighbours, side-to-side wobble, up-and-down hop, pinging, and spokes that keep loosening in the same area. Each is a reason to inspect the whole wheel rather than reach for a spoke wrench.
One spoke feels loose
Compare it with the spokes either side and with those across the wheel before deciding anything. A single outlier can be a loose nipple, a stretched or damaged spoke, a cracked rim at that spoke hole, or the visible edge of a broader imbalance. Look at the spoke itself too: a bend, a crack near the head or threads, or a rounded nipple all change the answer, because none of those is fixed by turning the nipple.
Wheel wobble or lateral runout
Side-to-side rim movement as the wheel turns. Uneven lateral tension is one cause; a bent rim, incorrectly seated axle, bearing play or tire seating problem are others, and they feel similar from the saddle.
Radial hop or up-and-down movement
The rim rises and falls as it rotates rather than moving sideways. Radial tension variation can produce it, but so can a rim that has taken an impact, a tire bead that has not seated evenly, or a damaged casing. Keep the two separate: lateral is side to side, radial is up and down, and a wheel can be fine in one axis and out in the other.
Spoke pinging
A sharp click or ping, usually after a ride or during slow rotation, often from crossing spokes settling against one another or tension redistributing after assembly. Occasional pinging on an otherwise stable, true wheel is low concern. Persistent pinging alongside a newly loose spoke, wobble, repeated tension loss, cracked spokes or damaged nipples needs inspection. On its own it proves nothing about whether tension is correct.
Repeatedly loose spokes
The most diagnostic sign in the list, and the one riders most often paper over. One spoke loosening once can be normal settling on a newer wheel. The same spoke or area loosening repeatedly points at something structural: a cracked rim at the spoke hole, a damaged or fatigued spoke, a nipple that will not hold, or an uneven tension pattern that keeps redistributing. Retightening it weekly treats the symptom.
How Do You Safely Check Electric Dirt Bike Spoke Tension?

Work the wheel in a fixed order, bike off and supported, and inspect everything before adjusting anything.
Step 1 — Power off and secure the bike
Switch the bike off and remove or isolate the battery where practical. Support it on a stable stand so the wheel rotates freely and the machine cannot shift. Never work around a wheel while the bike is powered, and keep hands clear of the chain, sprocket and rotor.
Step 2 — Inspect every spoke visually
Go around the whole wheel once, looking rather than touching:
- Broken, cracked or bent spokes
- Missing spokes
- Damaged, rounded or seized nipples
- Corrosion at the nipple or spoke threads
- Nipples that have obviously backed off
- Cracks in the rim, particularly around spoke holes
- Rim deformation, flat spots or dents
Step 3 — Compare neighbouring spokes
You want relative consistency, not identical feel across the whole wheel. Compare each spoke with those beside it on the same side, then work around the rim looking for outliers. Do not expect both sides to match. Park Tool explains why: on rear and disc-brake wheels one side reads lower overall, because spokes leave the hub at different bracing angles and the larger angle needs less tension to counter the other. That is normal when dish is correct, not a fault.
Step 4 — Perform a gentle spoke-pair check
Squeeze adjacent spokes gently and compare resistance around the wheel. Park Tool treats this as a legitimate estimating technique and notes it beats judging tension by how hard the nipple turns, since a stiff nipple can simply mean corrosion or a spoke at the end of its threads. Treat it as screening. It finds outliers. It does not produce a number.
Step 5 — Spin the wheel and check trueness
Rotate the wheel slowly against a fixed reference and watch the rim, not the tire. Check side-to-side movement, up-and-down movement, and whether the rotor is moving too. Then check the tire, since a poorly seated bead imitates a rim problem.
AMSOIL demonstrates a practical version for dirt bike wheels: tape a marker to each side of the rim with the tip a small distance away, spin the wheel, and treat any spot where the marker leaves a line as out of specification. Their demonstration uses 2 mm as the example gap, and directs readers to the owner manual for the actual run-out figure. That instruction is the important half. The AMSOIL dirt bike spoke guide has the full method.
What Is Wheel Trueness?
Wheel trueness describes how accurately the rim rotates. Two separate components, and a wheel can pass one and fail the other.
Lateral trueness
Side-to-side rim deviation as the wheel turns. Possible causes include uneven lateral spoke tension, a bent rim, an incorrectly seated axle, wheel bearing or hub play, and tire or rim seating problems.
Radial trueness
Up-and-down deviation, felt as hop. Possible causes include uneven radial tension, a rim damaged by impact, a tire bead that has not seated evenly, and a damaged tire casing.
Why a straight-looking wheel can still have a tension problem
Because trueness and tension are different measurements. A badly tensioned wheel can be trued by pulling some spokes tighter and letting others go slack, so the rim looks correct while the pattern underneath is poor. It will not stay true: low-tension spokes keep loosening under load and the rim drifts back out, which is exactly the repeatedly-loose-spoke pattern above. Visual straightness is necessary but not sufficient.
How Do You Check Wheel Dish and Hub Stability?

What is wheel dish?
Dish is the rim’s centring relative to the hub, and so its position between the fork legs or swingarm. A wheel can be perfectly true and still sit off-centre.
Signs of incorrect dish
- The rim looks off-centre between the fork legs or swingarm
- Clearance is noticeably uneven side to side
- The brake caliper sits oddly relative to the rotor
- Tension differs sharply between sides beyond what bracing angle explains
- Tire clearance to the frame or swingarm is uneven
Park Tool treats dishing as its own procedure, separate from truing and tension, and notes that adjusting tension on a wheel with different bracing angles can shift dish slightly. Another reason to check all three.
Check the hub and axle before adjusting spokes
The single most valuable step here. Before touching a nipple, confirm the movement you are chasing is actually at the rim.
- Is the axle correctly seated and secure?
- Is there play at the hub when you rock the wheel?
- Do the wheel bearings feel smooth when the wheel spins?
- Are the spacers present and correctly positioned?
- Is the fork or swingarm alignment correct?
|
The rule that saves wheels You cannot fix hub play, bearing wear or a loose axle by tightening spokes. Tightening spokes to chase movement that originates at the axle or bearing adds tension the wheel does not need and leaves the actual fault in place. |
Can You Check Spoke Tension by Sound?

Sound is a rough relative screening method, not a tension measurement. It can point you at an obvious outlier. It cannot tell you whether the wheel is correctly tensioned.
What spoke pinging can tell you
Tapping spokes and comparing tone across similar spokes on the same side can highlight one that is noticeably different. Useful as a quick screen, and it costs nothing.
Why sound is not a tension measurement
Tone changes with variables that have nothing to do with whether tension is correct:
- Spoke diameter and gauge
- Spoke length
- Spoke material
- Spoke profile, round or bladed
- Crossing pattern and where spokes touch
- Position in the wheel and bracing angle
- Tension in the surrounding spokes
- Corrosion, damage or contamination
Two correctly tensioned spokes can sound different, and two that sound alike can carry different tension. When a number matters, sound is not the tool.
How to Use a Spoke Tension Meter Correctly

What does a spoke tension meter measure?
A tension meter flexes the spoke between posts with a calibrated spring and reads the deflection on a scale. That reading is then cross-referenced against a conversion table to give tension, typically expressed in kilograms-force or newtons. The Park Tool tension guide walks through the full sequence.
The raw reading is not the tension. The conversion table turns it into a figure, and that table depends on knowing the spoke.
Why meter compatibility matters
Park Tool’s procedure starts by determining spoke material, testing with a magnet for steel, then measuring diameter or, for bladed spokes, dimensions. Only then does the conversion table apply. Before trusting a reading, confirm:
- Spoke material
- Spoke diameter or blade dimensions
- Spoke profile
- The meter’s supported measurement range
- That the meter is in calibration
- That a conversion table exists covering your spoke
- The wheel manufacturer’s target specification
Calibration is not a formality. Park Tool calibrates its TM-1 at the factory, advises against manual readjustment, and offers recalibration for worn or damaged tools. A dropped or worn meter produces numbers, not measurements.
Should you use a bicycle spoke-tension meter on an electric dirt bike?
Only if you have verified it covers your spoke, and never by borrowing the bicycle target figures along with it.
A tool is not automatically suitable because it is called a spoke tension meter. Check supported diameter, profile and measurement range against what your wheel uses. If your spoke sits outside what the tool and its conversion table cover, the reading is meaningless.
|
Do not transfer bicycle tension figures Park Tool notes most bicycle rims have suggested ranges of roughly 100 to 120 kilograms-force, or 980 to 1177 newtons, with no pressure in the tire. That is bicycle rim guidance from a bicycle tool manufacturer. Do not apply it to an electric dirt bike wheel. Different rim, different spoke, different loads. Use the specification from your bike or wheel manufacturer, and if you cannot obtain one, professional wheel service is the safer route than guessing. |
Relative tension versus absolute tension
Relative tension is how each spoke compares with the others in the same wheel. Absolute tension is the actual measured force against a target figure.
For most owners, relative consistency is the achievable goal. Park Tool offers a bicycle-wheel benchmark for it: spokes within plus or minus 20 percent of the wheel average are generally considered acceptable relative tension, and its Wheel Tension App is built around that balancing process. Treat it as a reference for how balance is judged, not as a Valtinsu figure. What you should not do is invent an absolute target. If your manual does not give one and the wheel manufacturer cannot either, hand the wheel to someone who can measure it properly.
Why You Shouldn’t Tighten Every Spoke Until They Sound the Same

The problem with "tighten the loose one"
Tightening a single loose spoke pulls the rim toward that spoke’s side at that point. If the rim was true before, it is less true afterwards, and if nearby spokes are also low you have created a local high-tension spot in an already uneven pattern. A loose spoke is information about the wheel, not just about that spoke.
Why over-tightening is dangerous
Park Tool is direct: too much tension can cause wheel failures including cracked rims, broken spokes and damaged hubs. Add rim distortion, seized nipples and a pattern that will not hold. More tension is not safer.
Why sequential tightening can distort a wheel
Working around the rim tightening each spoke in order concentrates correction wherever you happen to be. By the far side, the rim has already moved and you are correcting against a shape you created. That is the mechanism behind most self-inflicted warping. Not carelessness, just the wrong order.
What Is the Safe Spoke Adjustment Pattern?
Distributed, small and repeatedly checked. Corrections spread around the wheel rather than concentrated, in small increments, with trueness rechecked between passes.
AMSOIL describes a distributed pattern for dirt bike spoke tensioning: start at a reference such as the rim lock or valve stem, then check every third spoke around the wheel, on the basis that most dirt bike wheels have 36 spokes so this spreads tension evenly, much like lug nuts in a star pattern. After one revolution you return to the start, move one spoke forward and repeat until every spoke is covered. Their truing sequence follows the same logic: small adjustments first, loosening a quarter turn on the bent side, then tightening the opposite side by the same amount and rechecking each time.
|
An important qualification A distributed adjustment pattern such as an every-third-spoke sequence is used in some wheel-tension procedures to spread corrections. The correct sequence depends on the wheel design and the manufacturer service procedure, including spoke count, which may not be 36 on your machine. Do not treat any pattern here as a Valtinsu specification. Valtinsu does not publish a spoke count, spoke torque, tension figure or adjustment sequence. |
Spoke Problem or Another Wheel Problem?
Before adjusting anything, work the row that matches what you are seeing.
|
What the rider notices |
Possible spoke issue |
Other possible cause |
Safe distinction |
|
One spoke feels loose |
Low tension, loose nipple or broken spoke |
Damaged rim or impact damage |
Inspect neighbouring spokes and the rim, not only the loose spoke |
|
Side-to-side wobble |
Uneven lateral tension |
Bent rim, axle seating or bearing play |
Check hub and axle before touching a nipple |
|
Up-and-down hop |
Uneven radial tension |
Tire bead, tire casing or bent rim |
Inspect tire seating and rim separately |
|
Spoke pinging |
Spokes settling or contacting at crossings |
Loose nipple or damaged spoke |
Pinging alone proves nothing about tension |
|
Wheel feels unstable |
Tension loss |
Loose axle, wheel bearing or suspension hardware |
Locate where the movement actually originates |
|
Brake rotor rubs |
Wheel or rim alignment |
Bent rotor or caliper alignment |
Watch whether the rim or the rotor is moving |
|
Rear-wheel vibration |
Spoke or rim issue |
Tire, chain, sprocket, chain guide or bearing |
Check the whole rear assembly first |
|
Repeatedly loose spoke |
Nipple or tension-pattern problem |
Rim crack or spoke fatigue |
Inspect the rim hole and the spoke itself |
|
Rim appears off-centre |
Incorrect dish |
Axle, fork or swingarm alignment |
Measure clearance on both sides |
Spoke Tension Versus Wheel Bearing Problems
These get confused constantly, because both produce wobble. The distinction is where the movement lives.
|
Problem |
Typical clues |
|
Spoke problem |
An individual loose spoke, several inconsistent spokes, rim wobble, lateral or radial runout, pinging, visible spoke or nipple damage |
|
Bearing problem |
Play at the hub rather than the rim, rough or gritty rotation, grinding, noise that changes with wheel speed |
|
Axle problem |
Wheel movement with the hub and rim moving together, incorrect seating, loose hardware, alignment error |
The quick test: rock the wheel and watch whether the rim moves relative to the hub, or the hub moves relative to the axle. Rim to hub points at spokes. Hub to axle points at bearings or axle installation.
Front Wheel Versus Rear Wheel Spoke Inspection
Front: spokes, rim, hub, bearings, axle, tire, brake rotor and caliper, fork clearance.
Rear: all of the above plus chain, both sprockets, chain guide, chain slider and rear wheel alignment.
The rear wheel carries a whole drivetrain that also makes noise at wheel speed. On a chain-driven machine, work those components before blaming spokes.
When Should You Stop Riding?
|
Stop riding and arrange inspection if
Do not keep riding to see whether it gets worse. A wheel that is losing tension or has a cracked rim is degrading with every impact, and the failure mode is not gradual. |
When Should You Use a Professional Wheel Builder?

Hand the wheel over when:
- Multiple spokes are loose
- The wheel needs significant truing rather than a minor correction
- The rim is bent or cracked
- The hub is damaged
- The dish is incorrect
- The tension pattern is badly uneven
- A spoke keeps losing tension after adjustment
- You do not have the correct tension specification
- You do not have a compatible, calibrated meter
- You are not confident you can correct it without making it worse
Do and Don’t
|
Do |
Don’t |
|
Power off the bike and support it securely |
Tighten every spoke until they sound identical |
|
Inspect the entire wheel before adjusting |
Guess a tension value |
|
Compare neighbouring spokes |
Apply bicycle specifications to an electric dirt bike |
|
Check lateral and radial trueness |
Aggressively tighten one loose spoke |
|
Check dish, hub and axle |
Ignore a cracked rim |
|
Verify meter compatibility and calibration |
Ride with a broken spoke |
|
Use the manufacturer specification |
Use an incompatible tension meter |
|
Make small, distributed corrections |
Diagnose a bearing or axle fault by tightening spokes |
|
Recheck the wheel after every adjustment pass |
Work around the rim tightening in sequence |
Electric Dirt Bike Wheel Maintenance
Build a quick spoke and rim check into the routine you already do for tires and brakes. One loosening spoke caught early is a five-minute job; caught after it has taken three neighbours with it, it is a wheel service.
Give it a proper look after mud, sand, water or hard impacts. Impacts crack rims and bend spokes with nothing obvious from the saddle, and grit and water corrode nipple threads, which is where seized nipples come from.
And check the whole wheel, not just the spokes: rim condition, hub play, bearing feel, axle security, tire bead seating, rotor trueness and, on the rear, chain and sprocket condition.
Valtinsu Model Context

Wheel diagnosis on a fast adult machine has to account for several systems at once. The Valtinsu EM-5 Pro electric dirt bike is currently listed with a 52 mph top speed, a 287 lb maximum load, 17-inch front and 14-inch rear wheels, hydraulic disc brakes, chain drive, front hydraulic shocks and rear air suspension, for riders 18 and over.
Those figures are context, not a spoke specification. They show why a wheel symptom deserves a system-level check: brakes, tire, axle, bearings, chain and sprockets can all produce vibration, noise or rubbing a rider reasonably blames on spokes.
Wheel sizes differ across the range, so a check that applies to one machine may not transfer to another. The adult electric dirt bike collection shows how wheel, brake and suspension specifications vary.
|
What Valtinsu does not publish The available Valtinsu product information does not state wheel construction, spoke count, spoke gauge, spoke material, spoke tension, spoke torque, nipple torque, wheel runout limits, dish measurements or axle torque for any model. Check the applicable Valtinsu user manual or manufacturer service documentation for the model-specific specification. Do not infer a wheel specification from motor power, torque, wheel diameter or load rating. |
Before adjusting a spoke or removing a wheel, consult the Valtinsu electric dirt bike user manual for your exact model. Valtinsu currently provides manuals for the EM-5, EM-5 Pro in green and black, EM-5 Ultra and EM23. Valtinsu’s own guidance is not to force components that do not align and to seek qualified technician assistance for unfamiliar work.
Electric Dirt Bike Spoke Inspection Checklist
- Bike powered off
- Battery removed or isolated if practical
- Bike securely supported
- Every spoke visually inspected
- No broken, cracked or bent spokes
- No damaged or seized nipples
- No rim cracks, especially at spoke holes
- No severe rim deformation
- Neighbouring spoke tension compared
- Lateral trueness checked
- Radial trueness checked
- Wheel dish checked
- Hub checked for play
- Axle seating and security checked
- Wheel bearing feel checked
- Tire and bead seating checked
- Brake rotor trueness checked
- Rear chain and sprockets checked
- Meter compatibility verified before use
- Manufacturer specification confirmed before adjusting
Final Takeaway
Electric dirt bike spoke tension is a whole-wheel property. Inspect before you adjust, compare spokes against their neighbours rather than an imagined ideal, check lateral trueness, radial trueness and dish separately, and confirm the hub, axle and bearing are not producing the movement you are blaming on spokes.
When precise measurement matters, use a compatible calibrated meter and the manufacturer specification, not sound. When you do not have either, a wheel builder is cheaper than a rim. And for anything model-specific, the Valtinsu electric dirt bike user manual is the reference, alongside the wider Valtinsu electric dirt bikes range for model details.
Frequently Asked Questions
How do you check electric dirt bike spoke tension safely?
Power off the bike, remove the battery if practical, and support it securely. Inspect every spoke for damage, compare each with its neighbours, then check lateral and radial trueness, dish, hub play and axle security. Use a compatible calibrated meter if a measured value is needed, and make only small distributed corrections.
Can you check spoke tension by sound?
Only as a rough relative screen. Tone varies with spoke diameter, length, material, profile, crossing pattern, position in the wheel and surrounding tension, so two correctly tensioned spokes can sound different. Sound can flag an obvious outlier. It cannot confirm that the wheel is correctly tensioned.
What does spoke pinging mean?
A sharp click or ping usually means crossing spokes are settling against each other or tension is redistributing, which is common after assembly or adjustment. Occasional pinging on a stable true wheel is low concern. Persistent pinging with a newly loose spoke, wobble or repeated tension loss needs inspection.
Should all dirt bike spokes have the same tension?
No. Hub geometry, bracing angle, dish and wheel design mean tension legitimately differs, particularly between sides. Park Tool notes that on rear and disc-brake wheels one side reads lower because spokes leave the hub at different angles. The goal is a consistent, appropriate pattern, not identical numbers.
Do I need a spoke tension meter?
You need one when a measured value matters, such as rebuilding a wheel or verifying an uneven pattern. It is only useful if its range, calibration and conversion table match your spoke material and diameter. Without a compatible meter and a manufacturer specification, professional wheel service is safer.
Can tightening one spoke warp a wheel?
Yes. Tightening one spoke significantly pulls the rim toward that side at that point, increases tension imbalance and can create lateral or radial distortion. A loose spoke is usually a signal about the whole wheel, so inspect the surrounding pattern and rim before making any correction.
When should I stop riding because of loose spokes?
Stop if a spoke is broken, the rim is cracked or severely bent, several spokes are significantly loose, the wheel has severe wobble or hop, the hub has play, the axle is loose, or tension drops again quickly after adjustment. Do not ride on to see whether it worsens.
SOURCES AND TECHNICAL REFERENCES
- Park Tool, Spoke Tension Measurement and Adjustment. Published 6 April 2021. Retrieved 11 Aug 2026. Supports: spoke tension defined as pulling force measured in kgf or newtons; good tension viewed as a whole-wheel system with consistent tension between all spokes; the load cycle where spokes at the bottom of the rim lose tension and the consequences of low tension including de-tensioning, broken spokes and rim fatigue; consequences of excessive tension including cracked rims, broken spokes and damaged hubs; the squeeze-in-pairs estimating method and why it beats judging by nipple turning effort; determining spoke material and diameter before using a conversion table; bracing angle explaining lower readings on one side; plus or minus 20 percent of wheel average as generally acceptable relative tension; suggested bicycle rim ranges of 100 to 120 kgf; and TM-1 factory calibration with recalibration advice. All bicycle-specific figures are labelled as such in the article.
- Park Tool, Wheel Truing, Lateral and Radial. Retrieved 11 Aug 2026. Supports: lateral and radial trueness as separate aspects of wheel condition.
- Park Tool, Wheel Dishing and Centering. Retrieved 11 Aug 2026. Supports: dish as a distinct procedure from truing and tension, and that tension adjustment can shift dish on wheels with different bracing angles.
- Park Tool, TM-1 Spoke Tension Meter. Retrieved 11 Aug 2026. Supports: meter operating principle and the requirement to match spoke material and diameter to the conversion table.
- Park Tool, Wheel Tension App. Retrieved 11 Aug 2026. Supports: relative tension balancing as a documented process.
- AMSOIL, How to Tension Dirt Bike Spokes. Published 9 January 2019, updated 19 November 2021. Retrieved 11 Aug 2026. Supports: improperly tensioned spokes can break, bend the rim or cause a crash; the marker-and-tape run-out check with 2 mm used as their example gap; the instruction to consult the owner manual for run-out specifications; quarter-turn adjustments loosening the bent side then tightening the opposite side equally; using a spoke torque wrench and referring to the owner manual or wheel manufacturer for torque specifications; and the every-third-spoke pattern from a rim lock or valve stem reference, based on 36 spokes on most dirt bike wheels, with subsequent passes offset by one spoke.
- RevZilla, How to Lace and True Motorcycle Wheels. Publication date not confirmed. Referenced for general motorcycle wheel truing and distributed adjustment context. No specific figure in this article is attributed to it.
- Valtinsu, User Manuals. Retrieved 11 Aug 2026. Supports: model-specific manuals for EM-5, EM-5 Pro Green, EM-5 Pro Black, EM-5 Ultra and EM23, and their role as the authority for wheel, axle and spoke specifications.
- Valtinsu, EM-5 Pro Black Electric Dirt Bike. Retrieved 11 Aug 2026. Supports: 52 mph top speed, 287 lb maximum load, 17 and 14 inch wheels, hydraulic disc brakes, chain drive, front hydraulic shocks, rear air suspension, age grade 18+. Used as model context only.
- Valtinsu, Electric Dirt Bike Collection. Retrieved 11 Aug 2026. Supports: lineup context, varying wheel specifications across models, and off-road use only positioning.
- Valtinsu, Parts and Accessories. Retrieved 11 Aug 2026. Supports: EM5 Front Wheel, EM5 Rear Wheel Hub and EM5 Pro Front Wheel listed as replacement components, and the guidance not to force components and to seek qualified technician assistance.


Looking for something else?
Electric Dirt Bike Replacement Parts Availability: What Buyers Should Verify Before Ordering
LEARN MORE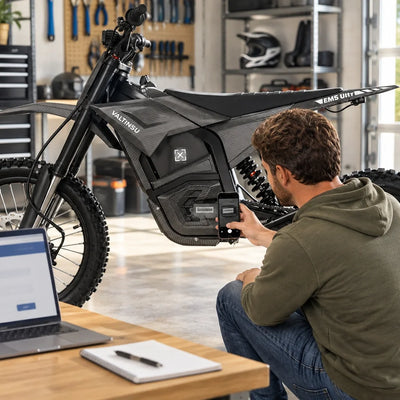
How to Check an Electric Dirt Bike for Safety Recalls by Model and Serial Number
LEARN MORE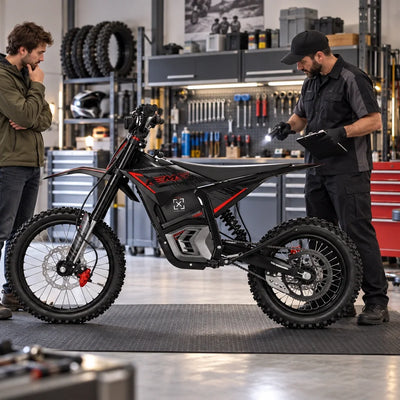
How to Choose an Electric Dirt Bike Repair Shop: Questions to Ask Before Service
LEARN MORE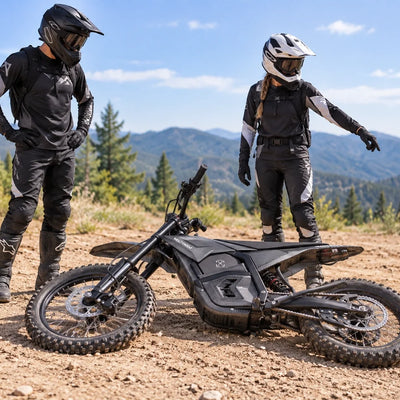
How to Lift a Fallen Electric Dirt Bike Without Hurting Yourself or the Bike
LEARN MORELooking for something else?
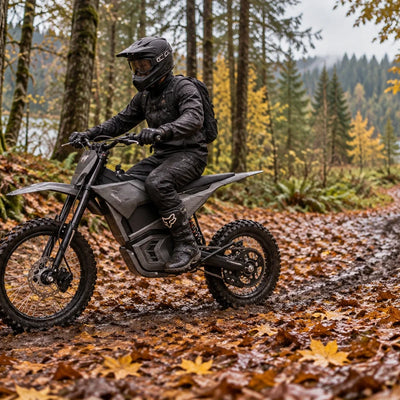
Electric Dirt Bike Fall Riding on Wet Leaves: Grip, Hidden Obstacles and Braking
LEARN MORE
Electric Dirt Bike Trailside Power Loss: Recovery Plan When the Battery Is Dead
LEARN MORE