Electric Dirt Bike Suspension Sag Setup: A Rider-Weight Method
Electric dirt bike suspension sag setup starts by measuring the rear suspension fully extended, then measuring it again with the bike alone and with you in full riding gear. Use those readings to establish static and rider sag, compare them with the applicable shock or motorcycle guidance, make one documented adjustment, and remeasure before riding.
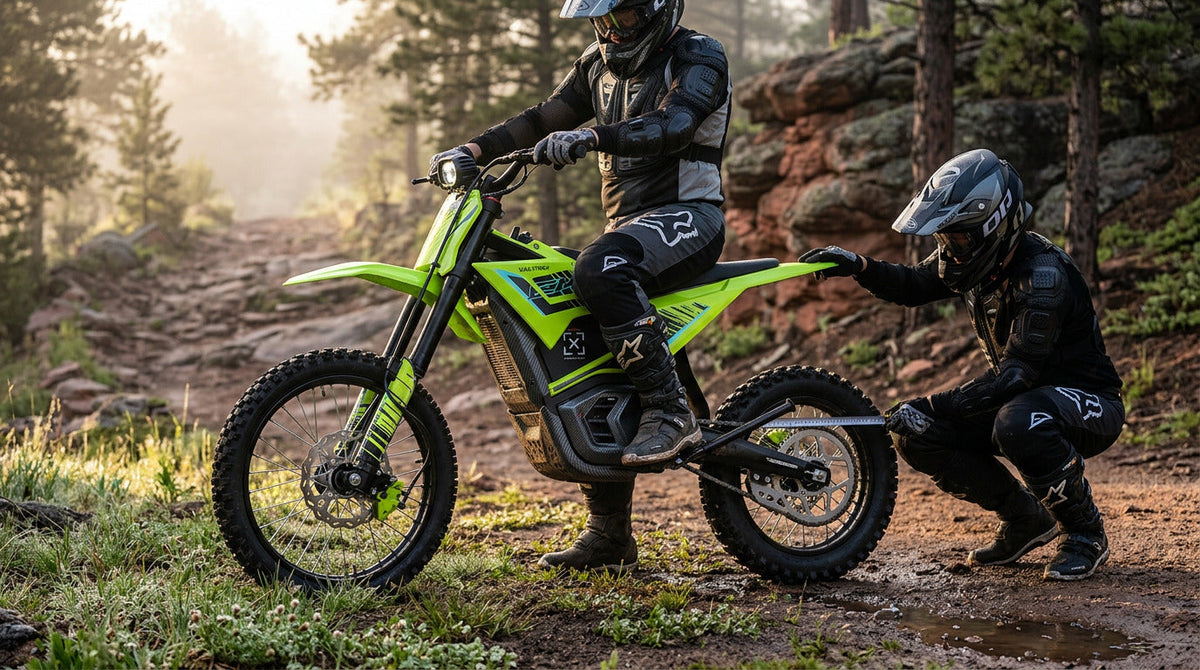
An 80 kg adult rolls an EM-5 Pro out of the garage before a rocky Colorado trail. The rear air shock has not been touched since delivery, and the bike looked fine in the garage with nobody on it.
That is the gap this article closes. The Pro’s geared motor uses internal reduction to multiply drivetrain output at low RPM, so 5,600W and 177 lb-ft of listed torque can shift load rearward quickly the moment you open the throttle. Where the suspension sits when that happens is set before you ride, not during. On an adult electric off-road motorcycle, sag does not make the shock better. It places the suspension in a usable starting position for your weight and your load.
Sag Is Ride Height Under Load
Three positions matter. Fully extended is the suspension topped out with the rear wheel unloaded according to the measurement procedure. The bike-only figure is how far the suspension settles under the motorcycle’s own weight. The rider-loaded figure is how far it settles with you aboard in normal riding gear and a repeatable position.
The first answers how much the motorcycle itself settles. The second answers how much it settles under the load that actually reaches the trail. They are different quantities and they are never interchangeable.
Watch the labels rather than trusting them. Race Tech calls the bike-only figure "free sag" and calls the rider-loaded figure "static sag" or "race sag." Other suspension material uses "static sag" for the bike-only figure instead. Same words, opposite meanings, which is why this article works from A minus B and A minus C rather than from labels. Before you compare your number against any published figure, confirm which quantity that figure describes.
Why Rider Weight Changes Sag
Put a 65 kg rider, an 80 kg rider and a 100 kg rider on the same motorcycle and the suspension settles to three different heights, because more combined load compresses the spring or air spring farther unless spring support changes to match.
So weigh the load that actually rides. That means you plus helmet, boots, armor, hydration, backpack and any tools you normally carry. Set the suspension for the rider who reaches the trail, not the rider who stepped onto a bathroom scale.
What you will not find here is a PSI-per-pound formula. No verified universal conversion exists across motorcycle shocks, because air-spring volume, leverage ratio, shock design and chassis mass all differ.
Measure Three Positions Before Adjusting Anything

|
Measurement |
Condition |
Record as |
|
A |
Rear suspension fully extended per the measurement procedure |
Extended reference |
|
B |
Motorcycle on the ground, no rider |
Bike-only reference |
|
C |
Rider aboard in full riding gear |
Rider-loaded reference |
Then calculate A minus B for the bike-only figure and A minus C for the rider-loaded figure. Use exactly the same two physical reference points every time, ideally the rear axle center and a clearly repeatable chassis or subframe point roughly above it.
Three things ruin a measurement before you finish taking it: changing reference points between readings, measuring diagonally one time and vertically the next, and letting the rider shift posture.
Use two people. The rider stays in full riding equipment, feet in the intended position, hands normally placed, body neutral, bike upright. The helper steadies the motorcycle, measures between the established points, and stops the rider leaning on a wall in a way that changes weight distribution. FOX makes the same point about measuring in riding gear and a normal position rather than a convenient one.
Account for Suspension Stiction
Seals, linkage pivots and bushings all create friction, so the suspension can stop at slightly different heights depending on whether it arrived from compression or from extension. One bounced reading hides that completely.
Race Tech’s method exposes it instead. Load the rider normally, compress the rear slightly and let it return slowly, and record that reading. Then lift the rear slightly, let it settle slowly, and record again. The difference between those two readings is the stiction zone, and Race Tech notes that a gap over roughly 4 to 5 mm means the linkage needs attention.
Average the two readings and record the gap alongside them. That gives a repeatability band rather than the false precision of one millimeter figure. A single measurement cannot diagnose a linkage failure, though a widening gap across sessions is worth investigating.
Percentages Only Work When the Travel Definitions Match

The formula itself is simple: sag percentage equals measured sag divided by the applicable suspension travel, multiplied by 100. The trap is in the words "applicable suspension travel."
Rear wheel travel is not automatically the same as shock stroke. On a linkage-driven rear end the wheel and the shock move by different amounts, because the linkage creates a leverage relationship between them. So do not divide an axle-to-chassis sag measurement by the EM-5 Pro’s published 2.0-inch rear shock stroke and call the result a wheel sag percentage. Measurement method, travel definition and target specification all have to refer to the same system.
KTM’s current Freeride E makes the point from the other direction. Its WP XPLOR rear shock uses PDS, a design with no rear linkage at all, and KTM publishes 240 mm of rear suspension travel for a shock whose own stroke is far shorter. Two motorcycles can quote very different numbers for what sounds like the same measurement.
So what does 35 or 40 percent mean? On its own, almost nothing. It is a measurement until you know which travel figure produced it, whether that figure was rear-wheel or shock travel, the motorcycle’s design, its intended use and the manufacturer target. A correctly calculated reading that sits substantially deeper than the applicable target does suggest the chassis begins lower with less compression travel in reserve. That is not the same as saying 35 percent is always too much or that 40 percent is dangerous, and the Valtinsu user manual page is where your own window comes from.
Too Little Sag vs Too Much Sag
|
Behavior |
Too little sag |
Too much sag |
|
Starting position |
Chassis begins high in its travel |
Chassis begins deeper in its travel |
|
Reserve remaining |
Less extension reserve into dips |
Less compression reserve |
|
Ride quality |
Can feel less compliant |
May use travel early |
|
Geometry |
May alter front and rear balance |
Can change steering geometry dynamically |
Every symptom in that table can also come from damping, tire pressure, spring support, riding position, geometry or a mechanical problem. Do not diagnose sag from feel. Measure first.
Preload, Air Pressure, Spring Rate and Damping Are Different
|
Control |
Primary function |
Changes sag? |
Do not confuse with |
|
Air-spring pressure |
Changes spring support |
Yes, where the shock is designed for user air-pressure adjustment |
Rebound damping |
|
Spring preload |
Changes installed preload and the ride-height relationship |
Can affect sag |
Changing the actual spring rate |
|
Compression damping |
Resists compression motion |
Not the primary sag-setting control |
Spring support |
|
Rebound damping |
Controls return after compression |
Not the primary sag-setting control |
Preload |
Sag establishes loaded ride height. Compression damping manages the force relationship as the suspension compresses, and rebound controls how it returns. Verify condition first, establish sag second, record baseline damping third, then test. Change a damping setting only if the manufacturer documentation supports it.
One safety rule sits above all of that: do not publish or copy a generic shock PSI, preload turn count or clicker direction unless the applicable Valtinsu or component documentation verifies it for your machine.
Make One Adjustment, Then Run the Whole Cycle Again

Rider-weight setup record and single-variable test record. Blank templates.
The workflow is short: baseline, adjust one variable, remeasure A, B and C, record, compare. Adjust pressure, rebound and tire pressure together and you learn nothing, because three changes cannot be attributed to one result.
Any adjustment must stay inside documented limits, remain reversible and be written down. Keep tire pressure, rider gear, rider position, battery configuration and carried load constant across the comparison too. Change any one of those and you need a new baseline rather than a comparison, and a tire-pressure improvement is easy to mistake for a suspension-sag improvement.
EM-5 Pro vs EM-5 Ultra: Same Chassis Numbers, Different Power

|
Specification |
EM-5 Pro |
EM-5 Ultra |
|
Rear suspension |
Adjustable air, 2.0 in published shock stroke |
Adjustable air, 2.0 in published shock stroke |
|
Wheels |
17 in front, 14 in rear |
17 in front, 14 in rear |
|
Seat height |
31.5 in |
31.5 in |
|
Net weight |
143 lb |
143 lb |
|
Maximum load |
287 lb |
287 lb |
|
Motor and torque |
5,600W geared, 177 lb-ft listed |
8,000W, 203 lb-ft listed |
|
Listed top speed |
52 mph |
56 mph |
Their published chassis dimensions are largely shared. Their power systems are not. So do not assume identical trail behavior merely because two sag measurements match, since higher drive force changes dynamic load transfer once the motorcycle is moving. What the EM-5 Pro, including the signature Volt Green version, and the EM-5 Ultra share is the measurement method, not a target. Power affects load transfer; sag establishes the loaded starting position.
Valtinsu vs Sur-Ron vs Talaria vs KTM: Do Not Copy Sag Numbers
|
Platform |
Rear architecture |
Why its number will not transfer |
|
Valtinsu EM-5 Pro and Ultra |
Adjustable rear air suspension, 2.0 in published shock stroke |
Use Valtinsu documentation or support for these models only |
|
Sur-Ron Light Bee X |
Inverted hydraulic coil fork with an Intersect TR multi-link rear and adjustment |
Different linkage, travel and hardware, plus many bikes in circulation are modified |
|
Talaria Sting R MX4 |
Linkage rear shock on a mature, well-documented platform |
Different shock hardware and vehicle mass |
|
KTM Freeride E |
WP XACT fork with a WP XPLOR PDS shock, and no rear linkage at all |
A linkage-less PDS rear end has a fundamentally different stroke-to-travel relationship |
Each of these uses different shock and fork hardware, suspension travel, linkage architecture, wheel dimensions, vehicle mass and intended performance envelope. A sag number copied from one is not a valid setup for another. Credit where it is due: Sur-Ron has the stronger aftermarket and setup knowledge base, Talaria has an established owner community with substantial modification and setup knowledge, and KTM offers more developed full-motorcycle suspension hardware and a dealer service network. Valtinsu’s contribution is adjustable adult off-road suspension at a much lower entry price, and none of that settles what your shock should read.
Run a Controlled Test Loop, Then Follow the Decision Path

Choose a familiar legal trail or practice area with a repeatable surface and a low-risk speed, and do not add jumps to test a setting. Three features are enough: small repeated trail chatter, a moderate braking zone and a smooth acceleration exit. Record rear tracking, harshness, excessive settling, unwanted kick, any bottom-out evidence, steering balance and how often you are correcting. Never intentionally provoke instability, bottom-out or loss of traction, and remember that one pass cannot prove causation. The full-suspension explainer covers what each end of the motorcycle is doing on that loop.
Then read the result honestly. Better and repeatable means keep it and save the record. Worse means return to the baseline. Inconclusive means repeat before changing anything else. And if you cannot reach the applicable target inside the documented adjustment range, stop adjusting.
When Sag Points to a Service Problem
Being unable to reach the correct sag inside the documented adjustment range is itself a warning pattern, not a reason to push harder. Stop and seek qualified service for fluid leakage, a damaged shock body, a bent linkage, excessive play, binding, abnormal noises, an adjuster behaving abnormally, loss of air pressure or visible hardware damage.
Preserve the setup record when you make that call, because it tells a technician what changed and when. Opening the shock, altering valving, adding or removing internal spacers, recharging gas systems and fabricating linkage parts are all outside owner territory.
Most ruined measurements come from a shorter list: measuring without riding gear, using different reference points, letting the rider change position, leaning the bike on a wall, confusing shock stroke with wheel travel, treating a generic 30 percent as factory law, changing several controls together, failing to record the baseline, measuring after altering tire pressure, forcing an adjuster past its range, or diagnosing a mechanical fault as bad sag.
Set Suspension Sag Before the Trail
Five steps, in order. Open the correct Valtinsu manual for your exact model. Record your rider weight with gear. Measure A, B and C. Make only an approved adjustment if one is required. Then measure agayand save the setting alongside the date, terrain and tire pressure you used.
Conclusion
Back on that Colorado trail, the difference between a motorcycle that works with you and one that argues with you often comes down to where the suspension was sitting before you set off. Sag is a loaded ride-height measurement, rider weight drives it, and the bike-only and rider-loaded figures answer different questions.
Percentages only mean something when the travel definitions match, measurement comes before adjustment, and one variable moves at a time. A specification always outranks an internet average. Set and record sag before the trail rather than trying to diagnose suspension by feel halfway through the ride, and browse the riding guides for the skills that setup supports.
FAQS
What should dirt bike sag be set at?
Use the specification for your exact motorcycle or shock first, because that is the only figure that applies to your hardware. Generic percentages from suspension manufacturers are useful context rather than universal settings, and no Valtinsu rider-sag target is currently published.
How do you set suspension sag on an electric dirt bike?
Measure fully extended, bike only, then rider aboard in full gear, using the same two reference points each time. Calculate both figures, compare against the applicable guidance, make one documented adjustment inside its limits, then measure before riding.
What is the difference between rider sag and static sag?
One measures settling under the motorcycle’s own weight, the other under the motorcycle plus you and your gear. Confirm which quantity a document means before comparing numbers, because Race Tech uses "static sag" for the rider-loaded figure and other sources use it for bike-only.
Does static sag really matter?
Yes. It tells you how the motorcycle settles under its own mass, which helps put the rider-loaded reading in context and can hint at spring support being wrong for you. Interpret it using the applicable suspension guidance rather than a generic figure.
How do you calculate rider sag?
Subtract the rider-loaded measurement from the fully extended measurement, which is A minus C on one consistent reference line. Only convert that into a percentage when you know the correct travel quantity and it uses the same measurement system.
Is 35% sag too much?
Not universally. Before judging it, establish which travel figure produced the number, whether that figure was wheel travel or shock stroke, and what the manufacturer's target actually is. A percentage without its travel basis is not yet a meaningful measurement.
Is 40% sag too much?
The same principle applies. Substantial sag does leave less compression reserve available, which is worth knowing, but the acceptable window is set by the motorcycle and component guidance rather than by a number quoted without context.
What happens if suspension sag is too low?
The motorcycle begins higher in its travel with less extension reserve for dips, and it can feel less compliant while front and rear balance shifts. Similar symptoms also come from damping, tire pressure or a mechanical fault, so measure before adjusting.
What happens if an electric dirt bike has too much sag?
It sits deeper in its travel, may use compression travel sooner, and steering geometry can change dynamically. Confirm it by measurement rather than ride feel, because the same complaints can arise from damping, tires, riding position or a service problem.
What tool should I use to measure dirt bike sag?
A metric tape or a purpose-made sag tool, repeatable reference points, a helper and a written setup record. Use a shock pump only when the applicable air shock is designed for user pressure adjustment and you are staying inside its documented limits.
Sources
- Race Tech, Setting Sag the Race Tech Way
- FOX Factory, Measuring Sag, Bike Tech Help Center
- KTM, 2027 Freeride E Technical Specifications


Looking for something else?
Electric Dirt Bike Replacement Parts Availability: What Buyers Should Verify Before Ordering
LEARN MORE
How to Check an Electric Dirt Bike for Safety Recalls by Model and Serial Number
LEARN MORE
How to Choose an Electric Dirt Bike Repair Shop: Questions to Ask Before Service
LEARN MORE
How to Lift a Fallen Electric Dirt Bike Without Hurting Yourself or the Bike
LEARN MORELooking for something else?
Electric Dirt Bike Fall Riding on Wet Leaves: Grip, Hidden Obstacles and Braking
LEARN MORE
Electric Dirt Bike Trailside Power Loss: Recovery Plan When the Battery Is Dead
LEARN MORE