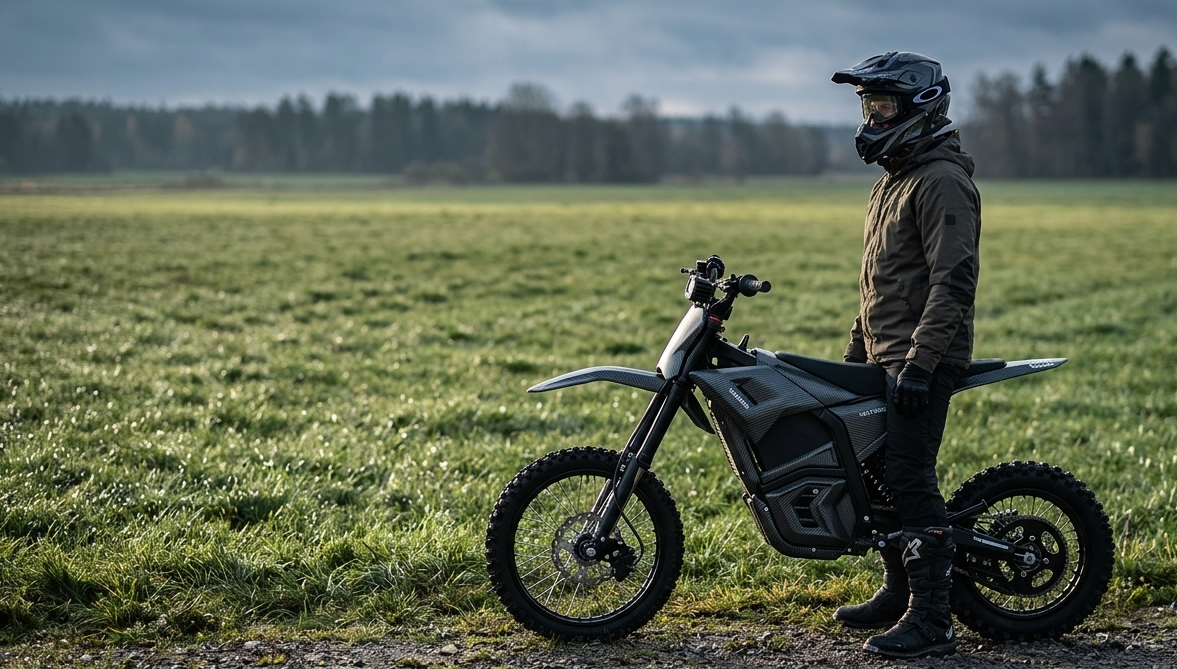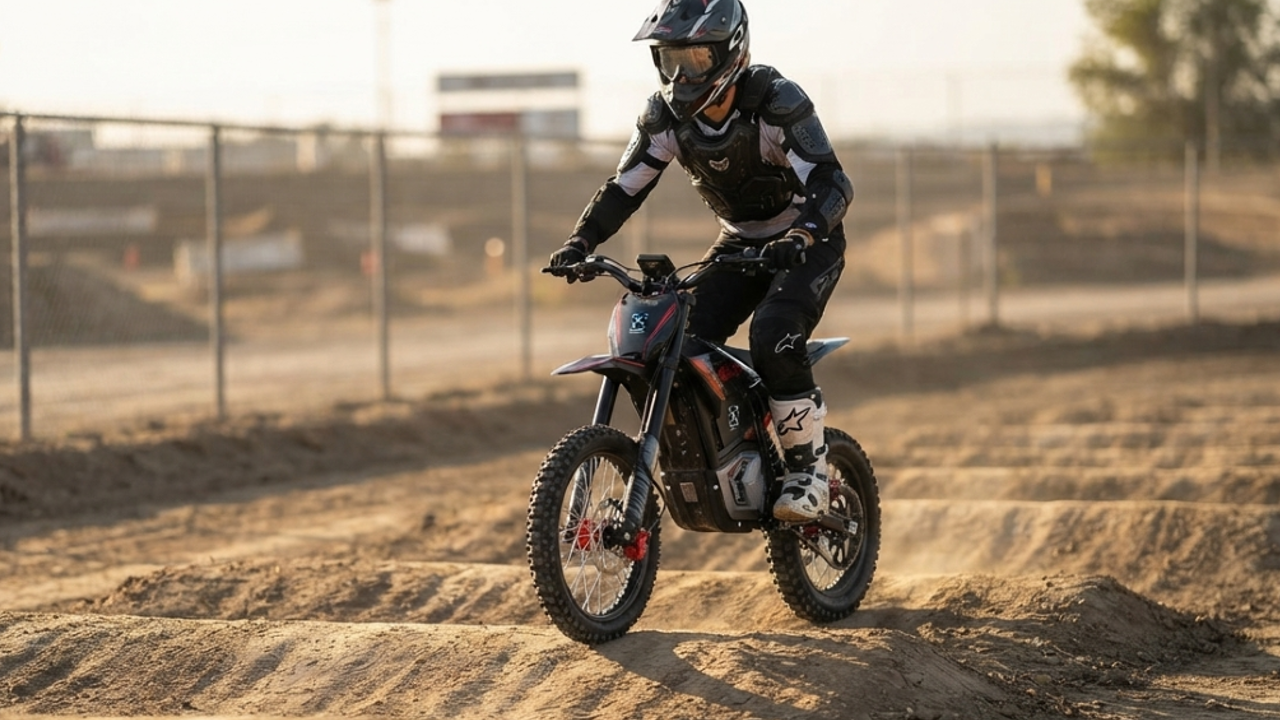
Electric Dirt Bike Whoops Setup: Suspension, Stance and Timing
Before riding whoops faster, confirm that the bike, suspension and practice section are suitable. Record the suspension and tire baseline, then combine one-change testing with a stable standing position, clear vision and repeatable timing.
An effective electric dirt bike whoops setup starts with measurements you can restore. Record sag, tire pressure, adjuster positions, rider load, ride mode and component condition. Change only one manufacturer-approved variable, repeat the same low-consequence section and compare the result.
Increase speed only after the bike remains controlled and repeatable at the current pace.
This guide covers the go/no-go inspection, a restorable baseline, a one-variable test loop, stance and vision, electric power delivery and symptoms that require stopping. Sag, damping and pressure values must come from the exact motorcycle and component documentation.
Set Up the Bike Before You Ride Faster
Increasing speed does not correct an unsuitable spring, damaged suspension, exhausted adjuster range, or unpredictable throttle response. Repeated whoops load the suspension, wheels, chassis, and rider in quick succession, so resolve mechanical or setup concerns before adding pace.
If the bike kicked, packed down, bottomed repeatedly or left the intended line, return to inspection and baseline before another run.
Start on the Easy Section
Practice at a legal closed venue on low, consistent whoops. Firm approaches. Clear runoff, and nothing fixed beside the line that punishes a small mistake. Work with a coach or an experienced track supervisor where one is available. The Motorcycle Safety Foundation runs hands-on off-road training at approved sites. Coached practice can help separate a technique problem from a setup problem before speed increases.
Treat Setup and Technique as One System
Suspension behavior, stance, throttle response, whoop spacing and rider timing affect one another. Diagnose the full sequence rather than assuming every symptom requires a damping adjustment.
Confirm the Bike and the Section Are Suitable
Two questions. Is this section appropriate today, and is this machine supported for repeated impacts at all?
Walk the Whoop Section
Walk the lane when venue rules allow it. Check height and spacing, whether the faces are consistent, soil firmness, moisture, damaged peaks, cross-ruts, traffic, and how much exit space you get.

Then assess the consequence if the bike leaves the intended line.
Hidden holes, fixed obstacles, poor sightlines, consequences past your ability. Any of those, pick a different section.
Check Rider Fit and Load
Stand on the pegs. Move fore and aft without striking anything fixed, and confirm you can still work the throttle and brakes through that whole range of movement. Rated load includes gear and anything carried, not just bodyweight on a good day. Check the figure for your model with all of it on. Boots included.
Confirm the Intended Use
Read the motorcycle manual and the documents for the installed suspension components, then confirm the machine and its parts are supported for motocross or repeated-impact use. Certification does not answer this one. UL Solutions states plainly that its personal e-mobility standard does not evaluate the operator's ability to keep control while riding. Power figures and advertised top speed do not establish suitability for repeated whoops.
Build a Recorded Suspension Baseline
A workable electric dirt bike whoops setup starts with numbers you can get back to. Not a copied setting. Somebody else's sag, clicker count, air pressure, and tire pressure belong to their spring, their weight, their tires, and their track.
Identify the Installed Components
Record the exact fork and shock, the spring or air system, and which compression, rebound and preload adjustments the components actually have. Confirm the available adjustments from the component markings and current documentation.
Record tire models, wheel sizes, current ride mode, rider load, service history and any documented regenerative-braking setting. Confirm that fitted components match the bike's records, especially on a used machine.
Measure Sag by the Specified Method

Follow the exact process from the motorcycle or suspension manufacturer for supporting the bike, choosing measurement points, and taking the unloaded and rider-loaded readings. Wear normal riding gear. All of it. Use a second person if the procedure needs the bike held upright, and compare the result only against the specified target range for that model. There is no universal sag percentage that covers every electric motorcycle.
Record Every Starting Position
Photograph each adjuster before changing it. Start a log and count clicks or turns from the direction and reference point specified by the component manufacturer; never force an adjuster past its stop.
|
Log field |
Why it matters |
|
Date and venue |
Conditions shift week to week, and so does the answer |
|
Rider weight with gear on |
The load the spring actually sees |
|
Fork and shock settings |
Counted from the maker's reference point, not from feel |
|
Sag reading, and the method used |
Makes the number comparable next month |
|
Tire model and cold pressure |
Recorded, not remembered |
|
Ride mode and regen setting |
Both change chassis pitch between hits |
|
Symptom observed |
One sentence, plain language |
Check Spring or Air-System Suitability
Preload moves ride height. It cannot correct a spring rate that is wrong for the rider. Excessive preload, a sag range you cannot reach, or almost no adjustment left at either end all point the same way. That is the spring, not the clickers. For an air system, use only the specified procedure and equipment. Unexplained pressure loss goes to a qualified suspension technician.
A respring or revalve is shop work. Budget for it before you budget for speed.
Establish Tire Conditions

Measure tire pressure before comparison runs using the cold-check procedure specified by the tire and motorcycle manufacturers. Stay within the approved range for the fitted tire, rim, load and surface, use the same reliable gauge and record the reading.
Inspect Before Testing
Fork and shock first, looking for leakage, seal damage, scoring and loose hardware. Then wheel bearings, rims, spokes, tires, brakes, steering, fasteners, controls. Bent parts, unusual play, damaged drivetrain components, exposed cables, any damage to the battery enclosure, any electrical warning on the display. Faults get corrected under the approved service procedure first. The whoops can wait.
Why We Publish No Sag Number, PSI or Click Count
A setting that suits one rider or motorcycle may not suit another. In repeated whoops, evaluate changes against rider mass, spring suitability, suspension travel, surface, spacing, and the component manufacturer’s adjustment range.
- Spring rate follows rider weight with gear, carried load and component spec, so a copied sag figure quietly hides the wrong spring.
- No shared sag method exists between manufacturers. Support points, measurement points and target ranges differ by model, and mixing them produces a number that means nothing.
- Count clicks from the maker's own reference point or the count means nothing to anyone else.
- Tires again: pressure depends on the fitted tire, the rim, the load, and the surface, which is why manufacturers publish ranges instead of one figure.
The process transfers. The settings do not.
HowTo: Test One Suspension Change at a Time
Eight steps. Traceable, repeatable, boring in the best way.
Step 1: Choose a Repeatable Test Lane
Short section, low consequence, consistent soil, open runoff, controlled traffic and a safe route back to the start. Nothing fixed beside the line.
Step 2: Warm Up Without Chasing Speed
Confirm braking, steering, suspension movement, throttle response and regenerative behavior on smooth ground first. Cold bike, cold rider, and an unknown lane are three variables too many.
Step 3: Ride the Baseline Pass
Use a manageable, consistent approach and record rider feedback. If the venue permits, video from a protected trackside position can help confirm timing and chassis movement that may be difficult to judge from feel alone.
Step 4: Identify One Repeatable Symptom
Packing, kicking, diving, bottoming, deflection, loss of rhythm. Pick the one that shows up on every pass, not the one from the single ugly lap.
Step 5: Make One Approved Adjustment
Change one permitted variable at a time within the documented range. Stacking rebound, compression, preload, tire pressure, and ride mode changes makes it difficult to identify which adjustment altered the behavior.
Step 6: Repeat Under Comparable Conditions
Same lane, same approach, same rider position, roughly the same pace. Stop comparing the moment traffic builds or the surface changes character.
Step 7: Log the Result or Return to Baseline
Better, worse, no change. Write it down. If the bike got less predictable, put the setting back before the next pass rather than at the end of the day.
Step 8: Escalate When Adjusters Cannot Solve It
Symptoms that conflict, a range you cannot reach, adjustments that do almost nothing, or internal service that is overdue. Technician's job now.
Coordinate Stance, Vision and Timing
Treat general track advice as a starting point, not a fixed prescription. Whoop spacing, shape, damage, surface, rider skill, and motorcycle setup determine which technique is appropriate.
Stand in a Mobile, Connected Position
Feet secure on the pegs, joints flexed, torso supported, and enough movement range left that the bike can work underneath you. A position you cannot hold for the whole section is the wrong position. Test that on the easy lane.

Controlled contact with the bike can limit side-to-side movement, but locked knees or a rigid grip can reduce the rider’s ability to absorb motion. If considering grip panels or heel-support pegs, verify compatibility and installation instructions.
Keep the Hands and Arms Responsive
Hold the bars without pulling on them continuously. Rigid arms can turn chassis movement into steering input and increase forearm fatigue. Maintain steady breathing and relax the grip when conditions allow.
Look Past the Front Wheel, Then Time the First Contact
Scan the pattern, the exit, damaged peaks, and other riders rather than fixating on a single trough.
The first whoop sets everything after it. Entry speed and line have to match the machine, the pattern, the traction, and the rider, which is exactly why no single entry speed can be published for all four.
Use the Method the Section Supports
Rolling, a deliberate rocking rhythm, or skimming across the tops. Three methods. Three sets of requirements. Uneven trail whoops often cannot support a repeatable rhythm at all, and a section that changes size and spacing every four features is not a blitzing section no matter who is riding it.
What Electric Drive Changes, and What It Does Not
Most electric dirt bikes run a clutchless single-speed drive, and the Valtinsu models here are built that way. On those, the most repeated whoops tip in motocross has nothing to act on, because there is no taller gear to grab on approach.
Not every electric machine is single-speed though. Reduction stages, selectable gears and clutch-like controls all exist, on conversions especially. Confirm what is fitted to your model before you adapt any combustion-bike technique to it.
On a single-speed, mode selection replaces it, done before entry, alongside a steadier wrist inside the section. Torque arrives immediately. Throttle-off behavior varies by model, and both can shift chassis pitch and rear grip between contacts.
|
Common gas-bike habit |
Electric equivalent |
|
Shift up a gear before the section |
Select an approved ride mode on smooth ground first |
|
Let the engine hold revs between hits |
Steady wrist; power comes in with no rev buffer |
|
Feather the clutch to smooth a hit |
No clutch on a single-speed, so inputs have to be progressive |
|
Engine braking on a closed throttle |
Regenerative braking, at whatever strength you selected |
|
Listen for revs to judge speed |
Watch the pattern; there is far less audio feedback |
Select the Ride Mode Before Entry
Pick a manufacturer-approved mode that behaves the way you expect, then test it on smooth ground. Not in the whoops. Do not change modes while committed to the section unless the machine is expressly designed for safe on-the-move adjustment.
Use Progressive Motor Input
Roll power on progressively. Abrupt throttle changes can increase wheelspin or upset balance, and no single throttle position works across every motorcycle, surface, and pattern.
Account for Regenerative Braking
Learn how your selected regen setting behaves when the throttle closes. Strong or unexpected deceleration transfers load forward between contacts, which is the last thing you want mid-section. Try new settings elsewhere.
Watch for Thermal or Power-Limiting Behavior
Stop if a warning appears, output drops, throttle response changes, or the manual calls for a cooldown. Then cool it by the specified procedure. Never bypass thermal limits, alter firmware or defeat protection to chase speed. Modifying a battery or drive system also voids the basis on which it was evaluated.
Diagnose What the Motorcycle Is Doing
One visible behavior, several possible causes. These matrices separate setup, technique, and mechanical wear. Read the last column first.
Front-End Symptom Matrix
|
Symptom |
What the rider feels |
Possible setup or technique factors |
Safe next check |
Stop-riding indicators |
|
Diving into troughs |
Front drops low, heavy bar weight |
Compression too soft; weight too far forward |
Fork compression against baseline, and stance on video |
Severe bottoming, fluid leaks, bent components |
|
Harsh deflection |
Sharp jolts through hands and arms |
Rebound too slow, so the fork packs; or compression too stiff |
Fork height and rebound settings |
Structural cracks, loose triple clamp bolts |
|
Repeated topping |
Front feels loose or unweighted after impact |
Rebound too fast; preload mismatch |
Available fork rebound range |
Metal-on-metal clunking |
|
Loss of steering accuracy |
Front wanders or skates across peaks |
Tire pressure wrong; front unweighted |
Cold tire pressure, then entry line |
Wheel play, damaged steering head bearings |
Rear-End Symptom Matrix
|
Symptom |
What the rider feels |
Possible setup or technique factors |
Safe next check |
Stop-riding indicators |
|
Rear packing |
Suspension stays compressed through successive hits |
Rebound too slow for the impact rate |
Shock rebound against the logged baseline |
Oil fade, seal failure, thermal warnings |
|
Kicking |
Rear bucks the rider forward over the bars |
Rebound too fast, or rear preload excessive |
Shock rebound and sag measurements |
Linkage binding, physical damage |
|
Bottoming |
Heavy impact through seat and pegs |
Spring rate too soft; compression under-damped |
Spring specification and compression setting |
Destroyed bottoming bumper, frame contact |
|
Squat or side-to-side swapping |
Rear sinks under power or steps out |
Throttle input too abrupt; low-speed compression soft |
Power mode, then rear compression |
Swingarm play, loose axle, drivetrain binding |
Distinguish Packing From Excessive Movement
Suspension packing can occur when the component does not extend sufficiently before the next impact. The ride may become progressively harsher, but similar feedback can also come from compression settings, spring mismatch, temperature, damage, or excessive pace, so diagnose before adjusting.
Do not change damping until you have checked the manual, the recorded baseline, spring suitability, and whether the symptom repeats under controlled conditions.
Separate Technique From Mechanical Faults
Ask three questions: Does the behavior follow a specific rider input? Does it appear at only one feature? Does it persist on smooth ground? If the symptom also appears on smooth ground, stop and inspect for a possible mechanical fault before resuming.
Three Mistakes That Show Up in Setup Logs
Two common setup errors are using preload to compensate for an unsuitable spring and changing several settings in one session. If specified sag cannot be reached within the allowed range, or a change cannot be isolated, consult a qualified suspension technician.
Record the original adjuster positions before making changes so you can return to a known baseline.
Stop Riding When Symptoms Point to Damage
Stop when sound, response, alignment, suspension action, braking, or electrical behavior changes. Inspect the motorcycle according to the manual before continuing.
After a Hard Strike or a Changed Response
Inspect wheels, tires, fork, shock, linkage, steering, brakes, frame, swingarm, drivetrain, external cables, and the battery enclosure per the manual. Take your time. The bike still rolling is not evidence that it is fine.
Do Not Continue With a Leak or a Loose Part
Oil on a fork leg, wheel play, bent controls, new noise, changed braking, damaged mounting points, exposed wiring, or an electrical warning requires inspection. Repeated bottoming or topping also warrants checking spring suitability, sag, damping range, load, and component condition.
Use Qualified Service When Required
Anything beyond routine owner maintenance goes to an authorized or qualified technician. No improvising. Do not open pressurized suspension components, electrical housings, the motor, the controller, or a high-voltage battery without approved instructions, correct tools, and training.
Build Skill With a Coach or a Technician
Controlled practice produces more useful evidence than adding speed. Increase pace only after the baseline is repeatable and the motorcycle operates normally.
Record an Easy-Section Baseline
Ask a coach to watch stance, vision, entry, and timing on a low-consequence section. A suspension technician can then confirm sag, spring or air-system suitability, service condition, and whether the machine is still inside its supported adjustment range. Two different jobs. Log settings and feedback after each pass, while you still remember what the pass felt like.
Where the EM-5 Ultra Fits, After Fit Is Verified
Riders comparing machines for this kind of practice want to know what the adjustment range looks like before they spend anything. Fair question. On Valtinsu's own range, the EM-5 Pro and the EM-5 Ultraboth list a front hydraulic shock assembly with 5.9 in of stroke and a rear adjustable air damper with 2.0 in, and the Ultra pairs three riding modes with reverse and a 287 lb rated load. These are published specifications, not proof of suitability for repeated whoops. Confirm the current model page and suspension documentation before comparing setups.
What that description leaves out is the part this article turns on. It names a layout and a stroke, and the phrase is Valtinsu's own rather than a component classification.
It does not give you the component model, the spring or air specification, which compression, rebound and preload adjusters are actually fitted, the approved range for each, the factory baseline procedure, the service interval, or whether the assembly is supported for repeated-impact use. Treat every one of those as not publicly specified. Get them from support in writing, for your bike's production version, before you test anything.

So work in that order. Rider fit, intended use and load capacity first, then the component answers above, then your recorded baseline.Before changing settings, obtain the model-specific manual or written support guidance rather than assuming procedures transfer between models. You can compare the range alongside anything else on your list, and Sur-Ron or Talaria owners should run the identical check against their own component documents.
Conclusion
Suitability, then baseline, then one change at a time. Diagnose repeatable symptoms only. Stop when the machine shows damage or warnings, and build timing on an easy section with qualified support beside you. Hardpack riding, jumps, suspension maintenance and trail difficulty ratings each carry their own setup consequences, so use the dedicated guides for those when they affect the next practice plan.
A clear setup log makes useful changes repeatable and ineffective changes reversible.
Frequently Asked Questions
How do you ride whoops on an electric dirt bike?
Begin at a controlled pace on a permitted practice area and use the technique appropriate to the feature, motorcycle, and rider skill. The core priorities are:
- Look through the pattern to the exit rather than at one trough
- Keep knees and elbows mobile while maintaining controlled contact with the bike
- Use progressive, predictable throttle input
- Build speed only after the line and chassis response repeat consistently
Should I change compression or rebound first for whoops?
Do not choose by symptom alone. If the suspension fails to extend before the next impact, rebound may be involved; if it uses travel too quickly on each hit, compression, spring rate, preload, load, or pace may be involved. Return to the documented baseline, change one permitted setting at a time, and consult a suspension technician if the cause is unclear.
What does suspension packing feel like in whoops?
Packing may feel like the suspension rides progressively lower and becomes harsher through a repeated sequence. Because excessive compression damping, an unsuitable spring, heat, damage, or excessive pace can feel similar, confirm the pattern with a controlled repeat and inspect the motorcycle before adjusting.
How do I set sag for whoops?
Use the motorcycle and suspension manufacturer’s procedure rather than a universal number. A useful process is:
- Confirm tire pressure, rider gear, cargo, and spring condition.
- Measure from the exact reference points named in the manual.
- Compare static and rider sag with the approved range.
- Adjust only within the permitted preload range and record the change.
- If the target cannot be reached, stop using preload as a workaround and ask a qualified technician about spring suitability.
Does electric drive change whoops technique?
The basic needs for vision, balance, traction, and suspension control remain, but electric power delivery can change timing. Before entering whoops, confirm:
- How the selected ride mode responds to small throttle changes
- Whether throttle-off creates coasting, motor drag, or regeneration
- That cables, battery retention, and external electrical components are secure
- That the machine’s mass and load remain within documented limits
When should I stop riding whoops and inspect the bike?
Stop immediately if the motorcycle’s sound, alignment, suspension action, braking, steering, or electrical behavior changes. Inspection is required for oil leakage, wheel play, repeated bottoming or topping, damaged controls or mounts, exposed wiring, warnings, or a new noise that persists on smooth ground.
Sources
- Motorcycle Safety Foundation, DirtBike School (2026)
- UL Solutions, Personal e-Mobility Evaluation, Testing and Certification (2026)
- Michelin, How to Check Your Tire Pressure (2026)
- Valtinsu, EM-5 Ultra Electric Dirt Bike (2026)
- Valtinsu, Electric Dirt Bike User Manuals (2026)


Looking for something else?
Fit-First Electric Dirt Bike for Women: Lightweight Models & Seat Height Guide
LEARN MORE
Electric Dirt Bike Weight Limit: What Riders Over 200 lbs Need to Know
LEARN MORE
Electric Dirt Bike for Farm Use: Practical Fencing, Livestock & Land Management Guide
LEARN MORE
Night Riding on an Electric Dirt Bike: Lights, Safety & Setup Guide
LEARN MORELooking for something else?
Mid-Drive vs Hub Motor Electric Dirt Bike: Which Is Better for Off-Road Riding?
LEARN MORE
Electric Dirt Bike vs ATV: Which Is Better for Off-Road Beginners?
LEARN MORE
Electric Dirt Bike Battery: Voltage, Amp-Hour Range & Replacement Tips for Off-Road Riders
LEARN MOREYou may also like
Moto eléctrica todoterreno para adultos EM-5 con luz
VALTINSU EM-5 Pro Off-Road Black Electric Dirt Bike
VALTINSU EM-5 Pro Green Electric Dirt Bike
Moto eléctrica todoterreno para adultos EM23
Further reading
Electric Dirt Bike Steep Descent Technique: Braking and Body Control
Electric Dirt Bike Whoops Setup: Suspension, Stance and Timing
Electric Dirt Bike on Clay Soil: Setup, Technique and Cleanup