How to Ride an Electric Dirt Bike Over Wet Roots
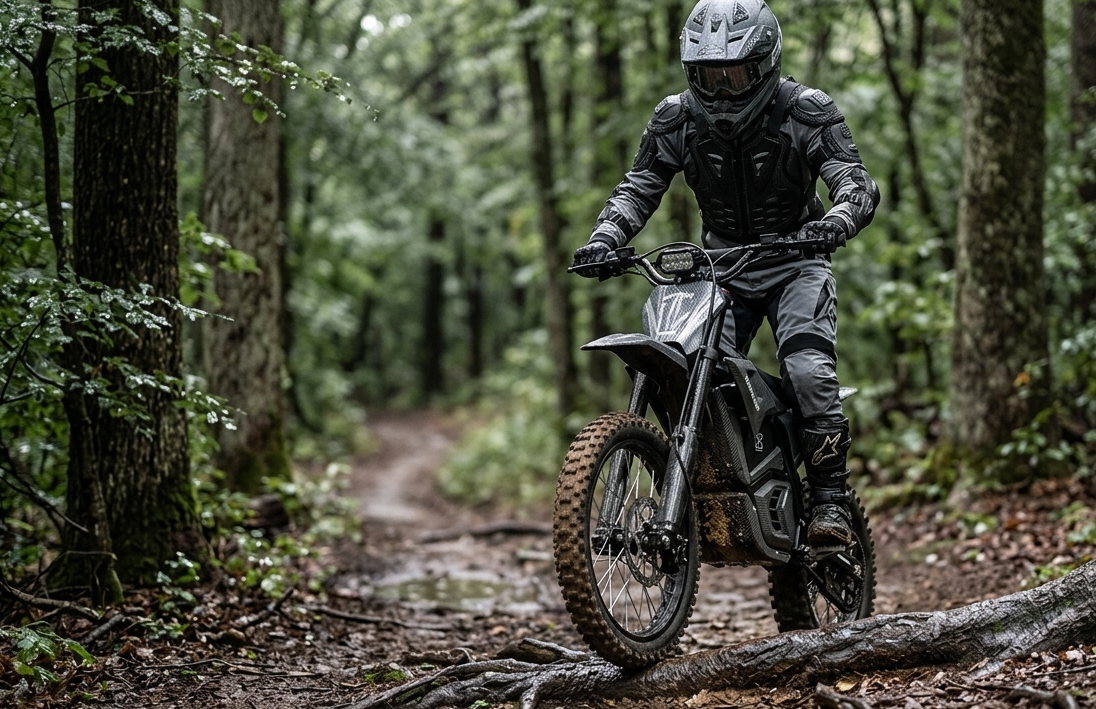
Set your line and entry speed on firm ground before the roots. Cross prominent roots as close to square as the trail safely allows, keep your body relaxed and minimize abrupt steering, braking or throttle while the tires are on wet wood. Resume stronger inputs only after both tires regain dependable traction.
Wet roots create an abrupt grip change within a short distance. Their rounded shape can also deflect a tire, especially when the root crosses the line diagonally or lies parallel to the direction of travel.
Water-resistance information addresses defined exposure conditions for the motorcycle or components; it does not predict tire traction on wet roots.
This guide covers the ride-or-turn-back decision, model-specific setup, line choice, the crossing sequence and a matrix for common root patterns.
The Short Version
- Decide first. Legal access, soil condition, and whatever sits beside the roots if a tire lets go.
- Speed and direction get set on dirt. Never on wood.
- Stand up, arms loose, knees soft, weight through the footpegs.
- Eyes on the exit. Not on the front tire.
- While the tire is on bark: light throttle, light brakes, quiet handlebars.
- A small tire deflection can occur. Stay relaxed and guide the bike toward the available exit instead of making a sharp correction on the root.
- Roots vary, so the plan varies. Turn around when the margin runs out.
Why Wet Roots Behave Differently From the Dirt Around Them
Wet bark can provide much less and less predictable grip than the adjacent soil, so the tire may move between traction levels within a single wheel rotation.
Grip Changes Inside One Wheel Rotation

A tire rolls off tacky dirt, onto polished wood, and back onto firm ground before you have finished thinking about it. Then it happens again on the next root. The Motorcycle Safety Foundation makes the same point about damp leaves and pine needles, which turn slick in a way dry trail never does. Mud complicates it further by hiding how tall the root is and how wide the gap behind it runs.
Root Shape Steers the Front Wheel for You
Roots are rounded, raised, angled, sometimes all three. A protruding root can deflect a front wheel you did not spot in time, which is exactly the hazard MSF flags for narrow trail riding. Diagonal roots push the tire along their length.
Parallel roots let the front wheel track the wood like a rail and refuse to step off it. Off-camber roots do the worst thing of all, which is to hand the bike a downhill direction you never chose.
Electric Power Arrives With No Build-Up
On a direct-drive, throttle-controlled electric dirt bike, motor response can arrive immediately with throttle movement. An abrupt input can spin the rear tire on wet wood. Models with noticeable regenerative or motor braking can also add rear-tire drag when the throttle closes.
On models that have it, closing the throttle can produce noticeable drag right when you wanted the wheels to coast. Response varies by model, by selected mode, by speed and by settings, so learn your own machine instead of assuming every electric bike behaves alike.
Decide Whether the Section Should Be Ridden at All
Three checks, in order: is the trail open to you, is the ground fit to ride, and what happens if the bike slides. Any one of them can end the discussion before technique matters.
Confirm the Trail Is Open to Your Vehicle Class
Check the land manager notices for the day you are riding, not the ones you remember from last season. Forest Service districts publish a Motor Vehicle Use Map showing which routes allow motorized travel, along with open dates and seasonal closures, and routes that are not on the map are not open.
Wet weather rules are separate, and they move fast. Mendocino National Forest can close OHV trails temporarily once two inches of rain fall inside 24 hours, or when soils saturate after a storm, and the closure holds until 48 consecutive hours pass with no measurable precipitation. Those thresholds are local. Yours will differ. A quiet motor does not create access either, so an electric bike is no more welcome on a closed or non-motorized trail than a gas one.
Read the Soil Before You Read the Roots
Deep tire marks. Standing water. Trail edges crumbling under load, ruts starting to form, mud packing into the tread and staying there. Any of those and the ground is telling you it cannot carry traffic today.

Forest Service guidance to riders is blunt about it: stay off trails when your tires will leave ruts in the tread, and Tread Lightly asks riders to avoid wet, muddy routes where possible. If saturated ground is the main problem rather than the roots themselves, this is not the guide you need.
Judge the Consequence, Not the Difficulty
Look past the roots before you commit. A brief loss of traction on a flat trail with open run-out is a non-event. The same slide next to a drop-off, a tree, a rock field, a narrow bridge or a downhill fall zone is not. Factor in riders coming the other way, and whether you or anyone with you could actually recover a heavy bike from wherever it might end up.
Walking is not automatically the safer choice. On steep, greasy ground beside a heavy electric dirt bike, it can be worse than riding. Follow the shutdown and handling steps in your manual, and do not walk alongside a powered bike on unstable footing. If neither riding nor dismounting gives you margin, go back the way you came.
Set the Bike Up From Documentation, Not From a Forum Post
Nothing in a wet-root setup is universal. Not pressure, not mode, not a suspension click. What follows is where the numbers come from, not what they are.
Start With the Documented Baseline
Read the owner manual and setup documentation before changing anything, and work from its approved tire-pressure range, its notes on ride modes, traction features and regenerative braking, and its wet-weather guidance. MSF says the same about pressure: run what the manual specifies for the terrain. Under-inflation lets a bike squirm on hard ground, over-inflation makes it harsh. Copying another rider’s setup proves nothing about your model.
Inspect the Tires and Controls
Worn or missing knobs, cuts, gouges, embedded debris. Check the tread first, because a rounded-off rear tire loses far more on wet wood than it does on dry dirt. Our electric dirt bike tire guide covers tread selection by terrain if you are due for replacements. Then compare pressure with the approved baseline using the manufacturer measurement procedure, and check brake feel, throttle return and control reach while you are still standing next to the bike.
Pick a Power Mode You Already Understand
If your model changes throttle response or regen behavior between documented modes, choose the one you have ridden before. Predictable beats aggressive. A mode name that implies extra traction is marketing, not a guarantee, and a wet root is a poor place to discover how a new map behaves.
Confirm the Water-Exposure Limits
Quick pass, since this ground is well covered elsewhere. Check the charging-port cover, battery enclosure, external cables and visible connectors for damage or a poor seal. Then read your manufacturer water-exposure guidance and any published component ratings. One rated component does not certify the whole motorcycle.
|
Pre-crossing check |
What you are confirming |
Where the answer comes from |
|
Legal access |
Route open to your vehicle class today, plus wet-weather status |
Land manager notice, MVUM, district phone line |
|
Soil condition |
Ground firm enough to carry a motorcycle without rutting |
What you can see at the trailhead and on the first wet section |
|
Tire condition |
Tread depth, knobs intact, no cuts or embedded debris |
Visual check, tire guide for replacement choices |
|
Tire pressure |
Inside the approved range for the terrain |
Owner manual, measured with a gauge |
|
Power delivery |
A mode you have already ridden, and how it drags on throttle close |
Owner manual, plus your own seat time |
|
Brakes and controls |
Lever feel, throttle snapping closed, reach while standing |
Pre-ride inspection |
|
Water exposure |
Seals closed, connectors sound, documented limits understood |
Manufacturer guidance and component ratings |
Read the Roots and Choose the Lowest-Consequence Line

Line choice happens before any of the inputs below, and it is a separate skill. Choose the line before the front tire touches the first root; once the tire is on wet wood, large direction changes use traction that may not be available.
- Look past the first root. Scan the whole pattern, the direction changes it forces, and the run-out space beyond it. The exit matters more than the entry, because a crossing that ends in soft mud or a blind turn was never a good line.
- A squarer approach generally reduces the tendency for a raised root to steer the front tire along its length. Cross as close to 90 degrees as the trail safely allows, but do not force an angle that creates a worse approach, exit or exposure.
- Keep the braking and the turning off the bark. Plan the line so heavy braking, lean angle and weight shifts all happen on firm dirt, before or after the wood. On the roots themselves, nothing dramatic.
- Stay on the trail while you do it. Tread Lightly asks riders to go over obstacles rather than around them, because riding around is how singletrack quietly doubles in width. Your line options end at the trail edge.
- Check what the mud is hiding. Water-filled pockets, loose branch debris, sharp rock, off-camber pitch, a second root cluster tucked behind the first. Also look for drop-offs immediately past the feature.
The Crossing Sequence
Six steps. The first three happen before the tire touches wood, which is the point.
- Set speed and direction on dependable soil. Finish decelerating and finish steering before the roots. Carry enough momentum to roll across without stalling and without needing a burst of throttle mid-crossing.
- Stand, and stay mobile. Up off the seat, elbows and knees bent so they can work as shock absorbers, weight centered over the footpegs. MSF gives the same instruction for obstacles and whoops. Keep the balls of your feet on the pegs so your toes do not catch a root.
- Look at the exit. Head up, eyes on where you want the bike to end up. Stare at the front tire, and you will steer straight into the thing you were worried about.
- Go quiet on the inputs. Minimal throttle movement, minimal brake, minimal handlebar. Wet wood punishes instant torque, and MSF notes that braking on wet surfaces has to be far more gradual, with brakes themselves less effective once wet.
- Let the bike move under you. Small slips and sideways deflections are normal here. Stiffening your arms or snatching a correction is what converts a twitch into a washout or a highside. Loose grip, soft elbows, let the chassis find its own way through.
- Resume normally only after grip returns. Wait until both tires are on stable soil before you accelerate hard or reach for the front brake. Confirm the bike is settled, then set up for whatever is next.
|
Expert View |
|
Across the low-speed control sessions our team runs on practice features, the most common error is not the throttle. It is timing. Riders complete the crossing correctly, then grab a brake or open the throttle while the rear tire is still on the root, and lose it there rather than in the middle. The crossing is longer than it looks. The second pattern we see: riders who tense their arms the moment the front tire touches wood. The bike stops being allowed to move, every small deflection transmits into the bars, and the correction arrives late and too large. Loose arms are trainable. Practice them somewhere with nothing to hit. |
Match the Plan to the Root Pattern
Different arrangements fail in different ways. This is the version we use when talking riders through a section, including the point at which turning around is the right answer.
|
Root pattern |
Main concern |
Planning priority |
Turnaround trigger |
|
Single root across the trail |
Brief wheel slip or impact |
Stable approach and a clear exit |
Hazardous landing, or no recovery space |
|
Diagonal root |
Sideways tire deflection |
Improve the crossing angle where terrain permits |
Forced parallel contact near exposure |
|
Roots parallel to travel |
Tire tracking along the root |
Find an alternate line that is still on trail |
No safe place to leave the root line |
|
Multiple raised roots |
Repeated deflection, lost momentum |
Read the whole sequence before entry |
Hidden gaps, or no stable exit |
|
Off-camber roots |
Slide toward the low side |
Evaluate fall consequence first |
Drop-off, tree, or unsafe recovery zone |
|
Mud-covered roots |
Hidden shape, uncertain grip |
Treat visibility as limited and slow down |
Root height and gaps cannot be assessed |
If a Tire Slips, Do Not Add a Second Problem
Most root slides do not become crashes. What makes them crashes is the rider input that follows.
Leave the panic input alone. An abrupt throttle, a grabbed brake or a hard steering correction can remove whatever grip is still there and push the bike further off line. Relax your arms. Do not try to correct every movement at once.
Then take the exit that exists rather than the one you wanted. If the bike is still controllable, look for open ground and let it run there. Forcing it back to the original line is usually the more expensive choice. Reassess once both tires have dependable traction under them. No technique recovers every slide, and pretending otherwise is how riders get hurt.
After a hard strike or a fall, stop properly. Move somewhere safe, shut the bike down per the manual, then check controls, handlebar, wheels, brakes, guards, drivetrain parts, the battery enclosure and external cables. You are looking for looseness, cracks, rubbing, warning messages, or any change in how a control responds. Something changed, or something might be damaged? Do not ride it out.
Practice the Sequence Before You Need It
Wet roots are a bad classroom. Find a better one.
Pick a legal training feature or a small root with a flat approach, firm soil around it, an open exit, no drop-off or traffic nearby. Confirm repeated laps will not chew up the trail, because practicing your way into a rut helps nobody. Then set direction early, look through the exit, keep throttle, brake, and steering calm across the bark.
Repeat at a controlled pace. Change only one manufacturer-approved variable between attempts, or you learn nothing about which change mattered. MSF suggests running an exercise until you can complete it five times cleanly. Treat that as a practice benchmark, not a promise that the movement turns automatic after a set number of clean runs.
Use the session to judge fit as well as skill. Throttle predictability at walking pace, balance, control reach while standing, how the weight behaves when the bike goes light, and how strong the regen drag feels on a closed throttle.
Those observations tell you more about whether a machine suits technical trail than any spec sheet does. Riders stepping across from a Sur-Ron or a Talaria usually already know what they want from low-speed response.
If you are shopping and technical trail is the priority, that is the lens to bring to the EM-5 Pro and to anything else on your list. Clean practice shows familiarity. It does not promise control on a longer, steeper, or more exposed root section.
Clean and Inspect After a Wet-Root Ride

Let it cool, switch it off, and follow the manufacturer cleaning procedure. Unless your documentation specifically permits it, no pressure washing, no soaking, no steam, and nothing aimed at seals, bearings, connectors or electrical housings.
- Clear debris with approved methods, then check tires, wheels, brakes, drivetrain, suspension areas, and skid protection for impact damage.
- Battery enclosure, charging-port cover, external cables, visible connectors. Trapped moisture and a cover that did not seat are worth finding early.
- Bark and mud packed into the tread hides cuts. Get it out before you look.
- Anything abnormal, stop there. Moisture somewhere restricted, damaged parts, warning messages, odd motor response, unusual heat, changed braking feel. Do not ride and do not charge it. Contact the manufacturer or a qualified service provider.
What This Guide Does Not Cover
Wet roots are one moment inside a bigger set of decisions. Keeping them separate is deliberate.
|
Question |
Where it belongs |
|
Does this bike fit the whole route? Dimensions, range, handling, legal access, recovery, transport, ownership. |
Singletrack route-fit guide |
|
Standing water, rut formation, mud depth, trail damage, saturated ground, post-ride cleaning at scale. |
Mud riding guide |
|
How hard is this route overall, and what is its hardest feature? |
Trail rating and route selection guide |
One caution about ratings. A posted difficulty grade says nothing about today's root moisture, last week's storm damage, current exposure or the condition of one specific crossing. Ratings describe routes. They do not describe conditions.
How We Built This Guidance
Three inputs, weighted in this order.
Published Off-Highway Rider Training
The technique follows established off-highway motorcycle instruction rather than invented rules: obstacle approach angle and pace, standing position with bent knees and elbows, eyes up and well ahead, gradual braking on wet surfaces, and the point that damp organic surfaces are slicker than they look.
Land Manager Rules, Checked Live
Access and wet-weather thresholds came from current Forest Service district guidance and Tread Lightly principles, verified in August 2026. One district's closure numbers appear as an example of how specific these rules get, not as a national standard.
What We Refuse to Specify
There is no universal crossing angle, tire pressure, suspension setting, ride mode, speed or water depth for wet roots. Root shape, trail camber, soil condition, tire condition, rider load and motorcycle setup all affect the answer, so use the current model and component documentation.
Before Your Next Wet Ride
Confirm access. Read the soil. Decide what a slide would cost before you decide how to ride the roots. Set speed and direction early, stay quiet on the bark, wait for grip before you ask for anything.
Then go practice it somewhere boring. A flat approach, firm dirt, an open exit, nothing to hit. That session tells you how much low-speed control you have and how well your current bike supports it, which is the honest way to work out whether a different machine would help. If it points you toward a new one, compare the range against the terrain you actually ride, not the top speed you might use twice a year.
Wet roots stay slippery either way. Being ready for them is the part you control.
Frequently Asked Questions
What Parts of an Electric Dirt Bike Should Not Get Wet?
Whatever your documentation lists as restricted. Open charging ports first, then damaged connectors, unsealed contacts, and any display or battery interface the manual names. Protection is granted component by component, so a rating like IP65 on a motor tells you nothing about the port cover two inches away.
Can an Electric Dirt Bike Get Wet?
Within documented limits, usually. Rain, splashes, and wet trail are normal use for most adult electric dirt bikes. Submersion is not. IP ratings under IEC 60529 classify a single named enclosure under controlled test conditions, which is why one rated component never clears the complete motorcycle for a water crossing.
Is It Okay if My Electric Dirt Bike Gets Wet?
Usually fine, if it sits inside the manufacturer's guidance and every cover and seal is undamaged. The two habits that cause damage are charging while moisture sits around the port, and pressure washing. Consumer washers start around 1,300 psi, far past the low-pressure jet an IP65 rating describes.
Is It Safe to Ride a Dirt Bike on Wet Grass?
Less grip than it looks like it should offer, especially on a slope with mud underneath. Braking and cornering are where it bites. Slow down before you enter, not during, and leave a much larger clear margin than firm dirt needs. Off-highway training is explicit that braking on wet ground must be far more gradual.
Should You Accelerate While Crossing Wet Roots?
No fixed throttle command exists for a crossing. Carry enough momentum to roll across without stalling, then leave the throttle alone. Off-highway training puts obstacle approach at walking pace, roughly 3 mph, which is slower than most riders expect. At that speed, a sudden opening spins the rear.
What Angle Should You Use to Cross a Wet Root?
Squarer deflects less, but no angle works everywhere. Off-highway instruction is to cross an obstacle as close to 90 degrees as the trail allows, which trees, ruts and trail width often rule out. Take the cleanest available angle and stay on the trail to get it.
Should You Lower Tire Pressure for Wet Roots?
Not to a universal number, no. Start inside the range your manual approves for the load and terrain, make only documented adjustments within it, and measure cold with a proper gauge. MSF is direct on this: under-inflation lets a bike squirm on hard ground, over-inflation makes it harsh, and both sit outside the approved window.
Does Regenerative Braking Make Wet Roots Harder?
It can, depending on model and mode. Closing the throttle produces deceleration you never asked a brake for, and on wet bark that drag is enough to break rear traction. Behavior varies by model and controller setting, so confirm it in the current manual for your motorcycle before you meet a root.
Sources
- Motorcycle Safety Foundation, Tips and Practice Guide for the Off-Highway Motorcyclist (2024)
- USDA Forest Service, Mendocino National Forest: Wet Weather Trail Closures and Rain Gauges (2026)
- USDA Forest Service, Bitterroot National Forest: Off-Highway Vehicles (OHV) (2026)
- Tread Lightly!, T.R.E.A.D. Principles (2026)
- USDA Forest Service, Motorized Use: Responsible Riding Guidance (2026)


Looking for something else?
Electric Dirt Bike Replacement Parts Availability: What Buyers Should Verify Before Ordering
LEARN MORE
How to Check an Electric Dirt Bike for Safety Recalls by Model and Serial Number
LEARN MORE
How to Choose an Electric Dirt Bike Repair Shop: Questions to Ask Before Service
LEARN MORE
How to Lift a Fallen Electric Dirt Bike Without Hurting Yourself or the Bike
LEARN MORELooking for something else?
Electric Dirt Bike Fall Riding on Wet Leaves: Grip, Hidden Obstacles and Braking
LEARN MORE
Electric Dirt Bike Trailside Power Loss: Recovery Plan When the Battery Is Dead
LEARN MORE