Electric Dirt Bike Front-Brake Modulation: Build Control Without Lockup
To modulate the front brake without lockup, begin upright with eyes up, throttle closed and both brakes available. Squeeze the front brake smoothly, increase pressure only while the front tracks cleanly, and hold or reduce pressure as grip requires. If the front begins to skid, immediately reduce front-brake pressure to restore wheel rotation and steering, then reapply progressively only after traction returns.
That is front-brake modulation: increasing and reducing brake force progressively while keeping steering and tire grip intact. On an adult electric off-road motorcycle it is a skill built below the traction limit, not at it. The goal is never to find the exact point where the front wheel locks.
Lever force, finger count, reach and brake split vary, but the front-skid principle does not: immediately reduce front-brake pressure enough to restore wheel rotation and steering, keep the motorcycle upright and eyes up, do not add throttle, and reapply progressively only after traction returns. Any actual skid ends the exercise for surface and motorcycle inspection.
Define Front-Brake Modulation Before Practicing It
Modulation Is a Range, Not an On-Off Action
Modulation is the ability to move from no braking force to increasing deceleration in a predictable sequence. The sequence has parts worth naming separately:
- Initial lever movement
- Pad contact or brake engagement
- Pressure buildup
- Deceleration
- Pressure reduction
- Full release
Riders who treat the brake as a switch tend to skip four of those six stages, which is why their stops arrive all at once instead of building.
Brake Power vs Brake Modulation
- Brake power describes the maximum deceleration the system may produce under suitable conditions.
- Brake modulation describes how well the rider can control how quickly and how much of that capability gets applied.
A powerful brake is not automatically an easy brake to control, because a strong initial response means small hand movements produce large changes in deceleration.
Modulation vs Stopping Distance
A shorter stop is not the first training target, because consistent pressure buildup, stable direction and repeatable release all have to come first. Distance is a byproduct of those three, and a rider who chases it directly tends to learn a grab instead.
Explain Why Front-Tire Load Changes During Braking
Deceleration Transfers Load Forward
Slowing the motorcycle shifts part of the combined rider and machine load toward the front tire, and as that load increases the tire may gain braking capacity, provided the surface and the tire can support it. This is why a stop feels different at its end than it does at its start.
Pressure Must Follow Available Grip
Grip at the front tire may be limited before the load has moved there, so a sudden lever input can demand more braking force than the tire is able to transmit at that moment. Building pressure progressively gives the tire, the suspension and the chassis time to settle into the load they are about to carry.
Surface Grip Still Sets the Limit
Firm hardpack, loose gravel, dust over hard ground, mud, wet roots, sand and polished rock all behave differently, and none of them gets a safe pressure value in print. Firm uniform dirt usually offers more consistent feedback; loose-over-hard, wet organic ground, sand and contamination can reduce or change grip abruptly. Restart at mild pressure whenever the surface changes. Tread, wear and construction matter here too, which our tire guide works through by terrain.
Prepare a Legal Closed Braking Range

The practice area is part of the braking system. Full protective equipment is assumed throughout, and our protective equipment checklist covers what a braking session takes for granted.
Choose Predictable Terrain
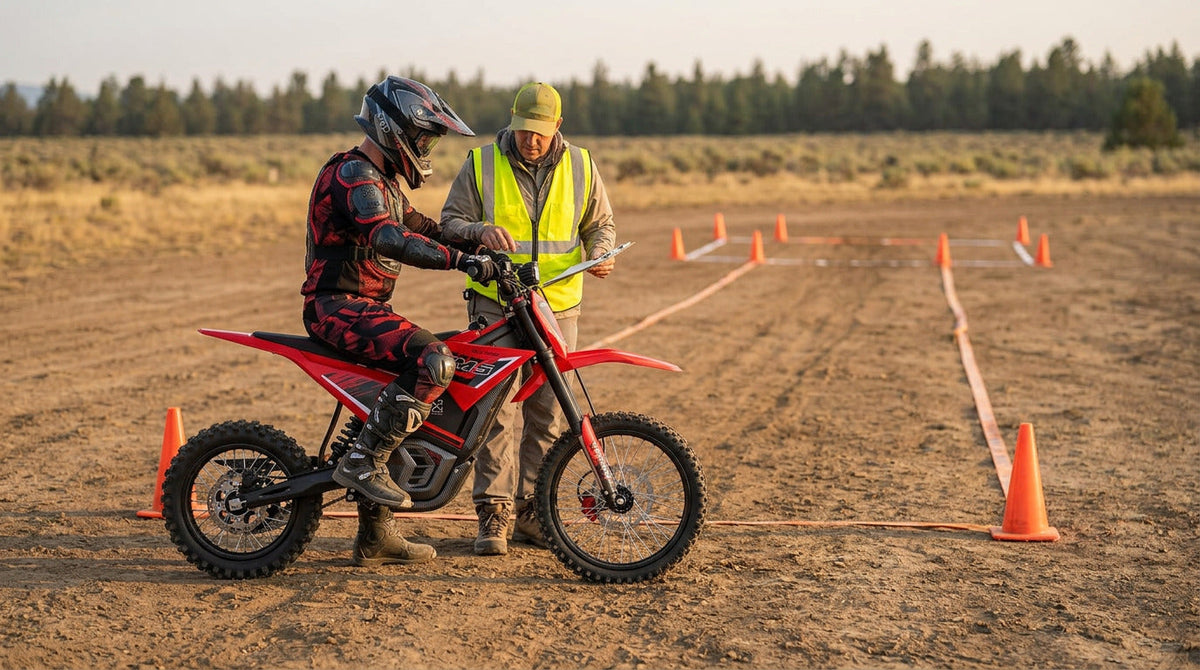
Use legal private property, a motorcycle training facility, or an approved off-highway practice area. The first lane should have a consistent surface, clear sightlines, adequate runoff, and none of the following: traffic, pedestrians, animals, crossings, slope, water or embedded obstacles.
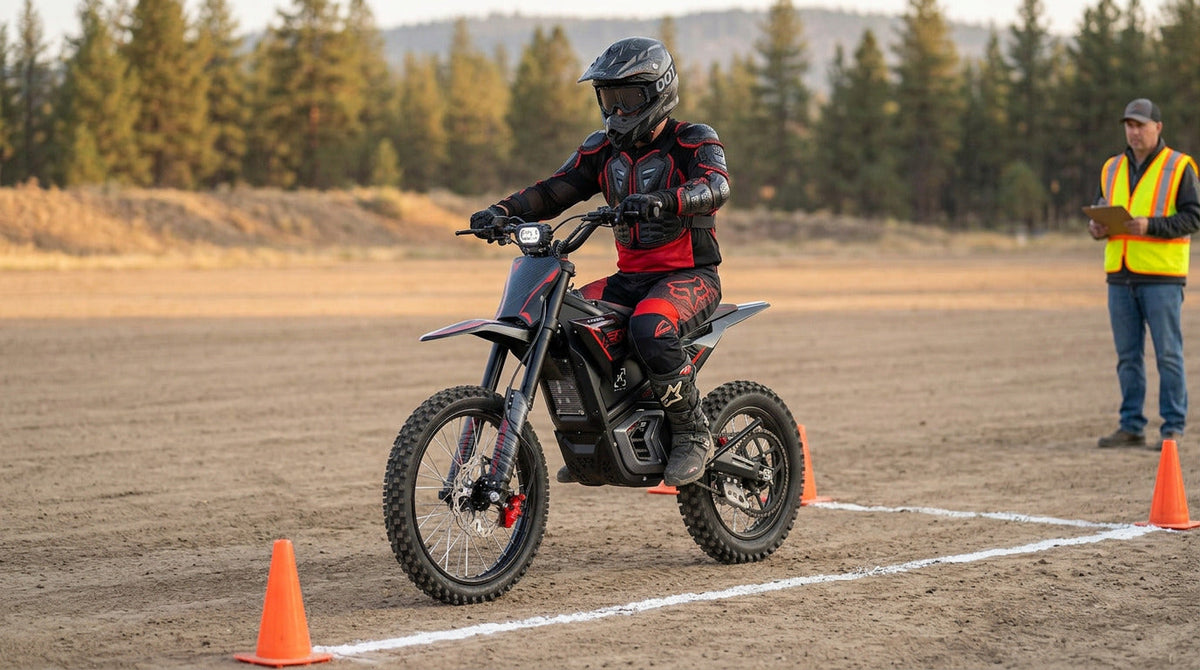
Build a straight walking-pace lane with a visible braking cue, marked stop zone and clear runoff. Before brake practice, verify the runoff exceeds the motorcycle’s no-brake coasting distance from the selected approach pace. The qualified instructor approves the layout and keeps all observers outside the travel path.
Mark Separate Zones
Identify a staging area, an acceleration area, a throttle-close cue, a brake-application zone, a planned stopping area, runoff, the coach position and an exit lane. Eight zones sounds elaborate on paper, and then a rider overshoots the stop and you discover there is nowhere for them to go.
Keep Surface Conditions Stable
Do not mix hardpack, gravel, grass, mud or pavement inside the first pressure ladder. A change of surface creates a new exercise and requires a reset rather than a continuation. Riders who have not yet built repeatable starts and stops should work through our 30-minute beginner practice plan first, and the rest of our riding guides cover the skills either side of this one.
Inspect the Exact Brake System Before Practice

Identify the Control Layout
Before mounting, use the exact EM-5 manual and a labeled product-accurate control image to identify the front-brake lever, rear-brake control, throttle, power/kill state and any documented brake-cutoff behavior. Do not infer the layout from another motorcycle or generic image.
None of that should be assumed from another machine, and controls should never be swapped around to suit a preference.
Complete an External Inspection
Following the manual, check lever condition and movement, hydraulic hose or cable condition, caliper security, rotor condition, pad condition, wheel and axle security, tire condition, steering movement, brake-cutoff wiring and display warnings. MSF’s T-CLOCS checklist covers the same territory for controls, brakes, wheels, chassis and fasteners, and our maintenance guide covers the routine version between sessions.
Establish the Known Brake Baseline
Establish the brake baseline through the exact-manual inspection, static lever return/travel and pad-contact checks, and any manufacturer-approved wheel-drag check. If service history is unknown or a fault is suspected, obtain technician clearance rather than test-riding to discover what is normal. New softness, excessive travel, sticking, pulsing, leakage, grinding, heavy rubbing, delayed release or an error indicator is a stop condition, not a starting point. Model-specific documentation sits on the Valtinsu user manual page.
Brake-Cutoff Function vs Mechanical Braking
Mechanical or Hydraulic Brake Action
The physical brake creates friction at the wheel to slow the motorcycle, using pads and a rotor or another physical arrangement to do the work.
Brake-Cutoff Sensor Action
A brake sensor may tell the controller to interrupt motor drive when the brake is used, though both the presence of a sensor and the logic behind it vary by model, so nothing should be carried over from one machine to another.
Why the Difference Matters
A working brake cutoff does not prove that the pads, rotor, caliper, hose, lever, tire and wheel are functioning, and a functioning friction brake does not prove that motor cutoff is happening as designed. These are two separate systems that happen to share a lever, and any sensor error, delayed drive interruption or unexpected motor response should go to the manual and to qualified service.
Use Pass Gates Throughout the Pressure Ladder
Every block in this ladder ends with one of three outcomes.
Pass
The rider repeats the intended pressure increase and release with predictable deceleration, stable direction, and no coach intervention.
Reset
The motorcycle is behaving normally and the rider is calm, but the pressure application is abrupt, inconsistent, late or poorly timed. Simplify the same drill and run it again, because adding speed to a drill that is not yet repeatable only makes the inconsistency harder to read.
Stop
End the session for unexpected wheel behavior, skidding or near-lock symptoms, brake fade, changed lever feel, fluid leakage, grinding, rotor pulsing, throttle and brake confusion, a fall or tip-over, rider panic, fatigue, warning indicators, surface contamination, or another user entering the range.
Stage 1: Establish the Initial Brake Contact Point

Rehearse With Drive Isolated
With drive isolated, the rider identifies the front-brake control and feels its movement using the manufacturer-approved procedure. This article does not prescribe a one-finger or two-finger technique or a lever-reach setting, because hand size, glove thickness, lever design and coaching method all determine what works for a particular rider.
Distinguish Free Movement From Brake Engagement
Stationary and powered down, identify free lever movement, pad contact and smooth return. Moving at an instructor-selected walking pace in the clear lane, identify the first repeatable deceleration. Static feel alone cannot establish where meaningful slowing begins.
Apply and Release Smoothly
The first real skill here is the release, and it means returning the lever fully without sticking, dragging or an abrupt snap of the hand.
Pass Gate
Proceed only when the rider can identify the correct control, apply mild pressure deliberately, release it fully, keep the throttle closed, avoid pulling on the handlebar, and notice anything abnormal in the lever feel. No repetition count is prescribed, because the gate is consistency rather than a number of attempts.
Stage 2: Build Mild Straight-Line Deceleration

Separate Acceleration From Braking
Establish a straight path, close the throttle, and then begin the coach-approved braking process. Using the throttle and brake at the same time is not a beginner drill and should not be improvised here.
Add Pressure Gradually
The sequence should be visible from outside the lane, running from a closed throttle and an upright motorcycle through initial brake engagement, a gradual pressure increase and predictable slowing, to either a gradual release or a full stop as directed. No universal force or distance is assigned. A pass requires throttle closed before brake input, a straight front wheel, no steering correction or skid, a controlled stop inside the marked zone across several consecutive attempts, and a repeatable smooth release.
Observe Chassis Response
The coach watches front suspension movement, steering alignment, rider tension, head and eye direction, front-tire behavior, the lever release and the final stopping line. That is seven things to observe, and the rider should still receive only one correction before the next attempt.
Pass Gate
Proceed only when mild deceleration repeats consistently and the rider is no longer making abrupt corrections.
Stage 3: Add Progressive Pressure Without Chasing Lockup
Build Pressure in One Continuous Direction
Pressure should increase progressively rather than through stabbing, pumping or a cycle of grabbing and releasing. Begin smoothly and increase pressure only while the motorcycle remains upright and the front tracks cleanly. Hold or reduce pressure as grip requires, then release progressively at the planned end. If the front begins to skid, reduce front-brake pressure immediately to restore wheel rotation.
Progressive Pressure vs Abrupt Pressure
- Progressive pressure builds deceleration in stages, lets load move toward the front tire, gives the rider time to evaluate grip, and produces predictable chassis movement.
- Abrupt pressure demands high tire force immediately, can exceed the available grip, may unsettle the steering, and cuts the time the rider has to respond.
Do Not Use Lockup as the Pass Gate
The rider does not need to lock, skid or slide the front wheel to prove control, and deliberately hunting the lockup point on a first ladder trades a manageable exercise for an unmanageable one. Progressive pressure does not guarantee the front will never skid. If it does, immediately reduce front-brake pressure enough to restore wheel rotation and steering, keep the motorcycle upright and eyes up, do not add throttle, and reapply progressively only after traction returns. End the exercise and inspect the surface and motorcycle.
Pass Gate
Advance only when the rider can increase pressure, hold alignment, and then reduce or release that pressure deliberately, all without a skid and without coach intervention.
Stage 4: Coordinate Front and Rear Brakes
Front-Brake Practice Does Not Mean Front-Brake-Only Riding
Isolated front-brake recognition belongs inside a controlled coaching exercise. Real stopping normally uses both brakes according to the coach-approved method for that machine, and no universal split applies. Rear-wheel control deserves its own session, which our rear-brake guide covers on its own terms.
Independent Inputs vs Blended Stopping
- Independent control recognition helps the rider identify what each brake actually does.
- Blended stopping requires coordinating both controls without crossing throttle and brake inputs or upsetting the motorcycle’s balance.
Keep the Front-Pressure Goal Clear
The rider keeps building front pressure progressively while the rear brake contributes according to the coaching method. The rear brake is not a guaranteed protection against front-wheel lock, and treating it as one tends to encourage exactly the abrupt front input this ladder is meant to remove.
Pass Gate
Proceed only when the rider uses both brakes predictably, keeps the motorcycle aligned, and can explain how front-brake feel changed as deceleration increased.
Optional Follow-On Session: Restart After a Coach-Approved Surface Change
Treat Every New Surface as a New Baseline
Moving from firm dirt to another coach-approved surface means returning to mild pressure and leaving the previous stopping point, approach pace and lever-feel assumptions behind. The lever will feel exactly as it did before, but the tire will not behave the same way.
Firm Surface vs Loose Surface
- A firm, consistent surface may support a more predictable buildup of front-tire load.
- A loose or variable surface may change the available grip from one wheel rotation to the next.
There is no universal amount by which pressure should be reduced on looser ground, which is why the ladder restarts rather than adjusting.
Reset the Markers and Expectations
The coach reassesses surface consistency, runoff, motorcycle configuration, tire condition, rider confidence, brake temperature, visibility and other users before the first attempt on new ground.
Pass Gate
The rider passes this stage by rebuilding predictable mild pressure on the new surface, and the progression never moves toward intentional lockup at any point.
Recognize Front-Wheel Grip Loss Without Making It a Drill
Grip loss may present as: Warning signs include:
- Steering suddenly feeling light or vague
- The front tire beginning to push or slide
- The motorcycle no longer following the intended line
- A scraping or skidding sound
- The handlebar needing an unexpected correction
- Front-wheel rotation appearing inconsistent
- Deceleration changing suddenly
- The rider stiffening or looking down
Immediately reduce or briefly release front-brake pressure to regain front-wheel rotation and steering. Keep the motorcycle upright, look ahead and do not add throttle. Once traction and direction are stable, reapply progressively if stopping is still required. Then end the exercise; exact timing remains a qualified coaching task for the motorcycle and surface. Any actual skid, loss of line or near-fall ends the block and triggers a check of both the motorcycle and the surface before anything continues.
Initial Bite vs Modulation vs Brake Fade
Initial Bite
Initial bite is the first noticeable braking response after pad contact. A stronger bite is not universally better, because a sharp initial response makes progressive pressure harder to deliver.
Modulation
Modulation is the usable range through which braking force can be increased or reduced predictably, and it is the property this whole ladder is built to develop.
Brake Fade
Brake fade is a reduction or change in braking response after repeated or sustained use, and its warning signs may include more lever travel, reduced deceleration, changed lever firmness, a new odor, unusual heat, growing stopping distances or an inconsistent response. Nobody should keep testing a fading brake. Stop safely, isolate drive, do not touch the rotor or caliper, do not pour water on hot components, allow natural cooling, and obtain qualified service if lever feel, stopping response, noise or odor changed.
Normal Brake Feel vs Fault Symptoms
This matrix helps a rider describe what happened. It does not diagnose an internal fault, and one symptom rarely has one cause.
|
Observed symptom |
Conditions to record |
Low-risk external checks |
Required next decision |
|
Lever feels softer than baseline |
When it changed, session duration, temperature |
Visible leakage, hose or cable condition |
Stop and get qualified service |
|
Lever travels farther than before |
Number of stops, any impact |
Pad and rotor appearance, fittings |
Stop and get qualified service |
|
Brake grabs abruptly |
Surface, pressure applied, lever position |
Rotor and pad surface contamination |
Stop, then technique review after clearance |
|
Brake releases slowly |
Temperature, whether it worsens |
Lever return, visible binding |
Stop and get qualified service |
|
Front wheel rubs heavily |
After a fall or transport, or gradual |
Caliper alignment, rotor straightness by eye |
Stop and get qualified service |
|
Pulsing appears at the lever |
Speed, whether it is new |
Rotor appearance, wheel security |
Stop and get qualified service |
|
Grinding or scraping occurs |
When the sound started |
Pad wear visible, debris present |
Stop immediately |
|
Fluid appears near a fitting |
Location, quantity, spread |
External appearance only |
Stop immediately, do not ride |
|
Brake-cutoff warning appears |
Exact message, when it showed |
Visible wiring and connector condition |
Stop and follow the manual |
|
Motor drive does not interrupt as documented |
What the manual describes versus what happened |
None beyond visual |
Stop immediately, do not ride |
|
Stopping response changes during the session |
How many stops, ambient heat |
Heat at the rotor area, by observation only |
Stop, suspect fade, get service |
Nothing in that table is a repair instruction. Bleeding a system, adjusting calipers, straightening rotors, changing reach, disconnecting sensors and modifying wiring all sit outside a riding-technique article.
Brake Adjustment vs Riding Technique
Riding-Technique Issue
A technique problem looks like abrupt lever application, late braking, tension, poor visual focus or inconsistent release, on a motorcycle that has already been confirmed serviceable.
Brake-System Issue
A brake-system problem looks like changed lever travel, leakage, delayed release, heavy rubbing, contamination, damaged components, sensor errors or an inconsistent mechanical response.
Decision Rule
Technique drills must not be used to compensate for a brake-system fault, and mechanical adjustments must not be used to hide a coaching problem. Both directions of that mistake are common. Setup and repair belong to the Valtinsu user manual page and a qualified technician, and any part sourced from Valtinsu accessories should be confirmed as exact-model compatible with support before it goes anywhere near a brake system.
Hydraulic vs Mechanical Front-Brake Feel
Hydraulic System
In a hydraulic system the lever input transfers through brake fluid, and the feel, service requirements, fluid type and adjustment limits are all specific to that model.
Mechanical System
In a mechanical system the lever input transfers through a cable, so cable condition, housing, adjustment and caliper design all affect what the rider feels at the lever.
Training Implication
Neither system creates a universal pressure ladder, and neither type automatically prevents lockup. The rider has to establish the baseline of the exact brake system in front of them rather than importing hand force and lever habits from another motorcycle.
Regenerative Deceleration vs Friction Braking
Regenerative or Programmed Deceleration
Some electric motorcycles create deceleration through motor or controller behavior when the throttle closes or a control is used, and how that operates varies by both model and configuration.
Friction Braking
Friction braking is what the front brake itself does, using pads and a rotor or another physical arrangement to slow the front wheel directly.
Why Riders Must Separate the Two
A change in regenerative behavior alters how the motorcycle slows before and during friction-brake use, which changes what the lever seems to be doing. Do not assume the EM-5 or any other model includes a particular regenerative setting unless its current manual says so, and never treat regenerative deceleration as a substitute for two working physical brakes.
EM-5 Brake-Practice Fit and Verification
No model here is universally safest or easiest to learn braking on. What differs is mass, layout, what the controller does, and what support exists when something needs attention.
|
Model |
Platform and mass |
Brake and cutoff considerations |
First braking-session concern |
Parts and support |
|
Compact, 126 lb listed net, 14/12-inch wheels, 243 lb maximum load |
Confirm layout, cutoff behavior and any regeneration in the exact manual |
A 3,840W geared motor delivers strong low-RPM wheel force, and the combined mass of bike and adult rider must be slowed through a verified brake and tire system |
Lower entry price, model-specific manual and parts |
|
|
Larger, 143 lb listed net, 17/14-inch wheels |
Same verification requirement, on a higher-output platform |
More speed and torque available, so progressive pressure matters more, not less. Adults only at 18+ |
Signature Volt Green finish, same support structure |
|
|
Sur-Ron Light Bee X |
Light aluminum platform |
Model-specific layout and controller behavior |
Familiar in training circles, at a much higher purchase price |
Established aftermarket, large owner community, strong resale recognition |
|
Talaria Sting R MX4 |
Comparable weight class, varies by version |
Gearbox-driven, with adjustable regeneration that changes closed-throttle behavior |
The regeneration level should stay fixed through a pressure ladder so the rider is judging the brake, not the setting |
Deep aftermarket and an active owner community |
Commercial comparisons do not help a rider modulate the front brake. For the EM-5, confirm rider fit, the exact front/rear control layout, static brake condition and documented cutoff behavior before practice. Never fit a brake part without exact compatibility and professional verification.
Peak power does not determine stopping distance, whatever a spec sheet implies. Tires, surface, brake condition, total mass and rider input are what actually decide it.
Determine Whether the EM-5 Fits the Rider’s Control Needs

Work through the control checks before the purchase decision. Can the rider:
- Reach the front-brake control without changing throttle position
- Identify the front and rear controls correctly
- Close the throttle before beginning the stopping process
- Build mild front pressure progressively
- Coordinate both brakes
- Hold and walk the motorcycle with drive isolated
- Manage its size and weight
- Access a legal practice area
- Work with a qualified motorcycle coach
- Obtain exact-model brake parts and service
If every answer is yes, the Valtinsu EM-5 is worth evaluating properly, and the electric dirt bike collection shows where it sits against the rest of the range. If any answer is no, that is the thing to fix before the purchase rather than after it.
Stop the Braking Session When
End the session for any of these, regardless of how much time remains:
- Throttle and brake confusion
- A front-wheel skid or loss of line
- Changed lever feel
- A lever failing to return
- Fluid leakage
- Grinding
- Heavy rotor rub
- Pulsing that was not there before
- Brake fade
- A brake-cutoff fault
- Motor drive continuing unexpectedly
- Tire damage
- A loose wheel or steering concern
- A fall or tip-over
- Rider panic
- Hand fatigue
- Technique getting worse rather than better
- Surface contamination
- Another person or vehicle entering the range
Remaining session time is irrelevant once a stop condition appears. Hand fatigue in particular gets ignored, and a tired hand is exactly the hand that grabs.
Avoid Common Front-Brake Practice Mistakes
|
Mistake |
Why it creates risk |
Better decision |
|
Practicing on a public road |
Traffic and legal exposure arrive before skill does |
Use a legal closed range |
|
Beginning on loose or mixed terrain |
Grip changes faster than a new rider can read it |
Start on one consistent surface |
|
Trying to discover the lockup point |
Deliberately exceeding traction removes the margin the drill depends on |
Build pressure below the limit |
|
Adding speed after one clean stop |
One repetition proves nothing about consistency |
Repeat before progressing |
|
Grabbing the lever suddenly |
Demands tire force before load has transferred |
Build pressure in one direction |
|
Looking at the front wheel |
Vision drops, steering corrections grow |
Look through the stopping area |
|
Front-brake-only riding outside a coached exercise |
Removes half the available braking capability |
Use both brakes per the coaching method |
|
Changing lever reach mid-session |
Destroys the baseline every judgment depends on |
Set reach beforehand, per the manual |
|
Switching modes between attempts |
Makes rider and machine changes indistinguishable |
Hold one configuration per block |
|
Ignoring new brake feel |
A developing fault gets treated as a technique problem |
Stop and inspect |
|
Continuing after fade |
Braking response keeps degrading under further use |
End the session |
|
Copying another rider’s finger count or brake split |
Hand size, lever design and machine all differ |
Establish your own baseline with a coach |
|
Treating a brake-cutoff sensor as the braking system |
A sensor interrupts drive, it does not slow the wheel |
Verify both systems separately |
|
Using a test ride to diagnose a fault |
Puts a rider on a motorcycle with a known problem |
Diagnose off the bike, with service |
Conclusion
Inspect the exact brake system first. Establish where braking actually begins, build mild deceleration, then increase front pressure progressively while the load moves forward. Coordinate both brakes according to the coaching method, reset the whole ladder for every surface change, and stop for any grip-loss or fault symptom.
Deliberate lockup is never the pass gate. What clears each stage is repeatable pressure held below the traction limit.
Complete the front-brake pressure ladder with a qualified motorcycle coach, verify the exact brake system, and consider the Valtinsu EM-5 after those checks rather than before them.
FAQs
What is front-brake modulation on an electric dirt bike?
Front-brake modulation means building and reducing lever pressure smoothly so braking force stays within the grip available at the front tire. It is progressive control, not a fixed lever position or a sudden grab.
How should a beginner practice front-brake control?
Use a flat, legal closed area with consistent traction, full protective gear, and qualified coaching. Progress in this order:
- Inspect the brake, tire, wheel, lever, and any brake-cutoff sensor.
- Begin with straight walking-pace stops and deliberate throttle closure.
- Apply the front brake lightly first, then build pressure smoothly as the motorcycle settles.
- Repeat at the same pace until the line and lever feel are consistent.
- Increase pace only after the instructor approves the stopping control and runoff.
How do you avoid locking the front wheel on dirt?
Keep the motorcycle straight, load the tire progressively, and reduce lever pressure as soon as grip feedback changes. Loose, wet, off-camber, or downhill surfaces reduce the available margin, so the same lever force will not work everywhere.
What should you do if the front wheel starts to skid?
Reduce front-brake pressure immediately enough to let the tire roll and regain directional grip, while keeping the throttle closed and the motorcycle as upright as possible. End the repetition, check the surface and equipment, and restart only at walking pace with an instructor; do not practice intentional front-wheel lockups.
Why does the front brake feel spongy, rough, or different?
A changed lever can indicate air or fluid problems, cable adjustment, pad or rotor issues, heat, contamination, damage, or a displaced control after a fall. Stop riding and inspect the system under the exact service manual; do not compensate by squeezing harder.
Sources
- Motorcycle Safety Foundation, DirtBike School
- Motorcycle Safety Foundation, T-CLOCS Pre-Ride Inspection Checklist
- Motorcycle Safety Foundation, Tips & Practice Guide for the Off-Highway Motorcyclist
- National Highway Traffic Safety Administration, Motorcycle Safety
- Bureau of Land Management, Off-Highway Vehicles
- USDA Forest Service, Off-Highway Vehicles, San Juan National Forest (Motor Vehicle Use Maps, permits and local restrictions)


Looking for something else?

Street Legal Dirt Bike: The Best Models and How to Make One Road-Ready
LEARN MORE
12 Best Electric Bikes for Kids Ages 8-14: Safe & Fun Top Picks
LEARN MORE
Electric Bikes for Kids: Top 10 Safe Models & Buying Guide
LEARN MORE
Electric Dirt Bike for Adults, 50 MPH: The Best Models and the Real Speed
LEARN MORELooking for something else?

Can You Ride an Electric Bike in the Rain? Waterproofing & Safety Tips
LEARN MORE
What Is an RTR Ebike? Full Review, Price & Buying Guide
LEARN MORE
Best Electric Bike for 2 Adults: Two-Seaters, Payload, and the Safer Setup
LEARN MOREYou may also like
VALTINSU EM-5 Electric Dirt Bike
VALTINSU EM-5 Pro Black Electric Dirt Bike
VALTINSU EM-5 Pro Green Electric Dirt Bike
VALTINSU EM23 Electric Dirt Bike
Further reading
Electric Dirt Bike Hill Start: Prevent Uncontrolled Rollback
Electric Dirt Bike Standing Attack Position: Build a Stable Trail Foundation
Electric Dirt Bike Front-Brake Modulation: Build Control Without Lockup